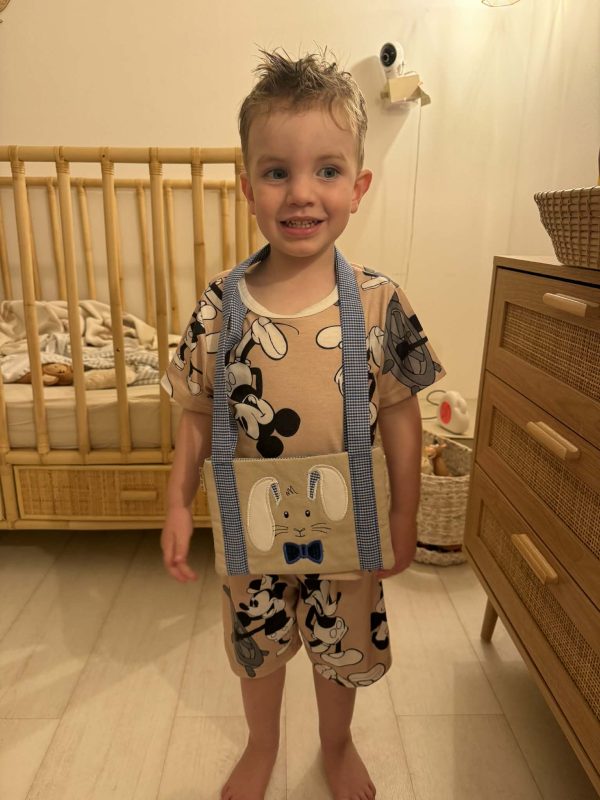
Well, for those readers who are retired as I am, from fulltime working, how good is life! Mind you, the days seems to fly by faster than ever, the older I get. It just seems like a couple of days ago that I was sitting down to stitch out samples and write up this Blog. But it’s a whole week of course, and Friday has landed with a thud again! I’m able to sew most days (all day sometimes), and this week I stitched up a quick Easter Countdown Chain for Bobby, who’s now 3 – a Pram Liner for Summer, (4 months old this week) and a quick embroidered Easter Hunt Bag for Bobby as well. Fabric to make one for Summer next year is all put aside ready. Off in the post they all went on Monday – and Wednesday morning I received photos back after they’d arrived. The Pram liner was a ‘request’ but the others were a nice little surprise in the mail Gemma said.
also typed up, and printed out all the Sample Setting forms for the rest of the feet I’ll be working on for the Blog. Then trimmed them all, and set aside to place into their little pouches for reference. I still have all the sample fabrics to cut up, but they will have to wait. There are kits to cut for a little Mastery Class project for next week, and oh, here’s a photo as promised of the lovely group I’m teaching Bernina Mastery to at the moment. Trish, Muffin and Alison are all ‘new owners’ of Bernina B570QE’s and members of Schoolhouse Quilters. Muffin’s husband Nigel even wrote us all a poem last week. (I got lost getting to their home on Gap Creek Rd, the first week of classes)
Driving Licence for Creating Fabric Art
Rhonda is teaching Bernina things, that make Quantum Theory seem dead.
And for three ladies trying to follow, it is messing with their head.
But they’ll be hanging on March Thursdays for this tool for magic Fabric Art.
Their fabric dedication will have them with a Bernina Drivers Licence start.
And four cheers for Rhonda who today hasn’t “Walkabouted” Gap Creek.
On Day one we all thought … “No lecture – she’s playing Hide and Seek”
Nigel
Next on my sewing list for others, is another Patchwork Jacket. The fabric parcel should arrive any day now. This will be #4 that I’ve made for my beautiful friends, Marion and Steph from The Quilters Angel up in Toowoomba. It’s the Melly and Me ‘Laura Jacket’. The first one was a lovely floral version, the second made entirely of beautiful Tilda fabrics for last year’s Showcase here in Brisbane, and this one will be off to Melbourne for AQC in April. Earlier this year I stitched more garment samples for them as they were attending both Brisbane and Melbourne Liberty Showcases. What a big week of sewing that was! Garments included the third jacket, two blouses and a skirt – what a dream Liberty Tana Lawn is to sew! Here are some photos of those finished garments. Skirt was all pieced on the L890 overlocker!
This week I took my L890 into Gareth at SewMasters, to have it looked at, and that meant I was without a Coverstitch machine here in the Studio, until my dear friend Deb Cahill offered the loan of her L890 until mine is returned. What a treasure to have friends so willing to help out, entrusting their precious machines into my care. Thank you Deb so very much! It is stitching beautifully, only just having returned from a service with Gareth as well. Coverstitch and Chain … welcome back!!!
... The Studio Update ...
This year, every 3rd Friday I’ll include a snippet of what’s changing in and around the Studio here at home. Although nothing has happened outside on the Studio for quite a few months now, we did have the Cubby House relocated to another family here in Forestdale … :”Cluckingham Palace”, now without any chooks, is going to be refurbished into a ground level playhouse for two families. It was not an easy job to move, but the new ‘owners’ were more than happy to get in and do the guiding onto the large trailer.
Ben has done a lot of work up there since, getting all the ground level again. The blockwork around the side of the Studio is coming along, and later it will be all retained, levelled, paved and looking fabulous – the clothes line will be off the end of it. We’ve had some rain, so everything is looking nice and green again.
Inside I have been busy ‘Decluttering’ as I mentioned last week, and this week I ‘trimmed’ up my black stool I use when embroidering. Here it is with the stack of boxes all filled up with samples from the Big Book of Feet Challenge, and atop these is the colourful version of the box for this year’s Big Books of Serging Challenge.
After cutting all the batting for Bobby and Leo’s Quilts earlier in the year … I’ll add some details about Leo’s next week … my second cutting mat was really looking fuzzy. I used an old rotary blade to scrape off the batting fuzz, and my trusty little handheld vacuum cleaner to get rid of the mess. I only use this mat when I’m rotary cutting batting as it gets in a real mess!
I’m slowly working on sorting out each of the cupboards, and love that I have the time now to ‘potter’ about each day in my ‘Happy Place’!
... Did You Know? ...
Types of Elastic
There are many types of elastic available—knit, woven, braided, and specialty, to name just a few—along with different widths, colours, and fibre compositions. With so many options, choosing the right one can be confusing.
While sewing patterns usually specify the width and length required, they don’t always indicate the type of elastic to use. That’s why understanding how each type behaves, is really important.
In this week’s section, I’ll introduce you to the most common elastics used in everyday sewing, explain how to recognise them, outline their properties, and offer a little guidance on when to use each one. I have quite a good stash here in the Studio.
Elastics for Garment Makers
These are basic, non-decorative elastics used in everyday sewing. They come in various widths and are usually available in black or white.
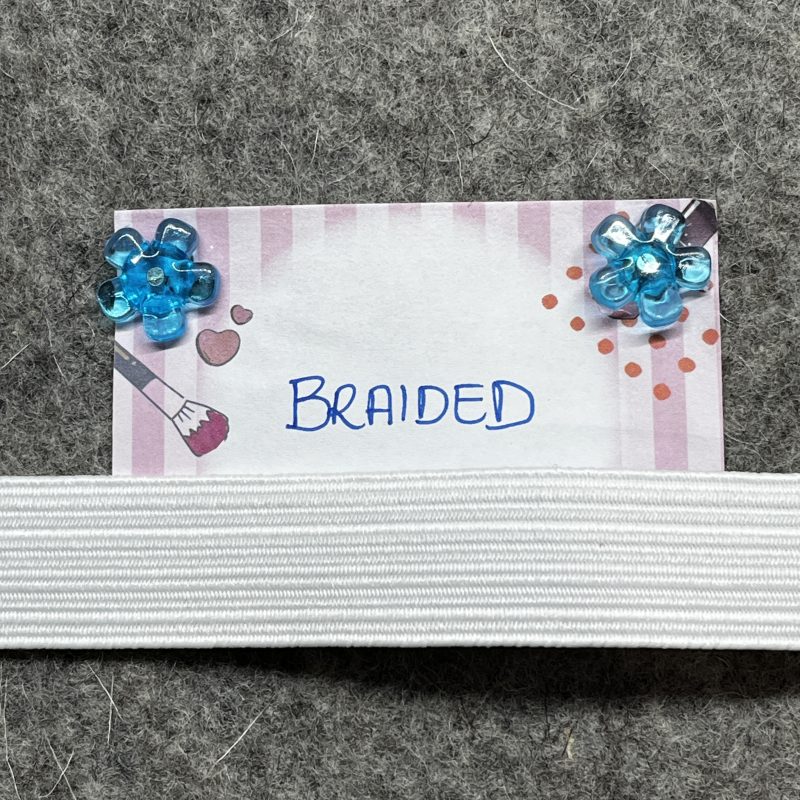
Braided elastic has distinct lengthwise ribs and becomes narrower when stretched. It is more prone to rolling, and stitching through it can weaken its strength and elasticity. For this reason, it is best used inside casings or channels rather than sewn directly onto fabric. It is typically lightweight and has a long lifespan.
Braided elastic is a practical choice for projects where the elastic is enclosed and not stitched through directly.
Knit elastic is soft with a smooth finish and remains comfortable against the skin. It keeps its width and elasticity when stretched or sewn, making it ideal for lightweight to medium-weight fabrics. It can also be stitched through without losing durability, so it works well both in casings and when sewn directly onto fabric.
Wider knit elastic may sometimes roll inside a casing, so it’s best suited to light- to mid-weight fabrics. It’s especially useful for garments where comfort is important, such as pyjamas and lingerie.
Woven elastic (“non-roll”) is the strongest type, recognised by its horizontal and vertical ribbing. It keeps its width and stretch even when sewn, making it ideal for heavier fabrics like outerwear. It’s also durable, handles extreme temperatures well, and tends to feel firmer with slightly less stretch than knit elastic.
Woven elastic is well suited for waistbands, medium- to heavyweight fabrics, and garments that need extra support and structure.
Specialty Elastics
Specialty elastics are designed for specific purposes and are often variations of basic types, combining function with decorative or performance features.
Clear elastic: Lightweight and transparent, it may narrow when stretched but retains strength when sewn. Ideal for stabilising and gathering knit fabrics.
Fold-over elastic (FOE): Decorative elastic with a centre ridge for easy folding over edges. Perfect for finishing raw edges on lingerie and knit garments.
Swim elastic: Braided elastic resistant to saltwater and chlorine. Narrows when stretched and works best in casings rather than sewn directly—ideal for legs, armholes and necklines of swimsuits. Regular elastic is damaged by exposure to pool chlorine and will rot.
Lingerie elastic: Typically knit, soft, and often plush-backed for comfort against the skin. Maintains stretch and comes in a wide range of widths, colours, and finishes.
Round Elastics
Shirring Elastic Shirring elastic is a fine, highly stretchable thread primarily used for creating shirred or gathered fabric. It is usually made from polyester, polyurethane, or rubber, often wrapped in cotton for added durability and a smooth finish.
When sewing with shirring elastic, the elastic thread is wound onto the bobbin while regular thread is used in the needle. This method produces rows of stretchy, gathered stitching, making it perfect for creating flexible, fitted areas in garments.
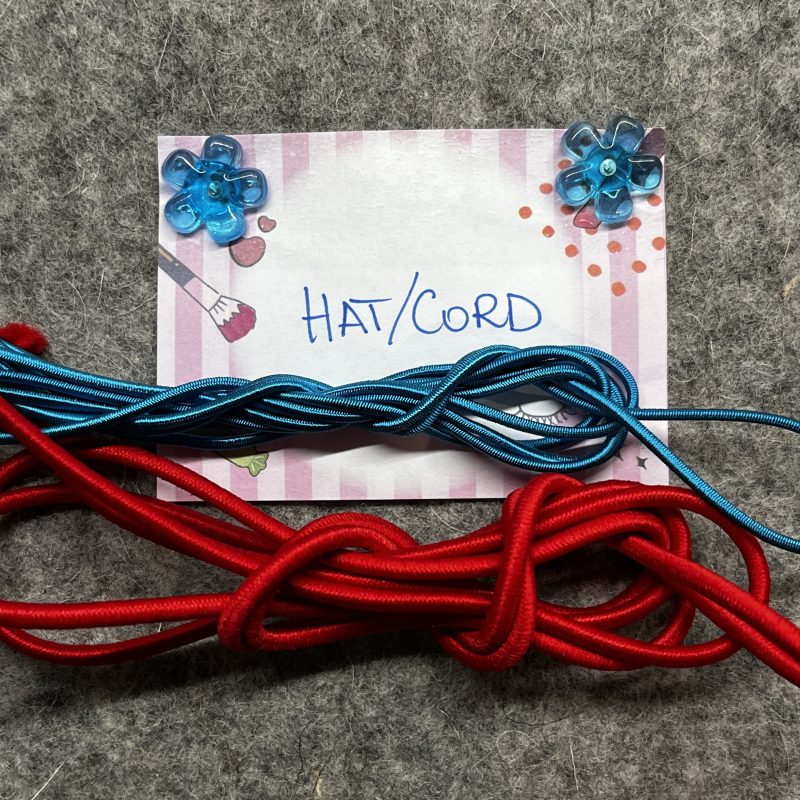
Hat/Cord Elastic Cord elastic is a versatile option commonly used for hat drawcords, button loops, gathering, and even beading projects. While flexible and easy to work with, it isn’t suitable for applications that require significant strength or support.
Cord elastic is typically secured with a zigzag stitch to maintain stretch, and finer cords can be anchored by hand or machine stitching within a seam.
... Time for Some Fun Feet ...
#C14 Elasticator Foot
After three weeks of quite the basic feet, it’s time to jump in and discover all the speciality feet and accessories for our Bernina Overlockers and Coverstitch machines.
We will start with this great foot whose purpose is to evenly attach elastic, up to a maximum width of 20mm, pre-tensioning it, neatening the fabric edge and therefore minimising bulk at the same time.
The #C14 Elasticator works only with the Overlock function of the L Series of machines. At the front of the foot is a lift up section, which when opened reveals underneath a gripped surface roller, a gap for threading the elastic through, and the front section marked with the two needle positions. On top of the lift up section is an adjusting screw with marks indicating the pressure, and at the very front of the feet, an adjustable guide with screws to perfectly locate the elastic for feeding, and needle positioning to sew.
Foot #C14 was used to stitch out samples using 4 different widths of elastics. After elastic was applied with an overlock stitch, the edge was turned over and coverstitched down to complete the sample.
Here is a link to the Bernina International video for this foot.
Additional Notes for other Models
Bernina L850 and L860 – foot is coded #L14
Bernina L450 and L460 – foot is called the Elasticator Foot
Bernette Funlock 40 Series (b42, b44, b48) and Airlock 60 Series (b62, b64 and b68) – foot is called the Elasticator Foot.
Additionally, the Coverstitch Function can be used to attach elastic on the Funlock 40 Series b42, b48 and Airlock 60 Series b62 and b68.
... This Week’s Foot Highlights or Challenges ...
When I’m using this foot, I always do a test sample on the garment’s fabric. Different fabrics and different types of elastics, give different results. After showing you the samples, I’ll add some tips I noted as I stitched along.
‘6mm Woven Elastic’ – This was stitched down using 3-Thread Overlock Narrow #4 – Right Needle. Finished with 3-Thread Coverstitch Narrow #24 – CC and RC Needles. I set the Differential Feed to 2, SL 4.5 and CW 6.5
‘10mm Lingerie Elastic’ – This was stitched down using 3-Thread Overlock Narrow #4 – Right Needle. My first sample I used 3-Thread wide and found it just too wide for this particular type of elastic I was using. Finished off with 3-Thread Coverstitch Narrow #24 – CC and RC Needles. I set the Differential Feed to 1, SL 4.5 and CW 7.5
‘12mm Woven Elastic’ – This was stitched down using 4-Thread Overlock with Integrated Safety Stitch #1 – Left and Right Needles. Finished off with 3-Thread Coverstitch Narrow #24 – CC and RC Needles. I set the Differential Feed to 2 on half of the sample and left the other half to setting 1. I do prefer it on 2, SL 4.5 and CW 7
‘20mm Braided Elastic’ – This was stitched down using 4-Thread Overlock with Integrated Safety Stitch #1 – Left and Right Needles. Finished with 3-Thread Coverstitch Wide #22 – LC and RC Needles. I set the Differential Feed to 2, SL 4.5 and CW 9
Sewing Gypsy Tips for Elasticator Feet
Set the right hand screw on the front guide first for the edge of the elastic depending on where you wish the needles to sew, and where the blade is. Then adjust the left hand screw on the guide to create a slot for the elastic to travel through easily. Do not make this too close that it grabs and tunnels the elastic!
Hold the elastic up and away from the fabric as it is stitched in.
When using narrow elastic, stitch with a narrow 3-Thread overlock stitch, and stitch length 3 to 4.5
Wider elastic may need a high Presser Foot Pressure.
Narrow elastic – cutting width 6 to 7
Elastic wider than 17mm – cutting width 7 to 9
Widest elastic 20mm – cutting width 9
Hold elastic at the back of the foot as you begin to stitch, watching it does not curl back and get caught in the needle
Sew a few stitches on the elastic only to stabilise it prior to putting fabric under.
Increase Differential Feed setting to gather slightly as you add elastic for a fuller edge.
Leave the beginning tail of elastic and some at the end to hold on to when you coverstitch the edge down. Alternatively use a leader at the beginning if you have already cut it off.
Remember the foot swings away for threading needles!!
Always have the Needle Stop function set to down!
... A Little Something Extra ...
Foot User Manuals
On the Bernina Website, you can download a User Manual for Foot #C14.