Back on track today, as life threw a curveball or two, a couple of weeks ago, and put my blogging ‘schedule’ a little skewed. I find that with the flexibility of working from home though, managing time becomes easier. I aim for one blog post per week, although life sometimes intervenes. Reacquainting myself with WordPress after eight years (which is how I publish the blogs) has been a learning curve, but writing down pointers in my trusty old-school spiral notebook helps. That’s why I designed the little write-on Info Tags for each of my samples.
I alternate between working in the Studio and my daughter Sally’s office, where she provides invaluable guidance. Embracing different approaches, (and I’m learning there’s more than one way to do EVERYTHING!) … and battling procrastination are all part of the process. Despite challenges, the journey of rediscovery is rewarding.
I have a wonderful connection with all my four Grandchildren, and the youngest Bobby, just 13 months old, lives about an hour away with his parents, my youngest daughter Gemma and her husband Jack on the Gold Coast. Gemma, a nurse, relies on Daycare for Bobby while she works. Two weeks ago, Bobby had an ear infection, and I stepped in to care for him when he couldn’t go to Daycare. Fortunately, with medication, he recovered quickly. My closeness to my grandchildren is a blessing that brings me much joy and fulfillment.
... ‘Gathering’ at the Studio ...
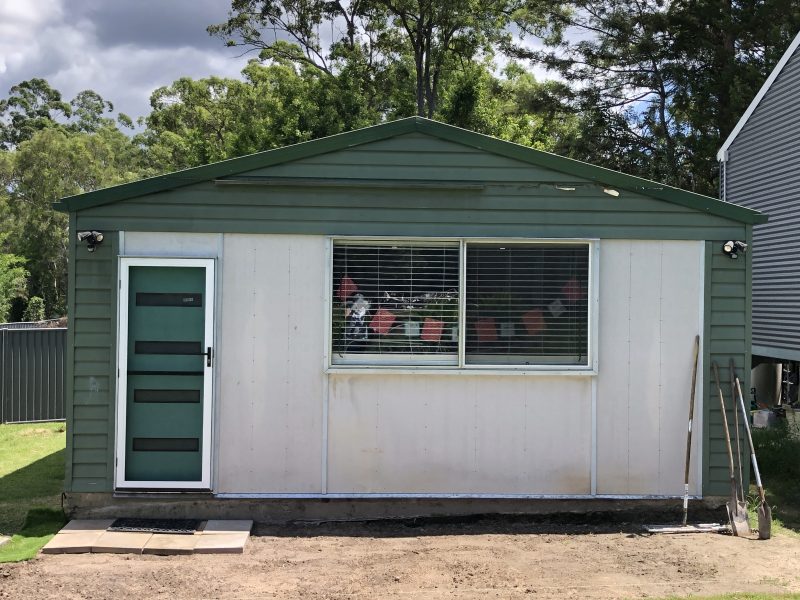
I returned home from the Gold Coast that night to prepare the Studio for the arrival of two special visitors: Kerrie Hay, National Product Educator from Bernina Australia in Sydney, and Joy Harvey, Bernina’s Area Manager for Queensland, based in Brisbane. We were excited about a few productive days planning and working on samples and projects for the upcoming Bernina Academy in Sydney. My Bernina L890 Overlock/Coverstitch Combination machine, along with all its accessories, worked alongside Joy’s L890 machine. Three days later, we packed up machines, laptop, fabrics, threads, samples, and notes, and they headed back home. Then, I returned to blogging!
Bernina Academy 2024 runs from 25 –28 September.
Sign up to the Newsletter to stay up-to-date with all the information as it’s released.
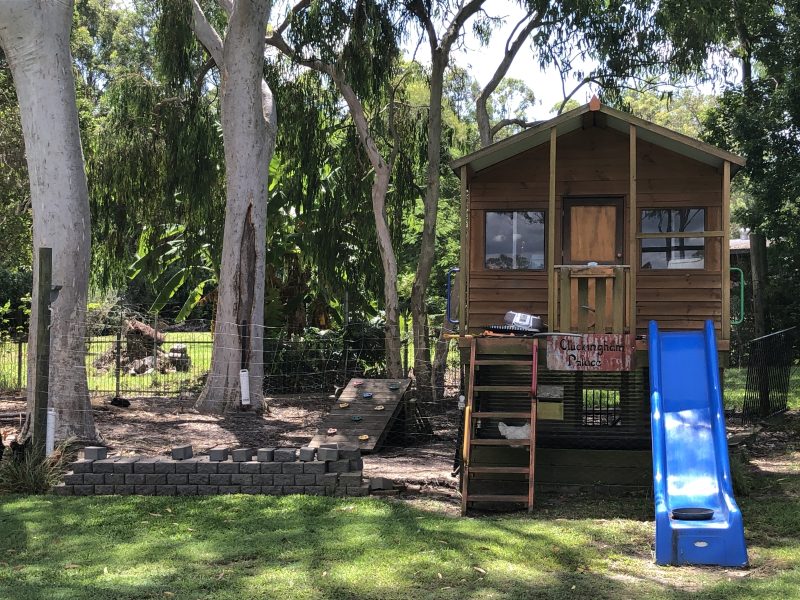
Last week, light rain kept outside ‘transformations’ quiet. Ben, my Son-in-law/’Project Manager’, stayed busy with lawn maintenance and clearing fallen branches from a recent storm on our acreage property. The Sewing Gypsy Studio sits near our Guest Cabin, where Sally’s been working on new garden beds. These will eventually connect with the Studio’s patio and the pathway to the house. Further away is ‘Cluckingham Palace’, home to our 10 chickens, under gum trees.
Inside the Studio… well, as I said before, I’ve been busy stitching on L890’s! No time to sort through/destash anything at all – but, there’s always next week … the ‘option’ of being retired!
... Keep Calm and Push the Button ...
Presser Foot Selection - Help – Tutorials – Creative Consultant
Knowing which foot works best with which stitch on which types of fabrics, usually comes from years of sitting at your machine, testing with different feet/stitches/fabrics, in other words, generally ‘nutting it all out’ for yourself. Thankfully our Bernina machines have several ‘help’ functions built into the operating system.
Presser Foot Selection:
Choose your desired stitch
Touch the Presser Foot Selection Icon to view suggested feet, including a recommended one.
Help: (I call it the “What Is ?” Button)
Press the “Help” button, then touch a stitch or icon to learn its name and various uses.
Tutorials:
Touch the Tutorial Icon to access folders.
Select the folder you need for information and choose from the submenu.
Creative Consultant: (LOVE this one!)
Touch the Creative Consultant Icon.
Select your fabric type and desired technique.
The screen displays recommended stitch, needle, thread, foot, and stabilizer needed.
Icons with a little ‘+’ on the corner, open up with more information as well.
Press the “green tick” to confirm.
The machine sets up correct stitch settings, and you add the foot manually.
Here’s what my screen looked like … when I selected Medium Weight Knit + Buttonhole
These Functions are all explained further in The Big Book of Feet, so take the time to read through pages 7 and 8. They are all available on my B790PRO, B750QEE, B590E and B435. Some Bernina Models may not have all these functions.
Wise Words of the Week: “You can get help from teachers, but you are going to have to learn a lot by yourself, sitting alone in a room.” – Dr. Seuss
... Helping Hold It All Together ...
Buttonhole Foot #3/#3C and #3A/#3B
Wikipedia says … “A buttonhole is a reinforced hole in fabric that a button can pass through, allowing one piece of fabric to be secured to another. The raw edges of a buttonhole are usually finished with stitching.” … and, they’ve been around since the 13th/14th Century … or longer perhaps!
Now that’s a long time ago! Let’s see how we make them now …
Buttonhole Foot #3 (for 5.5mm max stitch width machines) and Buttonhole Foot #3C (for 9mm max stitch width machines) not only helps stitch buttonholes, but can be used for a variety of techniques, as shown in this week’s samples.
The two grooves under the foot, allow the ‘beads’ of the buttonhole to align well, and hold cords, wire, elastic, fishing line and even yarns, in place when shirring or couching. There is a centre toe, as well as the left and right ones, and a slot for the thread to be placed in. A notch on the left hand side of the foot indicates the needle line. So much in one foot!
Buttonhole Foot #3B (designed for mechanical machines with a 5.5mm max stitch width, however can be used on computerised models) and Buttonhole Foot #3C (designed for computerised machines with a 9mm max stitch width) really make sewing buttonholes a breeze!
Attached to the Shank on both feet, is a sliding track with a small red tab on the left hand side. Maximum stitch length of buttonholes made with these feet is 29mm, or 1 ¼”. If needing a longer buttonhole, switch out to Foot #3/#3C.
Buttonhole Accessories to get the best finish
When sewing buttonholes on uneven edges of garments, the Buttonhole Compensation Plates are essential! Think about that collar stand with the buttonhole, and how challenging it is to get it stitched neatly/evenly. This accessory is often used here in the Studio, as well.
The Buttonhole Cutter with Wooden Block is the ideal tool for opening finished buttonholes. The wooden block is placed under the buttonhole, while the chisel is pressed against the block from above. Only slight pressure is required to cut through the fabric.
Foot #3/#3C had8 differenttechniques to stitch out, and Foot #3B/#3A had 2 different techniques to stitch out! Here’s the photos to show how they all went …
... This Week’s Foot Highlights or Challenges ...
Both these feet (#3A and #3C) are often used here in the Studio. I love garment making, and I have a big collection of buttons – so … I need buttonholes!
Samples this week were sewn out on the Bernina B790PRO, and the machine’s feature I’m loving this week, is that it has a Laser Light to position buttonholes exactly where I need on a garment, or in this case, a sample.
You can see a red dot here as I’m about to stitch this sample. I turn it off as soon as I’ve positioned the fabric under and have it in the right place. No need to leave it turned on.
The main challenge I had was getting a nice ‘Roll and Whip Stitch’ with #3C … and this technique was a favourite of mine in the 80’s when doing Heirloom Sewing on my Bernina 1230. I found an old reference workbook I had from those days, and altered my setting to ones similar to the workbook … worked a treat! I used Foot #3, changed my stitchplate to a 5.5mm one, (see ‘Foot’note at end of post), Stitch length 1.5 and Stitch width 4.0 – and remembered to hold those threads together at the back when I started!
Other than stitching buttonholes for use with buttons, I’ve made them for threading through ribbons, side ties on wraparound dresses/skirts, threading apron ties through, and even added some to a new apron I’m making, to ‘button on a necklace of pearls’, meant for Croc Shoes! … I’ll post a photo once the apron is finished. Yes … I do indulge in a bit of fun here in the Studio! Here’s a little laugh for you, courtesy of Cartoonist Jef Mallett, whose character has found another use for buttonholes …
... A Little Something Extra ...
Bernina’s Best Sewing Tips for Buttons and Buttonholes
This week I have only just touched on buttonholes, however the Bernina Australia Website is a great source of further information, both on your machine, and also on feet, accessories and techniques. Click on the box below, and take a look this week at some sewing tips on Buttonholes and Buttons.
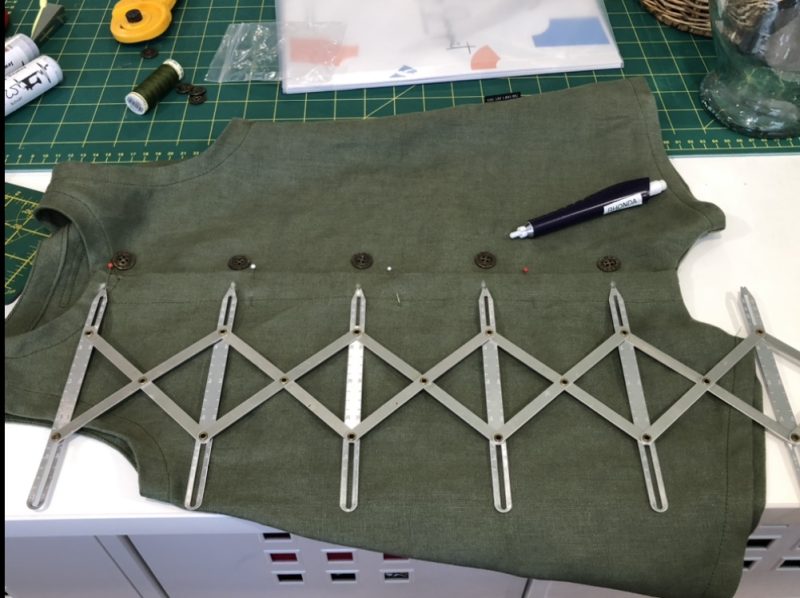
I am quite the ‘Gadget Girl’, and over the years I’ve bought and used some great haberdashery items. As we are discussing buttonholes this week – I thought I’d share my SimflexExpanding Sewing Gauge, which I have had for many, many years … and it has been used often! I made Grandson Bobby a romper for his first Christmas photo with Santa last December. I’d previously used the pattern for him (it’s a real favourite!), however it needed some extra length in the body. Hence, I needed to re-space the buttonholes (button placement marks).
Here is it … my Simflex Expanding Sewing Gauge! (Original price sticker till on the packet $3.75 !!) Here’s the tool in action … and a link to a great video on Youtube by SewVeryEasy that explains its many uses … a lot easier than having me writing it all out for you! PS … I’ve bought a newer version of this tool, which has 9 ‘points’, and a couple of securing screws to lock the gauge into place when using it for multiple markings – thought that would be fabulous! Always happy to ‘upgrade’ the toolbox!
is #35 Invisible Zipper Foot – 20% off – contact your preferred Bernina Dealer for this fabulous offer. This Foot makes inserting invisible zippers a breeze! I’ll be covering this foot later in the Blog.
*Australia and New Zealand PromotionOnly – ends 31 March 2024
Chat again Friday,
'Foot' note:
‘Foot’note: When changing out your Stitchplates at any time, remember to go into the Stitchplate/Needle Selection Icon on your machine, and select the correct Stitchplate. This is a security setting so that you do not break needles.