Tuesday 21st July 2026
... SAMPLES, SEWING & SEARCHING ...
It’s been another busy week here in the Studio, with a big batch of samples to prepare and stitch as I explore two different feet this week. It’s still very cool, and then the winds arrived as well—definitely not welcome! My favourite reading spot is now littered with gum leaves, so I think the wind has been having a little too much fun!
The weekend brought a lovely change of pace, with a visit from our Gold Coast family, Gemma, Jack, Bobby and sweet little Summer. It was so special for the cousins and adults of course, to spend time together and enjoy a family meal—those precious times together are always good for the soul.
There’s been a little baking happening too, because apparently there’s always time for that, especially my high school friend Julie’s Secret Squirrel Apple Cake but mostly I’ve been surrounded by far too many things in the Studio.
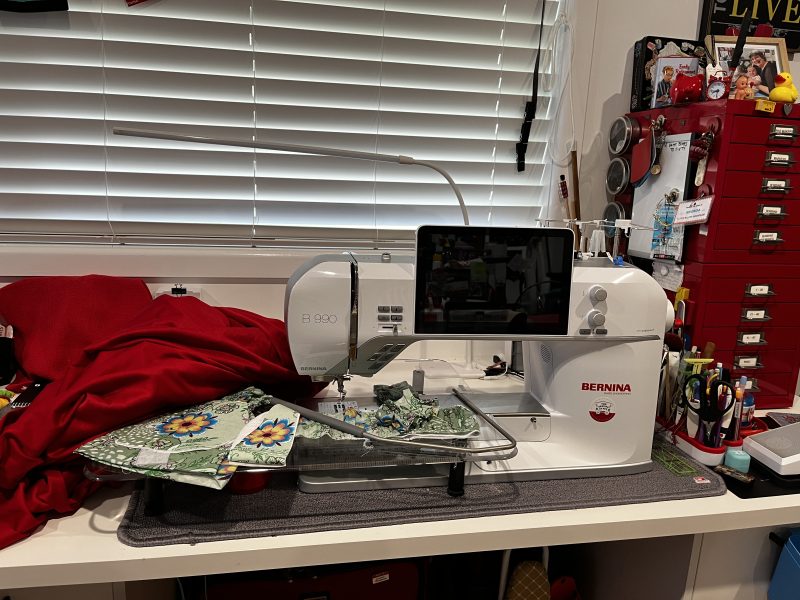
In fact, I managed to ‘lose’ a simple little project I was sure I had put somewhere safe. After searching around, I finally found it hiding under the cover of my sewing machine, all ready to be stitched. Clearly, I hadn’t uncovered that particular machine until the very last minute this week!
So, with family time enjoyed, samples prepared, feet ready to put through their paces, baking done, and a little Studio mystery solved, it’s time to share what I’ve been up to this week.
... ‘Gathering’ at the Studio ...
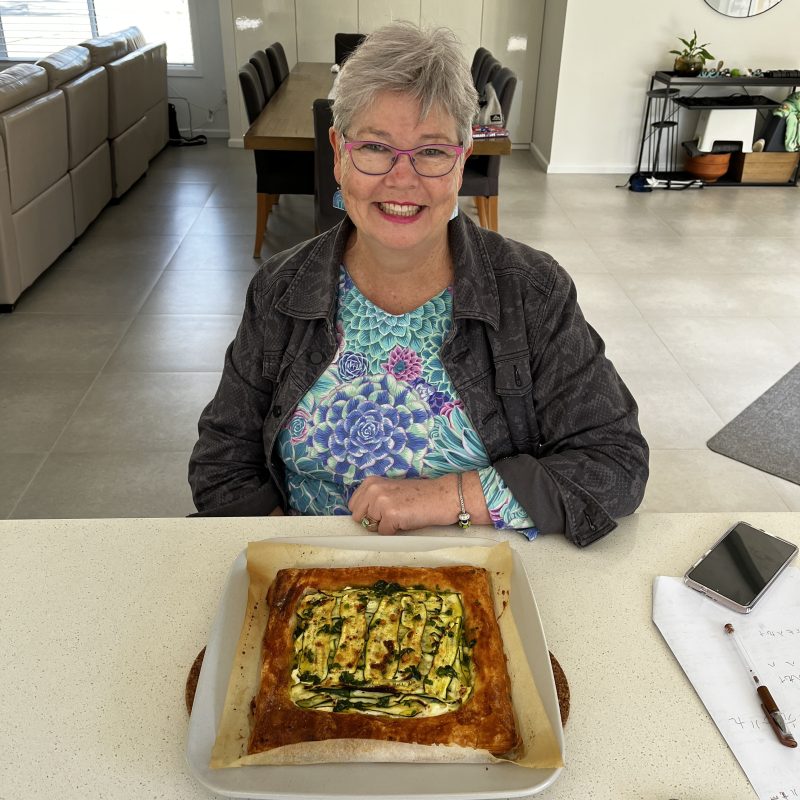
As well as the ‘Secret Squirrel Apple Cake’ I baked, I also managed to squeeze in preparing lunch to share with my dear friend Kim from Warana, up on the Sunshine Coast—of Kimz Sewing and Patchwork ‘fame’, hehe! Yes, Kim has visited the Studio many times now, and it was lovely to have another short but very special visit on Saturday.
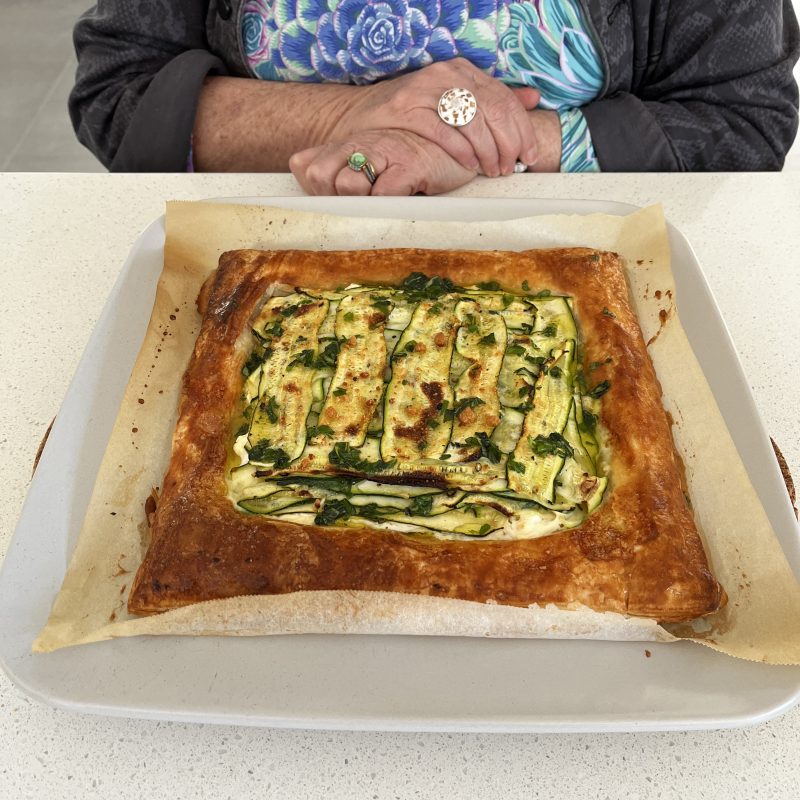
We chatted for hours, as we always do, and I made a Zucchini Tart for an early lunch while Kim sat opposite me at the kitchen bench. There’s something so lovely about spending time with friends, no matter what we’re doing—or what we’re talking about!
The tart was really easy to make, and I’ve been wanting to try the recipe ever since I spotted it on Instagram some time ago. Zucchinis, garlic, basil, lemon zest, ricotta cheese, parmesan (I crumbled in some Feta as well!) and golden puff pastry! It’s from @juliusroberts, a young cook, farmer and gardener from England. I do love an open savoury tart!
Once the tart had been eaten and the coffee finished, it was time to head up to The Studio for a little more chatting about sewing things in general.
Kim was here earlier in the year too, when she ‘encouraged’ me along as I tackled the decluttering challenge set by Karen from ‘Just Get It Done Quilts’ back in January. Hmmm… I think Kim now realises she may be needed again for some ‘remedial’ work in here!
We’re both off to Sydney in a few weeks’ time, and then I have a little hand-stitching retreat to look forward to up in the gorgeous Sunshine Coast Hinterland. After that, it will be time for some serious sorting out in the Studio!
Do you ever manage to keep your sewing area neat and tidy all the time? If only I had one project on the go at a time—and actually stuck with it, followed it through and finished it before starting something else—I might have a chance!
... The Studio Update ...
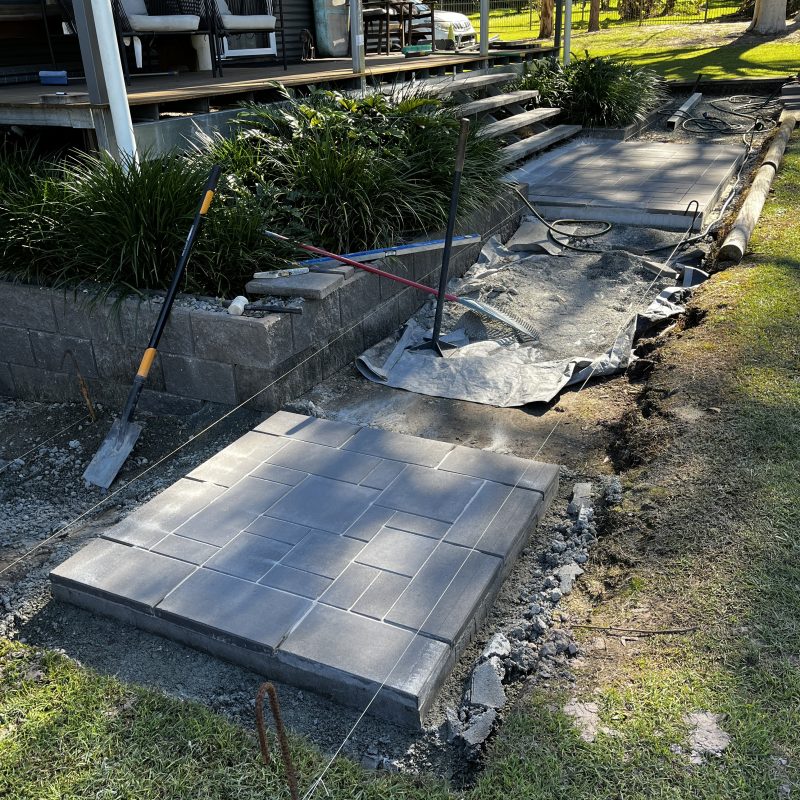
Last time I posted here was way back in May … ‘village’ life for all of us here has been a tad busy … so I did a little wander outside to take photos of what has progressed on the paving … and started thinking about what to share re ‘activity’ inside my little happy place, The Sewing Gypsy Studio, over the last 2 months.
Outside – Ben’s been waiting for quite some time now on more pavers to be made, and then delivered. However, two weeks ago a big truck was a welcome sight on the driveway with two full pallets of lovely gray pavers. The two empty spots on the grassed area were occupied again!
I’m constantly in awe of Ben’s dedication and commitment each weekend to all the construction, maintenance and planning around the home and grounds here. I asked him about his planning for the paving just the other day, and he said he just makes it up as he goes! The finished result is always so precise, ordered and such a high quality of workmanship. “Keep doing you Ben!”
Unlike constructing a patchwork quilt where we make the blocks and then add borders, Ben’s paving ‘technique’ on this path and every other place around the outdoor areas here, is … put a border around, and then fill in with blocks. Amazing how different processes are from one medium to another.
Inside – This week I updated my B990 (Version released just this last week V44.04.03) … enables use of the new Giant Magnetic Hoop and some other general performance improvements. Hopefully the new hoop will be available here in Australia sometime soon! For those with a B990 it has a maximum embroidery area of 305mmm x 410mm (12” x 16.1”) … and as it is a rectangular shape the full embroidery area can be filled … great for edge to edge designs! (The Giant Hoop, with the ratchet closure, has rounded corners.)
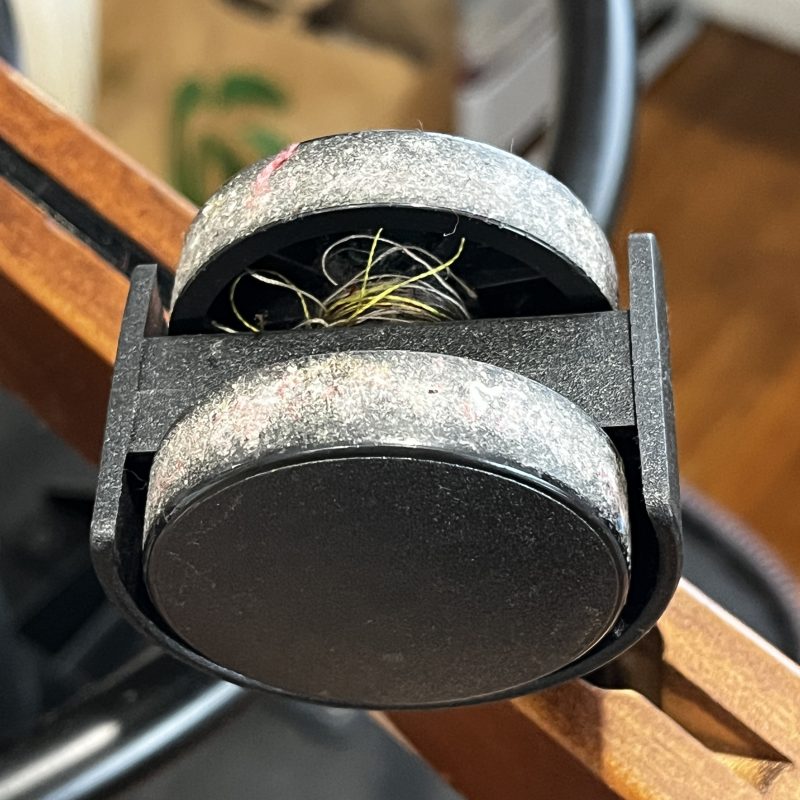
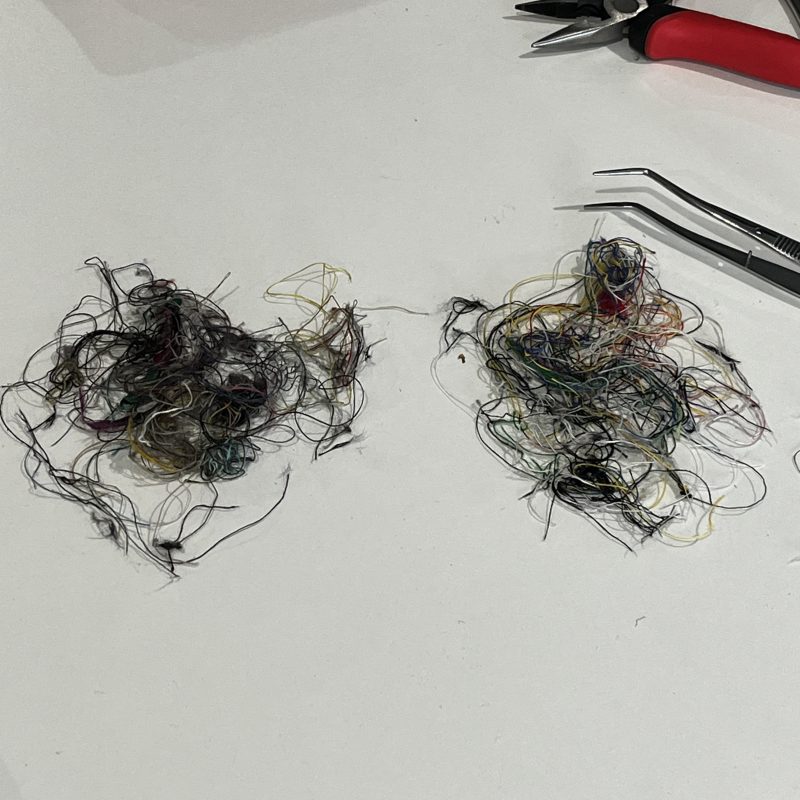
I’m very conscious of all the thread cut-offs around the Studio when I am working, using small bins at every machine, and even though I vacuum at the end of each day, over time my sewing chair wheels get clogged up with debris and don’t roll as efficiently as I’d like. I cannot simply change my wheels over for ‘skateboard type’ ones as the castors are welded to the frame of the chair. So I regularly need to upend the chairs (and they are heavy!), and remove threads from the castors – thank goodness for tweezers!! Cannot imagine what sort of piles of threads I’d have if I was one of those sew-ists who just dropped threads onto the floor as they sew!
Bernina Academy is less than 3 weeks away now and I’ve got a lot that needs to be completed before I leave, and enjoy a week away with lots of fellow Bernina lovers down in Sydney. There are three more Blog posts to complete, a garment project for me to wear down there (fingers crossed on that one!) … and a presentation to finalise that I was invited to give to Sew Much More at the Gap, an Australian Sewing Guild Chapter on the north side of Brisbane, including kits to cut for a little project for them all … on the day before I fly to Sydney!
There’s a lot to do here in The Studio … always!
... Did You Know? ...
Speciality Threads
I know I mentioned in my last post that I would include a section on specialty threads, but I simply ran out of time! I didn’t want you to think I had forgotten, though…
I’ll include it in my next post, when we look at the #C30 Belt Loop Folders. There won’t be quite as many samples to prepare and stitch for that post, so I should have a little more time to talk about specialty threads!
... Two Clear Wonders ...
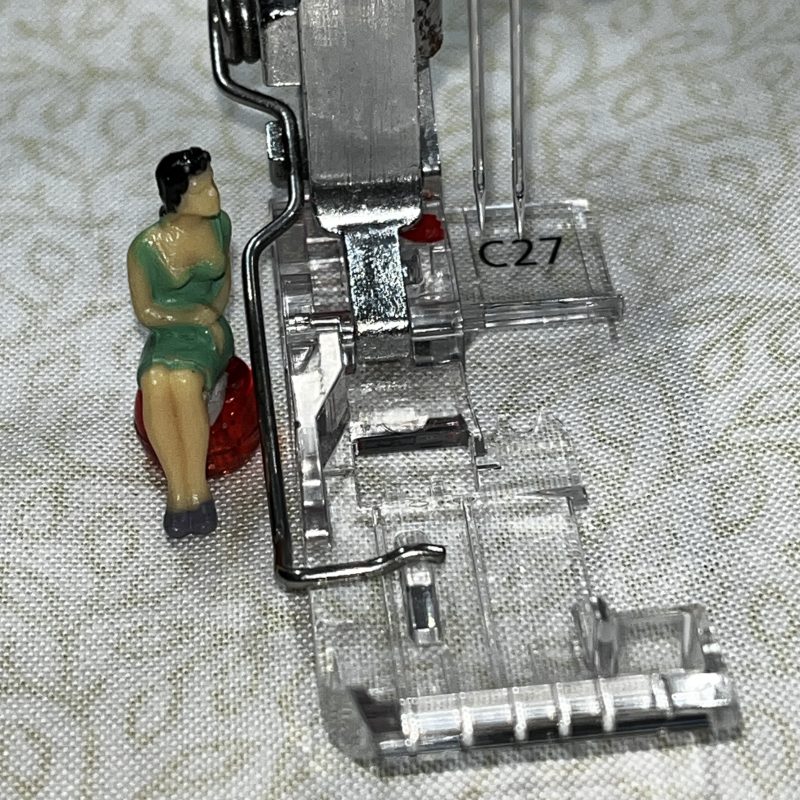
#C27 Clear Overlock/Combo Foot and #C28 Clear Cover/Chainstitch Foot
Before I get into the specifics of each foot, the most significant thing to remember regarding the differences in these two feet are … they are clearly designed/named for a reason … and it makes it easy which one to choose – it all depends on what stitch you are using!
#C27 is designed for Overlocking/Combo stitching, where the right-hand edge of the fabric is trimmed away before stitching, meaning the stitch is formed over a raw edge.
#C28 is designed for Cover/Chainstitch stitching, which is used when working on ‘flat’ fabric that extends beyond the right-hand side of the foot.
#C27 was available quite some time prior to the release of #C28. Hence the instruction manual for the foot does say for Overlock, Coverstitch or Combo stitches.
I added a little more about my thoughts on these feet at the end of the ‘Highlights and Challenges’ section.
Let’s look at them individually for the main features …
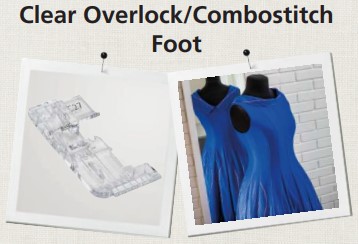
#C27 Clear Overlock/Combo Foot
The clear design provides an unobstructed view of the needle area and fabric, making it easier to sew perfect circles and accurately align seam ends.
An integrated tape guide neatly accommodates and feeds tapes or elastic up to 14 mm wide along the fabric edge, while the L27 accommodates tape up to 10 mm wide.
Built-in markings indicate three coverstitch and two overlock needle positions, as well as the cutting line (at cutting width 6), helping to achieve precise stitching.
The foot also provides full contact with both the front and back feed dogs, making it ideal for maintaining even stitches when adjusting the differential feed. (Just a reminder – Foot #C23 and #L23 Clear Curve Feet are shorter and therefore do not sit on the entire length of the feed dogs.)
Foot #C27 was used in 4 different techniques to stitch out, including three that used Cover/Chainstitch. I would use normally my #C28 for that. The Bernina International video that I am following along with now for samples, were created prior to #C28’s release, so that’s what I created the samples with.
Here is a link to the Bernina International video for this accessory.
Additional Notes for other Models
Bernina L850 and L860 – L27 – Tape guide slot 10mm
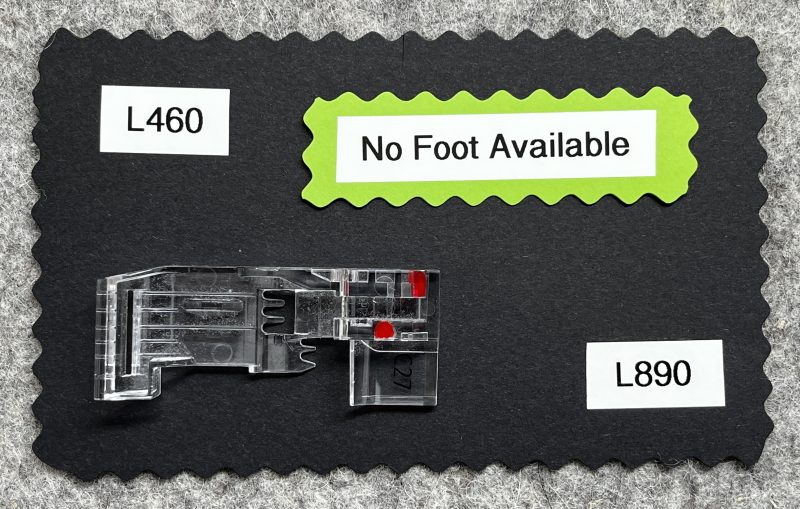
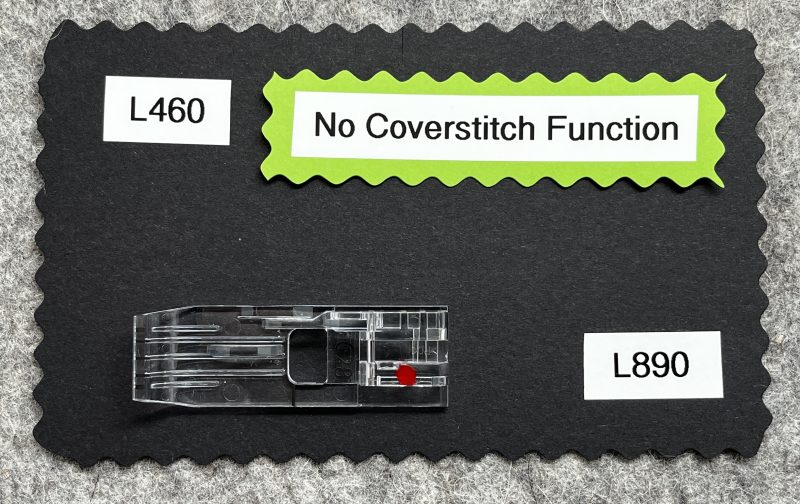
Bernina L450 and L460 – no Clear Foot Available
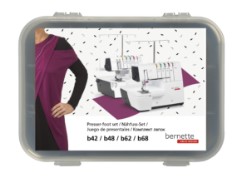
Bernette Funlock 40 Series (b42 and b48) and Airlock 60 Series (b62 and b68) – Standard with Clear Sole available in a Set –
Bernette Funlock 40 Series (b44) and Airlock 60 Series (b64) – no Clear Foot Available
#C28 Clear Cover/Chainstitch Foot
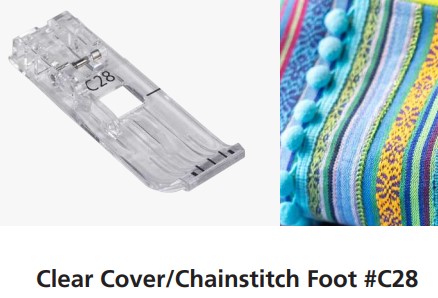
The clear viewing window allows you to see exactly where your stitches are landing, making this foot particularly useful when sewing over patterned fabrics or lace.
Built-in horizontal black guideline on the right hand side of the foot, helps with precise needle alignment on the fabric, while the three centred black guidelines on the toe provides an additional reference for accurate chainstitch or coverstitch placement. Also ideal for connecting stitches when sewing in the round.
The left and right outside black guidelines indicate 2mm from the left or right needle.
The distance between the edge of the foot and those needles is 6mm, a reference ideal for topstitching and applique – and patchwork seams! (6mm is a scant 1/4″)
It is compatible with various accessories and I particular love it for the #C30 Belt Loop Folders, which will be covered in the next post. (Also #C31 Hemmer, #C21 and #C22 Binders, Adjustable Tape Guide and the Seam Guides in Shaft.)
Foot #C28 was used in 6 different techniques to stitch out.
Here is a link to the Bernina International video for this accessory.
Additional Notes for other Models
Bernina L850 and L860 – No Cover/Chainstitch function
Bernina L450 and L460 – No Cover/Chainstitch function
Bernette Funlock 40 Series (b42 and b48) and Airlock 60 Series (b62 and b68) – Standard with Clear Sole available in a Set –
Bernette Funlock 40 Series (b44) and Airlock 60 Series (b64) – No Cover/Chainstitch function
... This Week’s Foot Highlights or Challenges ...
‘Reinforced Decorative Edge’: I used a piece of 10mm Grosgrain ribbon for this sample. The swing out foot helps when loading the ribbon into the slot. Sewed a couple of stitches into the ribbon to stabilise it before adding fabric underneath the foot. Trimmed off fabric as I went.
Machine Setup: 4-Thread Overlock Stitch #1 … SL 3.0 … CW 6 … DF 0.7 … Tensions – Default except for Upper looper – 3.0
Needles and Lower Looper – Maxilock Swirls Colour Tie Dye Punch – a fun thread I use a lot.
Upper Looper – 12wt Wonderfil Glamore GM180 – love this thread in the loopers as it is black with a multi coloured metallic addition.
‘Sew Tape/Ribbon as Trim: The slot in the front of the foot allows trims up to 14mm wide (L27 allows trims up to 10mm wide) – however I did use a 15mm ribbon and it worked fine.
Machine Setup #1: 2-Thread Chain Stitch #16 (RC Needle) … SL 3.0 … CW NA … DF 1 … Tensions – Default except for Chain Looper – reduced to 1.2
Needle – Maxilock Swirls Colour Tie Dye Punch
Chain Looper – 12wt Wonderfil Fruitti (You don’t see this thread, but I had it in there from doing another project I was playing with between stitching these samples)
Wide green ricrac was 14mm wide, and I used the clearview section near the needle to check on the needle position, ensuring it was stitching on the trim. If I did this again, I would prefer the 3-T Coverstitch Narrow #24 to apply the trim. That would keep the ricrac flatter through washing/wearing as well. See notes on yellow ricrac below.
Pale pink grosgrain ribbon was 12mm wide, puckered a little as it was stitching on, so could have decreased the differential feed setting to 0.9 to 0.7
Narrow orange ricrac flowed easily through the slot, and I simply guided it carefully, stitching slow!
Machine Setup #2: 3-Thread Coverstitch #24 (CC & RC Needles) … SL 3.0 … CW NA … DF 1 … Tensions – Default except for Chain Looper – reduced to 1.2
Needles – Maxilock Swirls Colour Tie Dye Punch
Chain Looper – 12wt Wonderfil Fruitti
Narrow yellow ricrac – with careful guiding, this trim stitched on beautifully, and the addition of a second needle creating another line of stitching, ensures it stays flat.
Blue satin ribbon – this was 15mm wide according to the reel – just 1m larger than what was recommended for the foot, however it performed well. Because it is a wider trim, the stitches are towards one side of the trim, and not centred.
‘Attach’ Elastic: Elastic or soft knit strips are ideal for this technique, and again the swing out foot allows easy loading of the elastic/strip. Check needle positions so that at least one row of stitching is positioned on the strip/elastic. Familiar settings for gathering, e.g. maximum stitch length and differential feed are used.
Machine Setup: 3-Thread Coverstitch Stitch #24 (CC and RC Needles)… SL 4.5 … CW NA … DF 2.0 … Tensions – Default
Needles – Maxilock Swirls Colour Tie Dye Punch
Chain Looper – Maxilock Swirls Colour Tie Dye Punch
Depending on your project, elastic/trim could be stitched onto the right or wrong side of your fabric. I have used a cotton tape also at one time stitched to the right side as a feature.
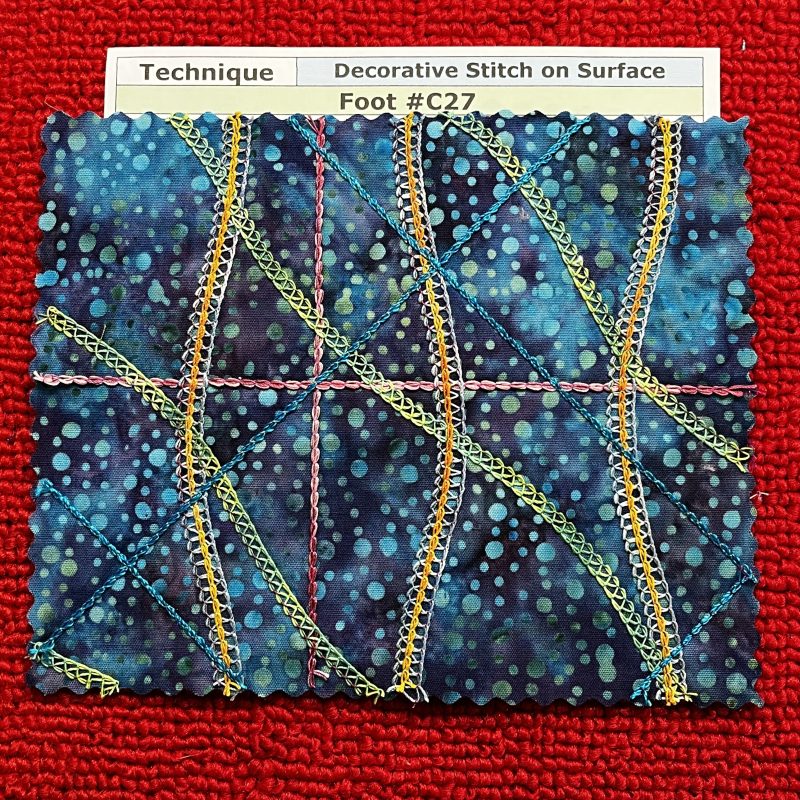
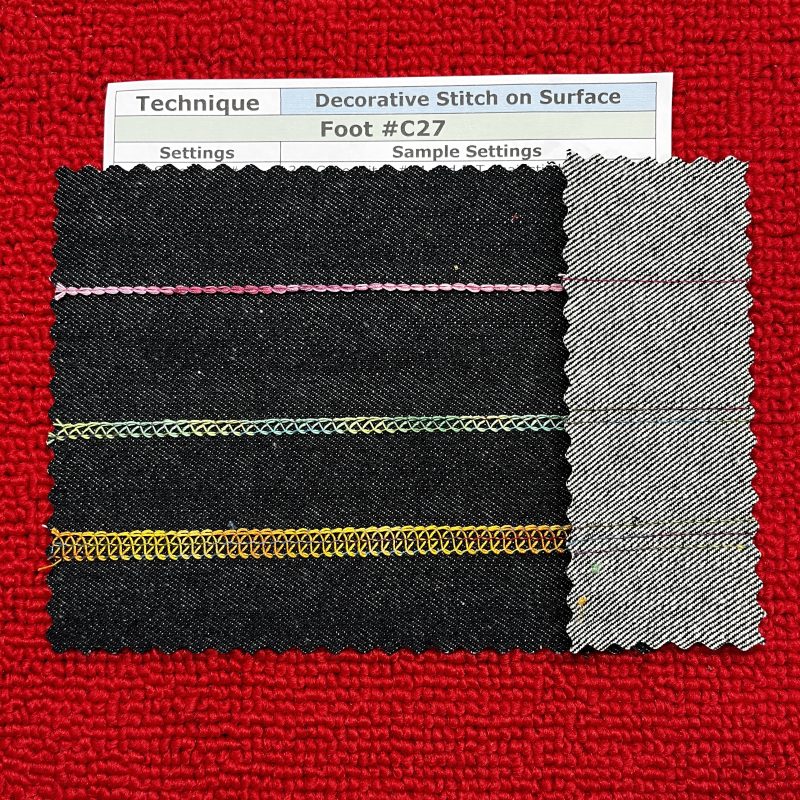
‘Decorative Stitch on Surface’: Mark design lines on wrong side of fabric, and if starting on an edge, use a supporting scrap of fabric to begin. Guide fabric keeping the marks on foot aligned with needles. I was ‘decorating’ a piece of batik to make into a little zippered pouch for my Thread Fusion which I bought a few years ago now (from Gail Yellen in the States) so I added a photo below of a small offcut I had. I’m not aware of any Australian Bernina stores that are stocking these, so I shall add a link to Gail’s website at the end of the blog.
Machine Setups:
(Pink) 2-Thread Chainstitch Stitch #16 (RC Needle) … SL 3.0 … CW NA … DF 1.0 … Tensions – Default except for Chain looper – 1.2
(Green) 3-Thread Coverstitch Narrow Stitch #24 (CC & RC Needles) … SL 3.0 … CW NA … DF 1.0 … Tensions – Default except for Chain looper – 1.2
(Orange) 4-Thread Coverstitch Stitch #21 (LC, CC & RC Needles) … SL 3.0 … CW NA … DF 1.0 … Tensions – Default except for Chain looper – 1.2
Needle/s – Maxilock Swirls Colour Tie Dye Punch
Chain Looper – 12wt Wonderfil Fruitti (hence the altered tension)
Clear Cover/Chainstitch Foot #C28
‘Stitching on Stripes’: The clearly marked guidelines (black) on this foot are fabulous, as I’d mentioned earlier in this post when we chatted about the actual foot. Heavier contrasting thread like a 12wt in the needles (Size 90), would be a great finish too.
Machine Setup: 3-Thread Coverstitch Narrow Stitch #24 (CC & RC Needles) … SL 3.5 … CW NA … DF 1.0 … Tensions – Default
Needles and Chain Looper – Maxilock Swirls Colour Tie Dye Punch
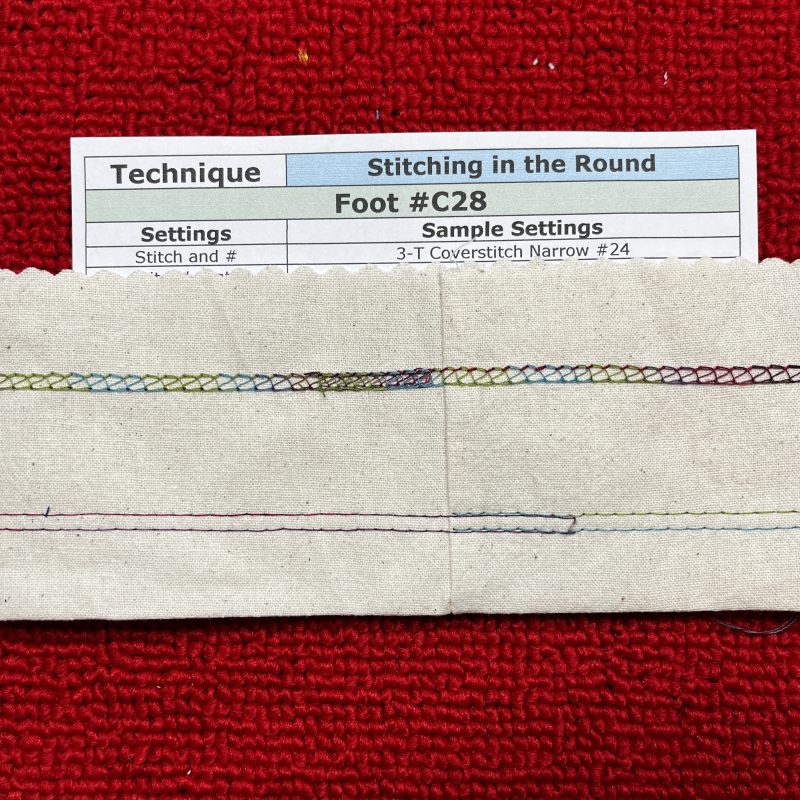
‘Stitching in the Round’: A little disclaimer about stitching this sample: The free arm on an overlocker is a great feature when stitching in the round. Although every one of my sewing machines—and several of my overlockers over the years—has had a free arm, I rarely use it. I much prefer stitching ‘inside a cylinder’ instead. As they say, “old habits die hard”!
Remember, there’s more than one way to approach many sewing techniques, and I’ve always been happy to step outside the circle and do things my own way—just ask some of my friends and workmates! For me, sewing has to be fun and joyful, so this week I chose not to use my free arm and went with the method I enjoy most.
The black needle guides on the front of the foot, and all three as raised markings nearest the needle, help to line up the starting point of the stitching.
Machine Setup: : 3-Thread Coverstitch Narrow Stitch #24 (CC & RC Needles) … SL 3.5 … CW NA … DF 1.0 … Tensions – Default
Needles and Chain Looper – Maxilock Swirls Colour Tie Dye Punch
A 12wt decorative thread in the Chain looper would be a nice finish if using the looper side on the finished outside of the garment.
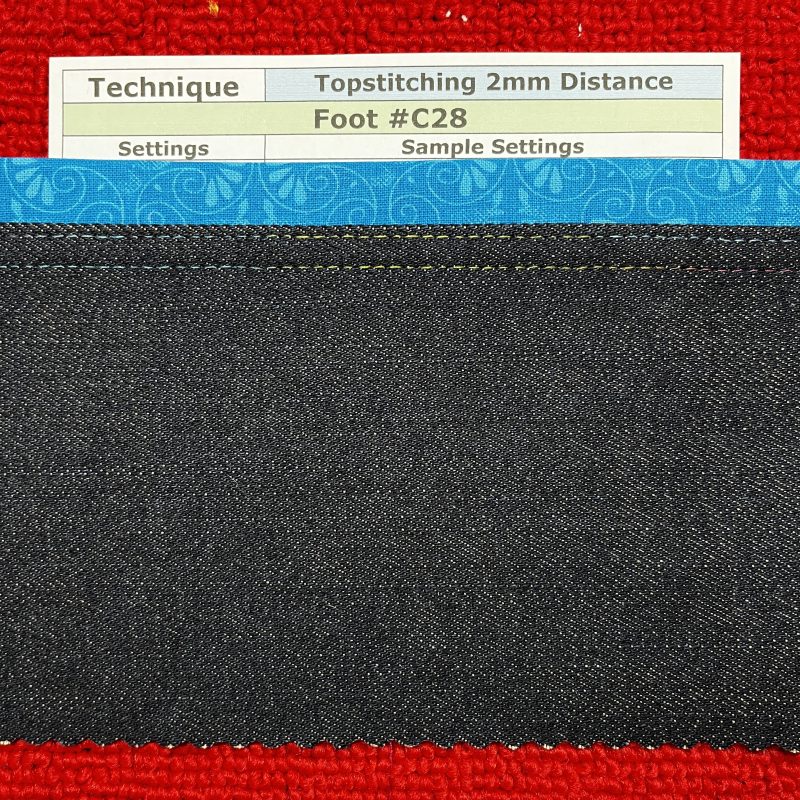
‘Topstitching 2mm Distance’: First step for this sample was to add a contrast trim to the edge of the denim. I used a 4-Thread overlock stitch and pressed the seam toward the denim. The small black markings on both sides of the front of the #C28 foot show the position 2mm from either the left cover or right cover needles. Placed this line on the edge of the denim (used a scrap piece to stitch onto first) and the resulting topstitch was perfectly aligned with the edge. Great for jeans seams!
Machine Setup: : 3-Thread Coverstitch Wide Stitch #22 (LC & RC Needles) … SL 3.5 … CW NA … DF 1.0 … Tensions – Default
Needles and Chain Looper – Maxilock Swirls Colour Tie Dye Punch
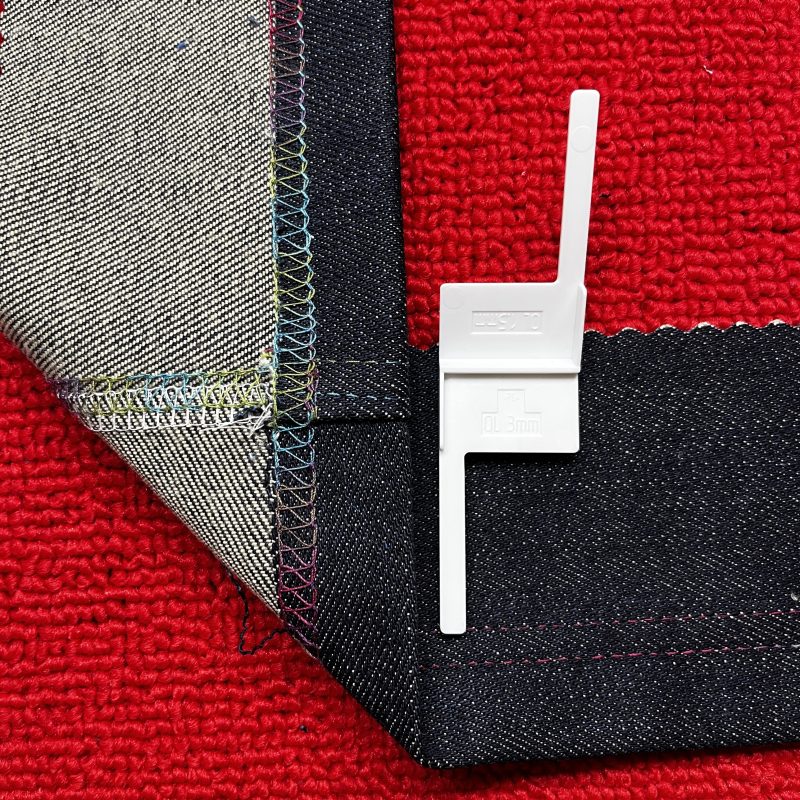
‘Topstitch and Hem + HCT’: Seamed two pieces together with 4-Thread Overlock stitch and pressed the seam to one side. Topstitched the seam through all layers as per last sample. Love that 2mm from the needle marked guide! When stitching the hem section, the HCT (Height Compensating Tool) was used to help the foot navigate the uneven fabric heights at the seamline, and maintain a consistent stitch length. I folded over the sample to show wrong side and even stitches. There are some good tips in the Bernina International video on the use of this great tool, and I’ll cover it before this Blog Challenge comes to an end.
Machine Setup: : 3-Thread Coverstitch Wide Stitch #22 (LC & RC Needles) … SL 3.5 … CW NA … DF 1.0 … Tensions – Default
Needles and Chain Looper – Maxilock Swirls Colour Tie Dye Punch – this thread looks great on denim!!
‘Combine Applique and Topstitch’: The design of this foot gives great guidance and accuracy for placement of stitches, including the fact that from the Left Cover needle position to the outside left edge of the foot is 6mm, and from the Right Cover needle position to the outside right edge of the foot is 6mm. I appliquéd the pineapple top on first, running the edge of the foot along the raw edge of the appliqué as I stitched. With that line in place, I turned it over and using the 2mm marking, outlined the previous row. I fused on the pineapple base and did the opposite – 2mm from edge with and then 6mm from that from the back.
Machine Setup #1: 2-Thread Chainstitch Stitch #16 (RC Needle) … SL 3.5 … CW NA … DF 1.0 … Tensions – Default
Pineapple Top Applique Needle (Size 90) – Wonderfil Spagetti 12wt … Chain Looper Wonderfil Glamore 12wt
Pineapple Base Applique Needle (Size 90) – Maxilock Overocking Thread .. Chain Looper Wonderfil Spagetti 12wt
Appliquéing around curved shapes is a lot easier of course with the Clear Curve Foot #C23 and would be my preference as a shorter foot means less contact with the feed dogs and a smoother stitched curve.
However I was using this foot, so I decreased the Foot Pressure to 2 which certainly helped going around those curves.
‘Decorative Ribbons and Trims’: A great little play with some pompom trims – the wider ‘woven edge’ did make stitching them onto the base fabric a lot easier. The distance between the left hand side of the foot (runs along the pompoms) and the left needle is 6mm so it often missed the outer right hand side of the woven edge. Loved the finish with the larger pompoms with the wider edge!
Machine Setup: : 3-Thread Coverstitch Narrow Stitch #23 (LC & CC Needles) … SL 3.5 … CW NA … DF 1.0 … Tensions – Default
Needles and Chain Looper – Maxilock Swirls Colour Tie Dye Punch
Summary: These two feet are often used here in my Studio – and the most recent addition was the #C28, a very welcome accessory for me. I do quite a bit of decorative work with my Bernina L890 and find both the clear feet excellent for aligning previous stitched rows and following design markings I’ve made.
When stitching with Coverstitch and Chain, I find the #C28 is the only foot that gives a clear view of hemming and stops that ‘puckered’ look/fabric being caught (mainly knitted fabrics) on the right hand side that sometimes comes when foot #C27 is used with coverstitch or chain. The narrower foot has nothing to catch or drag on the fabric. I hope that makes sense?
Here’s my thoughts on that issue: The two feet are clearly named for a reason – #C27 for Overlocking/Combo stitching (where the right hand edge of the fabric is always trimmed off before stitching – that is the stitch is made over a raw edge), and #C28 for Cover/Chainstitch stitching, when working on ‘flat’ fabric that extends beyond the right hand side of the foot.
... A Little Something Extra ...
Foot User Manuals
On the Bernina Website, you can download a User Manual for the #C27 Clear Overlock/Combo Foot
… and you can download a User Manual for the #C28 Clear Cover/Chainstitch Foot
As mentioned earlier, here is the link to the Thread Fusion ‘tool ‘ that I use when combining more than one thread in an individual threading path. I have the larger version for my L890. It’s a great addition to the ‘fun stuff’ here in The Studio – thanks Gail for seeing the need also and bringing it to market.
... A Little Reminder ...
Bernina’s Foot of the Month July 2026 *
is #16 Gathering Foot – 20% off – contact your preferred Bernina Dealer for this fabulous offer. … and this foot is used for gathering individual fabric layers or for gathering … and simultaneously sewing onto a flat piece of fabric … A very handy foot!
*Australia and New Zealand Promotion Only – ends … 31st July 2026
Discover limited-time offers on selected BERNINA machines and accessories. Whether you’re upgrading or starting your sewing journey, there’s something special waiting for you.
Here’s a link to details on this month’s promotion …
Chat again on Friday I hope, with the #C30 Belt Loop Folder … in 3 different sizes … as well as the last couple of fun stitch techniques, and snippets of what else is happening here in The Sewing Gypsy Studio.