As I sit in The Studio writing up this Blog post, there is a new Kmart jumper that has just been unpicked, the long sleeves removed, and binding added to re-make into a vest for my granddaughter Ambah. (Ribbing from stash!) She loved it in the store, but long sleeves were way too hot at this time of year. I love a good ‘makeover’ of a garment, and… I love a little challenge as well. It got me thinking about the blessing of having skills that prove useful day after day … and ‘mending’ in general.
It’s heartwarming to see a growing interest in mending and repurposing. ‘Make Do and Mend’ classes, groups and books reflect a shift towards sustainability and resourcefulness. I grew up in a family that valued these practices, where there was always something in the mending basket and crafty projects happening.
My Gypsy Calendar Baskets were inspired by my grandmother’s own made from outdated calendars, and hanky boxes made from gifted cards.
From a young age, I learned crochet and hand embroidery. Even in my teens, I enjoyed making my clothes, adding hand embroidery and ‘patches’ to elevate simple pieces. These skills let me express creativity and create unique garments.
Over the years, I made clothes for my children, adding special touches with my sewing machine. With its variety of stitches (my Bernina 1230 had 34 plus letters!) I sewed, embroidered, appliquéd, and embellished various items.
... Did You Know? ...
Wonderful World of Threads
Exploring my thread collection as I completed my stitch-outs this week, I realized how overlooked this subject can be in sewing education. Everyone is so eager to get a finished garment/project. While quality is often discussed, the reasons behind choosing a specific thread are equally vital. Enter the ‘why’ part of education, again. Threads, like needles and fabric, either complement each other or cause issues – for instance, threads can shred if the needle is too small. In my studio, I maintain an extensive range of threads because I enjoy experimenting with different techniques, as I’ve mentioned before.
I have developed favourites among brands, thicknesses, and fibre contents. It’s remarkable how companies continually innovate, creating better threads with improved performance. I’m always on the lookout for new additions to my collection that meet my preferences and elevate my stitching projects.
Given the depth of this topic, covering it fully would require more than a single post. I’ll touch on it briefly by adding a few comments when discussing my samples in the future. After all, the focus of the blog is primarily on the stitchouts, and there’s still plenty more to explore!
... Hole in the Foot ...
Embroidery Foot #6
Embroidery basically refers to sewing into a piece of cloth (or other material), and Appliqué refers to the joining or attaching of smaller pieces onto it. They both have practical origins in mending and reinforcing clothing.
This foot is sometimes called an appliqué foot, and was originally included with my Bernina 1230 when I bought it new in the 80’s. I used it a lot! These were the years before Machine Embroidery Modules.
Embroidery Foot #6 comes as a single version only. It fits on machines right across the Bernina range. The important feature of this foot is its wedge-shaped thread indentation on the sole. This design allows satin stitches to pass under the foot evenly, preventing build-up and ensuring smooth feed during stitching. The small hole in the front of the foot allows for thicker thread or narrow cord to be guided through and stitched down into place. When using this foot, I change out to a 5.5mm Stitch plate and select that plate in the Security Setting area.
Foot #6 had6 differenttechniques to stitch out, and again I revisited some Heirloom techniques I hadn’t used for quite a few years … I’m loving all these stitchouts!
... This Week’s Foot Highlights or Challenges ...
‘Satin Stitching’ brought the opportunity to use some threads other than my regular ‘sewing thread’ along with a little ‘playing with tensions’ to get the ideal finish. I used Wonderfil Tutti (50wt variegated cotton thread) through the needle and in the bobbin to start with. Stitch #2 with altered settings as per The Big Book of Feet stitched well. I changed to Stitch #1315 (with default settings ideal for satin stitching) … and there was my favourite narrow satin stitch I love! I changed to WonderfilDecobob (80wt cottonized polyester) in the bobbin … finer threads means less bulk at the back … and lowered the tension as the bobbin thread was just visible on the top – it was white so needed to lower to 1.25 to get a nice finish on top … Tensions are important to understand, particularly when doing decorative stitching. If bobbin thread is appearing on top … reduce the top tension to pull it to the underside.
‘Satin Stitch Applique’ – used the hole at the front, inserted Size 10 crochet cotton (see ’Foot’note at end of post), and it feed through easily. Used Stitch #1315 again with settings as per first sample – remember to engage ‘needle down’ function when appliquéing.
‘Couching’ – I couched down some DMC Perle #3 yarn this time, reducing my Presser Foot Pressure as I was sewing curves – Favourite stitch for this sample … #1309 – a little Pinstitch – SW 2.3 SL 2.6
‘Gathering’ – Zigzag #2 over Size 10 crochet cotton again – pulled up well SL 2.5 SW 2.5
‘Corded Scallops’ – Spray starched fabric first – added tearaway stabilizer – Row #1 – Scallop #428 – SW 5.5 SL 17.5 (Default) – Trim back edge close to stitches
Row #2 – Zigzag #2 – Added filler thread Wonderfil Dazzle (8wt) through the hole (gave a nice finished sparkle to the edge) – SL 1.0 SW 3.0 – Pressure Foot Pressure reduced to 30
‘Off the Edge Scallops’ –I used Vilene 541 Washaway Fabric Stabilizer (always used to be called that – not sure if that’s the current product name) under the folded edge – Scallop #416 SW 2.5 SL 13.3 (Default) Pressure Foot Pressure reduced to 30 – Wonderfil Tutti (50wt) Needle and Bobbin threads, and filler thread Wonderfil Dazzle Thread (8wt) through the hole in the foot. Washed out great!
Lots of stitching fun this week, as appliqué, couching and heirloom techniques featured in all 6 samples. Foot #6 handled every sample with ease – just as it was designed to do. The wedge shaped cutout underneath meant it ‘rode’ over the previous sewn stitches well when turning corners, and doing curves.
... A Little Something Extra ...
... My First Sewing Gypsy Studio ‘Hack’ for You ...
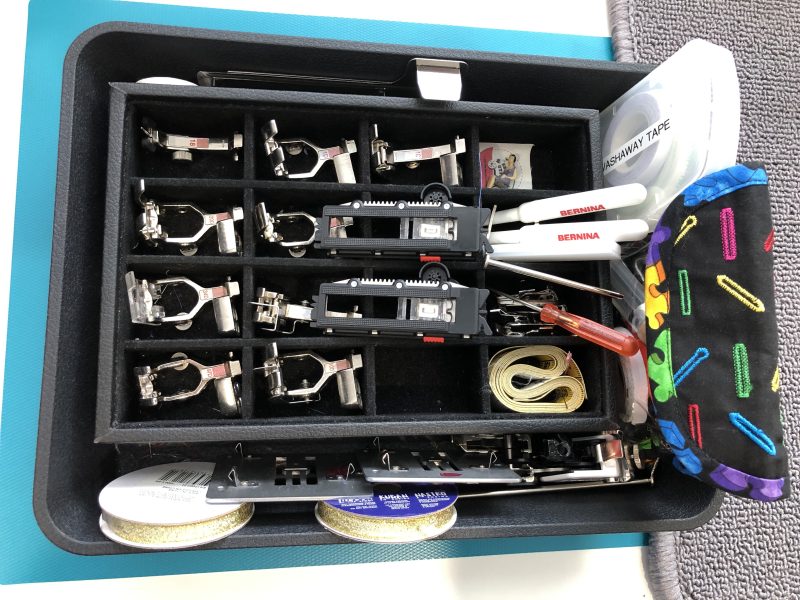
This ‘hack’ started out with the Bernina Accessory that I feel is an absolute must if you have your machines sitting on top of a bench, that is not set up in a sewing cabinet, the Bernina Perspex Quilting Table. I have one for each of my 4, 5 and 7 Series machines. (They all have different ‘profiles’). As you can see in the photo below, it increases your ‘table’ area substantially, giving your article more support as you sew. This could be a quilt, garment, curtains or … anything large that you’re sewing! When it’s on, there’s a great visible storage spot underneath for a container with your most used feet and ‘bits and pieces’ in …
Apart of my love of repurposing things here in The Studio, there’s something very satisfying in being able to ‘value add’ to an existing sewing room tool to solve an issue … and this one evolved (or perhaps revolved around literally) the need to ‘tame’ my strips of fabric/ball of thread when I was adding binding to a quilt, piping some cushions … and couching threads a few years ago. (For years I used my Knee Lever, as did a lot of other Bernina users, however it didn’t position the strips or yarn just where I needed them most … in front of the needle!)
I shared this idea with a few Townsville friends last year, and as I was using it again this week, I thought I’d share the idea with the readers of the Blog. Here’s a closeup of the table legs with the ‘add-ons’ for when I was attaching binding…
Using stick-on hooks, small zip ties, a 12mm diameter wooden dowel, cut to fit just outside of the hooks, a Wooden Curtain Safety Kit for the rod ends … they screw in after making a small pilot hole, a piece of cardboard poster tube … diameter of the inside of the pool noodle, and two slices from said swimming pool noodle, I fashioned a ‘horizontal binding/piping strip holder’, using my DIY skills inherited from generations past.
And the modifications didn’t stop there. Last year, when I wanted to couch multiple threads while appliquéing my Studio Doorstop, I encountered a challenge: the dowelling piece was too thick to go through the core of the thread reels … so a 6mm diameter piece of timber dowelling with removable rubber tips on the ends was needed to transform my quilting table into a ‘horizontal couching thread holder’. To prevent the reels from sliding around, I relied on Wonderclips for added stability. Here it is set up for when I was doing my sample for Corded Applique and Scallops this week.
These were simple modifications really, but made a HUGE difference to getting the thread/yarn/fabric strips feeding just where I wanted them …
and ... Another eBook for Your Collection
Bernina’s Machine Applique eBook takes you through tools, supplies, preparation and several ways of appliquéing by machine. More great ‘Click for Video!’ links as well – self paced learning couldn’t be easier!
Here is a link to the ‘Just SEW it Machine Applique’ eBook …
is # 35 Invisible Zipper Foot – Last chance this week for 20% off – contact your preferred Bernina Dealer for this fabulous offer. … This foot makes inserting invisible zippers a breeze! I’ll be covering this foot later in the Blog.
*Australia and New Zealand Promotion Only – ends … 31st March 2024 …
Chat again Friday,
‘Foot’note:
Have you ever tried to get yarn or thread through a small hole in a foot? Try this out … I have a box of these Dental Floss Threaders … available at Chemists, or online.
And they are amazing! Simply poke the reinforced ‘pointy end’ into the front of the hole, place the thread into the loop remaining, and pull through to the back of the foot and underneath.