Now, I’m not going to go into what the history of this particular day is and why around the world it is celebrated each year on February 14th, you can always ‘google it’!
However, I believe love should be celebrated every day, in all its forms – faith, family, friends … and creative pursuits! This past week I’ve been surrounded by all of these and more, but as this is my ‘sewing life’ I usually talk about, here’s a quick roundup of what ‘love’ was practiced here in the Studio and beyond.
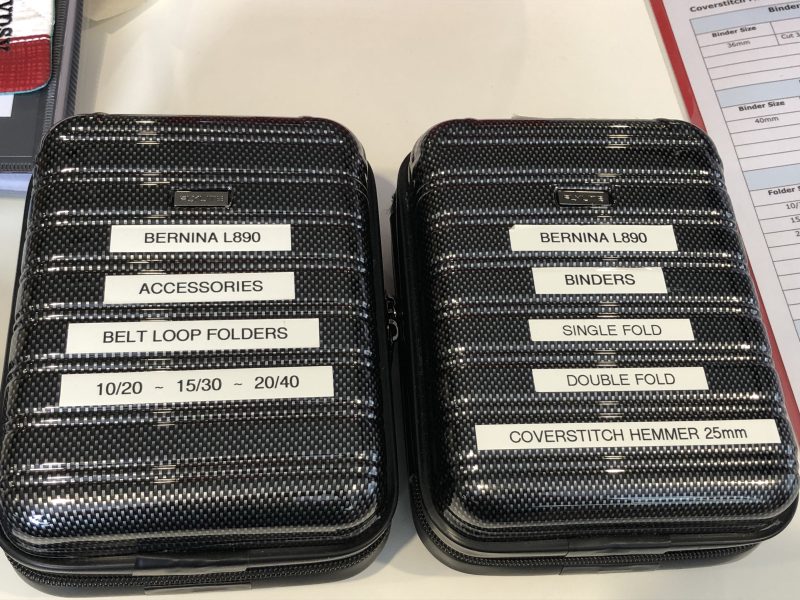
The love of overlocking/coverstitching and new Bernina L890 accessories to play with …
The love of organisation with new labels to put on my Accessory cases (my new Bernina Overlocking Accessory Case should arrive soon) …
The love of machine embroidery with some fun couching in the hoop to create a look-alike crocheted Granny Square …
The love of learning as I attended a Bernina Dealer non-technical session (oh, it was actually quite technical in parts!) …
The love of writing as I sit here ‘chatting again’ via this keyboard, and yes, last minute stitching again with a late night ahead I’m sure.
The love of friends as I welcomed my dear friend Kathryn from Townsville, who stayed with us for a few days, sharing fun times surrounded by family and more friends! Keep reading to find out just a little bit about our adventures last week.
... ‘Gathering’ at the Studio ...
Last week was a gathering of a different kind – a little bit here in the Studio, but mostly my car ‘gathered’ the kilometres and we, the connection of ‘our people’ as both Kathryn and I road tripped around Brisbane, including a little visit up to the lovely Sunshine Coast.
It was a big first day, as she arrived midday and off we went to visit Tracey of Bernina Chermside, at her new store in Carseldine, which was officially opened a few days before, and I believe there were literally hundreds of people through the door! What a great turnout to support the move into a bigger, brighter store – it even has a coffee shop within! Shop signage is up and Bernina Chermside is now … The Stitch House and All Sew Coffee. Congratulations Tracey – it is fabulous!
After a great coffee there and something to eat, I took Kathryn up to visit Kimz Sewing and Patchwork at Warana on the Sunshine Coast. We were welcomed by almost the whole gang – Kim, Maddison, Christine, Hayley and Neale (who was busy quilting on the Bernina Q24!) It always feels like coming home whenever I walk into this lovely store, as I fondly remember working alongside Kim for a few years before I went travelling around Australia.
The next day, it was off to my dear friend Sandy’s home for a morning of stitching together. My two other ‘Beechwood Buddies’ Deb and Trish, were unable to make it on the day. Sandy had a table full of delicious nibbles and treats, and before we knew it, the morning had flown! I forgot to take a photo, but we did actually do a little bit of sewing, some show and tell of Sandy’s latest makes, and a LOT of chatting! Thanks Sandy!
I had booked us a tour of one of Brisbane’s heritage properties, Miegunyah House Museum (in Bowen Hills) for the afternoon. Kathryn and I both share a love of ‘old things’, and I aim to take her somewhere interesting and different, each time she visits. Last time was Camp Hill Antique Centre – great food and sooo many lovely ‘old things’!
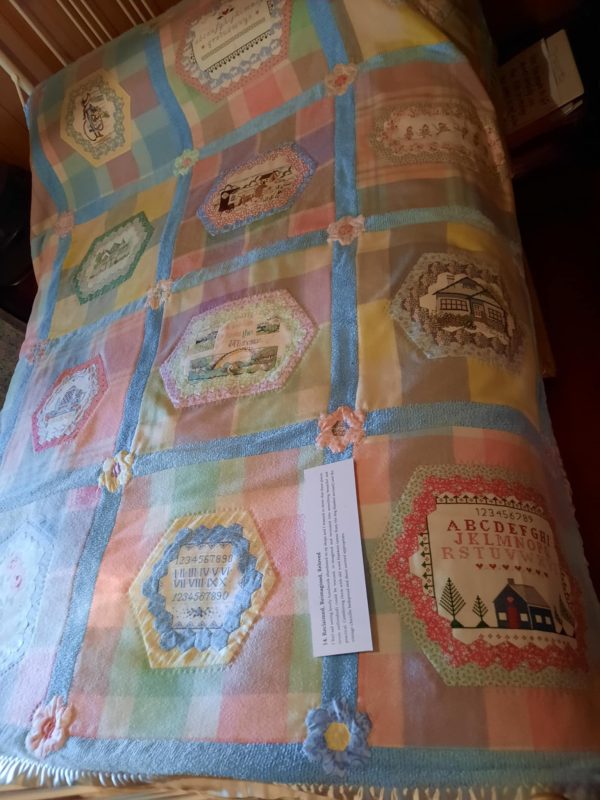
The reason I chose Miegunyah to introduce Kathryn to, was my fellow Bernina lover, friend and award winning quiltmaker, Nicky Haron has an exhibition of her work displayed throughout the home. We were thrilled to have Nicky there on the day to guide us through her amazing creations, and it was so lovely to catch up and chat over tea and scones on the lovely verandah afterwards.
Her beautiful pieces, all with a story of a previous life and purpose, are on display until April 16, and if you live in Brisbane or are visiting, we both highly recommend a visit. There is also a hands on class with Nicky on the Kawandi technique of quilting, and one on how to make a Vintage Caddy with Doilies. The Lecture however, is already sold out. Bookings are via this link.
Here’s some photos we managed to take on the day – bit of a photo dump here – there was so much to see!
We headed off back home, had dinner and then with torch in hand, ventured up to the Studio.
We chatted all things ‘Bernina’ for the few hours we had together in the Studio, sharing ideas for classes to teach up in Townsville, sometime in March. It was nice to show Kathryn a few fun things I had created as I’ve been stitching my way through the Big Book of Feet.
The next day it was an early start as we both were attending a Bernina Dealer Training session in Tingalpa. Another day spent with ‘our people’, and a catch-up on a few technical and non-technical Bernina matters. Afterwards, we met up with Joy Harvey (Bernina’s Queensland Sales Manager) for dinner, and more chatting!
Katherine flew out early the next morning … no rest for her though, as she was home only 3 days and then flew to Sydney for Craft Alive. A big day of setting up, and then 3 days of the Show. I might have had a couple of ‘slower’ days afterwards!
... Did You Know? ...
Easy Hack - Bias Cut Strips
Over the years, I’ve used a few different methods of making bias strips for piping, binding or trims. Last week I was making some garments for a friend, and wanted to finish off the seams with a bias trim. I had the perfect striped fabric to go with the main fabric, and didn’t mind making more than I actually needed as it would be a handy roll to have premade in my stash of bindings.
Quite a few months ago, I came across a quick ‘new to me’ method of cutting bias strips on YouTube (cannot remember where!), and found I turn to this method more than my usually chosen method of continuous bias, which involved drawing lots of lines and scissor cutting them.
Here’s a quick photo tutorial on how I make my bias strips. Lay out your fabric and cut a 45 degree piece off one end. (You could sew this onto the other end, making a parallelogram shape if you wish.)
Place a long quilting ruler on top aligning the 45 degree line on the ruler with the bottom edge of the fabric.
I use an empty cardboard tube for the next step. Place the tube against the edge of the ruler, remove the ruler, place the corner of the fabric around the roll, and roll up the entire piece. It doesn’t matter if your roll is shorter than your finished rolled fabric tube.
Remove the rube, lightly flatten the piece, and now it is easily cut into the width segments you require e.g. 2 ½” wide for binding a quilt, and then stitched together into one long length before using, pressing the seams open.
I cut all my sample pieces from this 1/2m length of backing fabric. All the left over pieces will be joined into one long length, and rolled up to join the others in my Binding Stash Box. If you haven’t already tried this method, ‘give it a crack’ … saves a lot of time!
... Twin Grooves ...
Double Cord Feet #59C and #60C
These two feet are designed for the same purpose, and each one has two grooves in the sole of the foot to guide cording or trims simultaneous as they are stitched into place.
These are the perfect feet to achieve 2 rows of neatly stitched down chunky style trims, using either a Zigzag or Feather Stitch or making larger diameter piping than what we have previously looked at, e.g. Bulky Overlock Foot #12C.
Double Cord Foot #59C accommodates cords from 4 to 6mm in diameter, and with the #60C foot, the grooves allow cords 7 to 8mm in diameter.
Options available for the feet – They are available in ‘C’ versions only, and are suitable for use on all models, however maximum width of stitches will be limited to the machines capabilities as always.
Foot #59C and #60C had4 differenttechniques to stitch out, and they were all easy to stitch.
... This Week’s Foot Highlights or Challenges ...
‘Coiled Projects’ – I cut 1” strips on the bias and wrapped around some cotton clothesline rope to make this little sample. Coiling at the beginning was easier to handle once it was pinned together, and then I came back and stitched a cross over those rows to secure.
‘Piping’ – with Foot #59C I used a 5mm cord and with Foot #60C the cord was 7.5mm. I lengthen the stitch for the first row to 4 with centre needle position, and did not have to change my needle position for the second row.
‘Double Couching’ – I used Feather Stitch #1332 on my B990 with the default length and width. Of course the white thread showed up on the black cord. A clear monofilament thread would have been a better choice.
‘Double Welting’ – The strip I had already cut was 2 ½” wide and I felt it needed to be wider for the size cord I was using. Turning the raw edges under was a challenge as there was not a great deal to work with. A wider strip of 3” would have made the task a lot simpler.
Here’s a photo of a bag I made many years ago as a sample for a Bernina Club on these two feet. The close up photo shows the design I stitched, and in this instance I used a clear thread so no stitches showed over the cords. The very heavy piped yellow trim was stitched into those seams with Roller Foot #55.
... A Little Something Extra ...
This week’s eBook and We All Sew Blog links will give you some great extra tips and ideas for using both the #59C and #60C foot. (Photo of cushion from Blog) Simply click on the little box and the link will take you there.
is the Overlocker Gathering Foot which makes attaching a gathered layer to a flat layer so very easy, or just gathering a single layer whilst neatening the edges at the same time – 20% off for the month of February – contact your preferred Bernina Dealer for this fabulous offer.
*Australia and New Zealand Promotion Only – ends 1st March 2025 …