So … here’s my Christmas Sewing Update – I have three stockings all cut out, one already pieced … simple squares in green and red Christmas fabrics. Other two are tumbler blocks and triangles. They will all be quilted, with white tops, pompom trim, little gold bells and embroidered names. Plan Number One locked in.
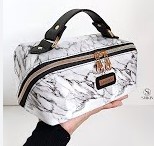
I’ve pulled the fabrics from my stash for the three ‘big’ grandkids … I’m making them zippered bags for bathroom items – aka toiletry bags … hmmm does anyone still call them that? Bag pic below is the pattern I’ll be using called Zip and Grip. An exciting family holiday ahead for Ambah and Leo next year – and Lucas often stays over with family as well – practical things this year! That’s Plan Number Two.
Bobby, the youngest one’s ‘playthings’ still not finished – but high on priority list for next week. Plan Number Three. After the weekend, I’ll be indulging in a whole week of sewing every day, so that all will be finished at least 2 days before Christmas. Well … that’s the plan at least … I’ve got cooking/baking to do after that. Need to squeeze in two more Blog write ups as well … so let’s get this one done and posted …
... ‘Virtual’ Gathering at the Studio ...
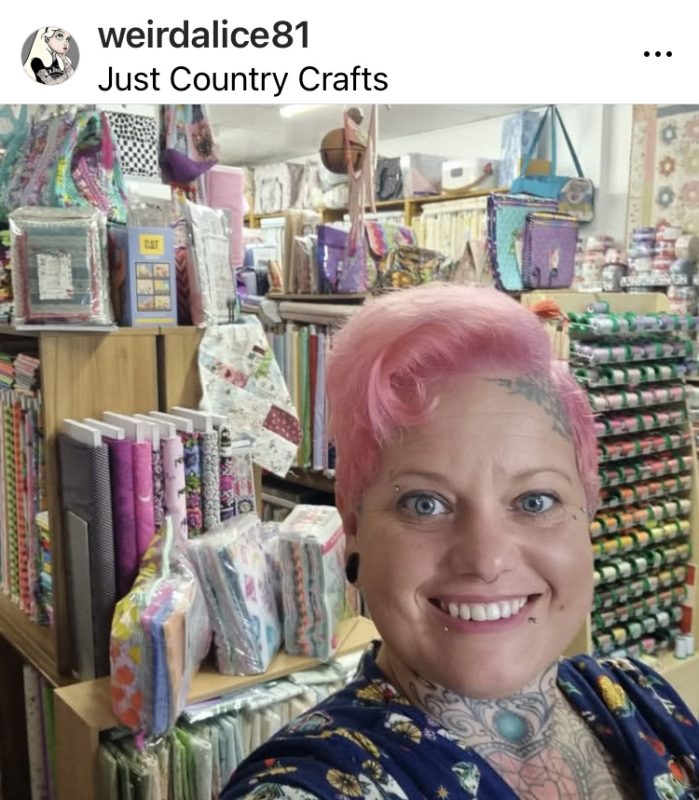
Not exactly the usual ‘gathering’ at the Studio, as this week I ‘invited’ Amanda Wright (aka Instagram’s @weirdalice81), a fellow ‘Bernina Lover’, amazing textile artist/quilter and talented teacher of all things textile art, patchwork and quilting techniques at Just Country Crafts in Townsville, to allow me to share some her work on the Blog.
Amanda fell in love with the Bernina Needle Punch Accessory earlier this year, and made THE most wonderful embellishments for her denim jacket. She wore it to Bernina Academy in Sydney this year.
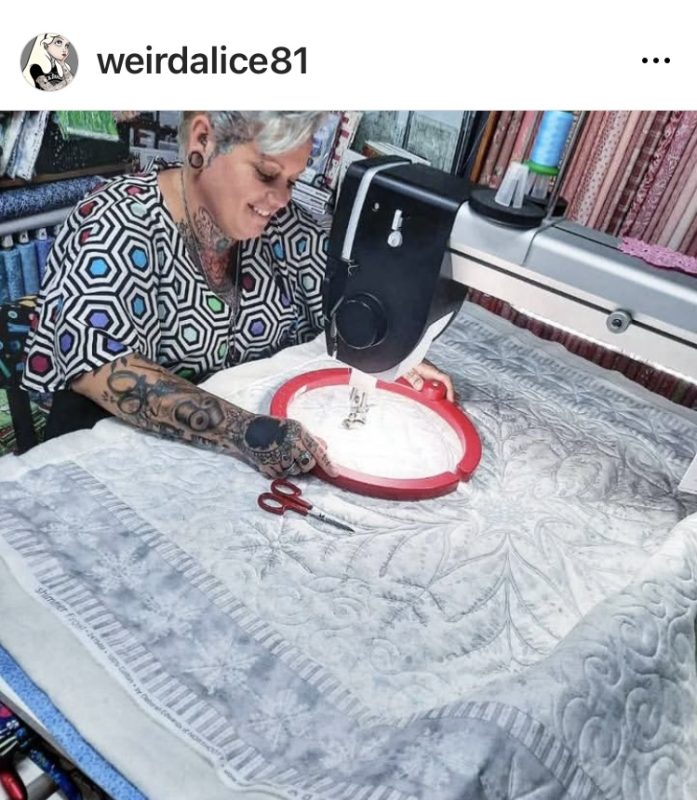
Amanda is such a fun, vibrant person and her artwork is extraordinary. In the last couple of years since I met Amanda, her love and deep appreciation of Bernina machines has grown to a very high level – and she’s totally rocking her creations using quite a few machines, from the Q Series, right down to her favourite this week … the B570 – perks of working in a Bernina store is getting to sew on ANY of the machines in the store!
Friendships in this industry are treasured – and here’s her bestie Stephanie Allen (another talented sewist/textile artist/pattern maker) who works at Needleworks in Mackay – one of Bernina’s newest Queensland dealers! Yes, that’s their ‘work in progress’ in the background – a workshop with Kathryn Harmer Fox in Mackay late last year.
Head over to Instagram and see more of Amanda’s work … oh a few AWARD winning Competition entries there – I’ve seen them in person, and you may have as well … at some of the recent shows – truly remarkable! She’s a crafty crocheter as well – really funky designs! Thank you Amanda – maybe one day you can come visit me here the Studio!
... The Studio Update ...
A very short update this week … things are happening … but so was the rain!
Posts up for the patio roof … plenty of time ahead to paint them to match the Studio – roof panels not arriving now until sometime in the new year!
All good things come to those who wait !
... Did You Know? ...
Magnifier Set
This is another accessory that is a true game changer, if you are having difficulties in viewing either the needle when manually threading, or the stitching area as you sew. The set comes with three magnifying strengths – D7 (approx 1.7X), D6 (approx 1.5X) and D5 (approx 1.25X). These interchangeable lenses, attach to the machine via a bracket, which can be left on the machine if you wish. It is easy to switch between lenses, as no special tools are required.
You will need to purchase the mounting bracket for them, dependant on the model of machine you own. One version of the bracket will fit my 4, 5, 7 and now 9 Series machines, however I have yet to purchase it. Santa’s list is getting longer by the day!! – Luckily all accessories are 20% off this month!
A different version is needed for my Simply Red 215, and I have had that one for many years, as I originally bought the Magnifier Set way back when I had a Bernina 180 or maybe the 440QE machine, and it fitted several machines I owned after that. My 8 Series machine came with a specialised mounting bracket.
The original bracket I have did work OK for the sample I did this week, but the correct one for the machine will fit a lot snugger. I’ll add a bit more information about which bracket is for which machine at the end of the post.
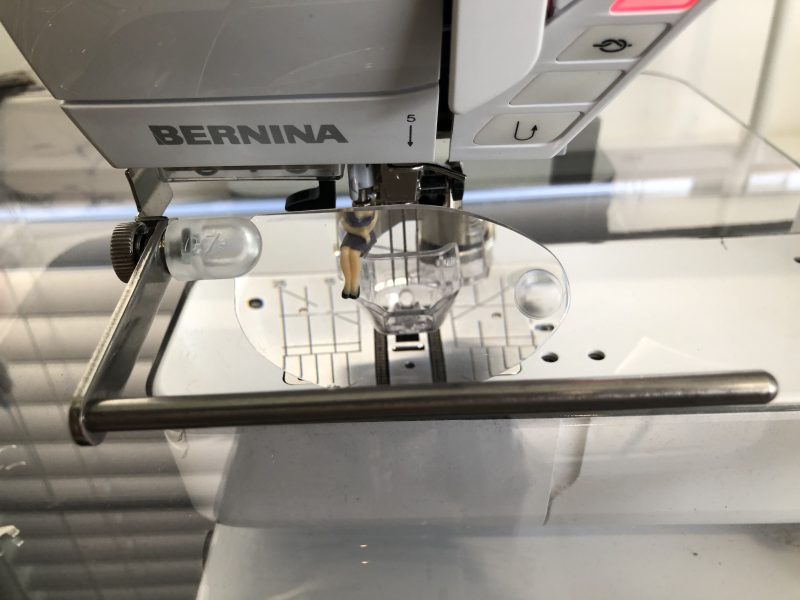
The instructions on the Bernina Site for the Lens Mounting Bracket state “Requires installation by specialist personnel” … however, it just pushes up into a slot on the left side cover. You can see where it goes if you have a little mirror …
The Magnifier Set’s bracket is also used when attaching the yarn guide for the Needle Punch Tool #45, which is this week’s Challenge post. I’m going to try it out later with a few of the Cording Feet we’ve already covered, to see how it operates with them. Watch this space!
... No Thread Chicken Ever! ...
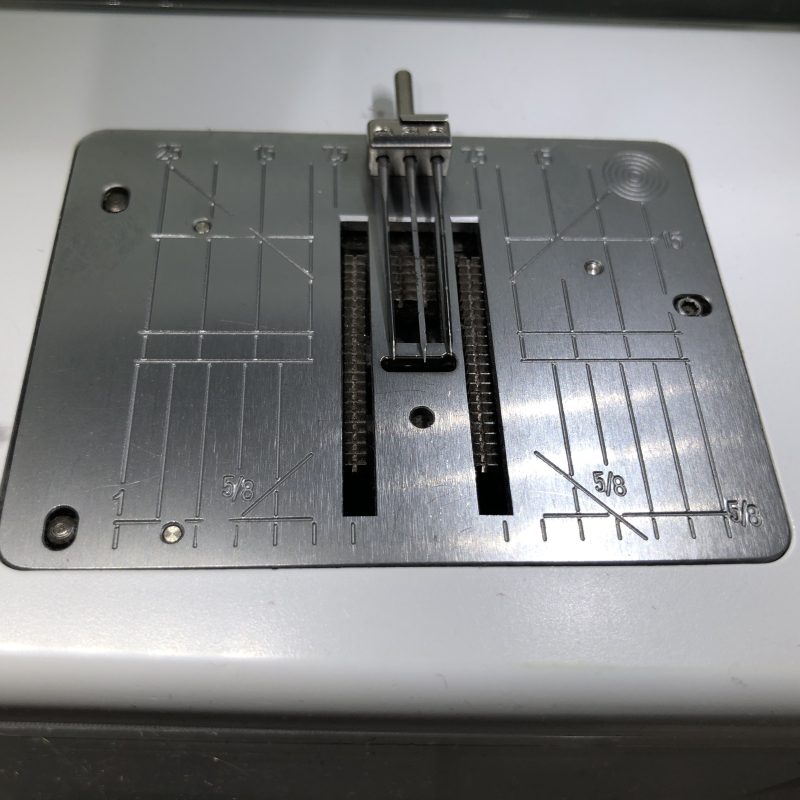
Needle Punch Set #45
Something very different this week, and for those who’ve never seen this unconventional sewing machine technique before, needle felting on a Bernina sewing machine works like this: no thread top or bottom, a foot with a guard around to protect your fingers – and a cluster of barbed needles, available in two different lengths, long for lighter weight punching, and short for regular punching – I always use the shorter length ones – assists in not breaking/bending too many. (Note to self – make sure needles are seated well and secure in the opening before starting!)
When you step on the foot control, the barbed needles move up and down rapidly, meshing together the soft fibres or precut shapes and the base, creating interesting layers, patterns and colours. You can add extra stitching after punching over the top of the felted fibres, either free-motion, machine embroidery or decorative sewing stitches.
You will need to attach a specialised Punch Stitch plate, lower the feed dog, turn off upper and lower thread sensors, and program the changes in your machines operating system. Lastly with this foot, there is an adjustment wheel to alter depending on the ‘thickness’ of your fibres etc under the foot (only on the Rotary Needle Punch Set version). You are then ready to start ‘felting’.
I make a few tackdown, straight back and forward passes to hold either shapes or fibres loosely into place, and then use small circular free-motion passes to really secure things down. The more you punch, the more fibres go through to the back.
You have to keep moving continually, as if you leave the needles in the same place too long, you will create a hole. I like to flip it over and work on the back as this then pushes the background fabric into the piece as well. However, do be aware that working on the back will push the bottom colours up toward the top of the piece, which would be great for blending colours. Not what I wanted in my Owl Feet mat I’m working on …
Options available for the accessory – It’s available in two versions – the PunchWork Tool for CB Hook, which fits all models with a CB Hook System (like my Simply Red 215 and the current 3 Series machines) and the PunchWork Tool for Rotary, B9 and Bernina Hook Systems.
Foot #45 had a few differenttechniques to stitch out, depending on what fibres or additions you wanted to include.
... This Week’s Foot Highlights or Challenges ...
‘Needle Punching/Felting’ – I used some ‘Owl Footprints’ I had cut out using the CutWork tool last week on the first sample. Needle felting is fun to do, my sort of free-motion! Three precut felt shapes were needlepunched down, and I overlaid some white chenille looking yarn and some yellow wool roving as well to round out using different fibres. I tried to needlepunch down some ‘sparkly lame’ type fabric but it would not bed into the base denim, just fell apart, so I folded it in the centre and needlepunched the yarn over the centre to secure it– that worked!! It looks sort of like a 3D bow. Some fibres just aren’t meant to be ‘simply’ needlepunched down.
The rest of the ‘Owl Prints’ I needlepunched down onto denim again, and after realising the black just didn’t show up much, I used them as an underlayer, like a shadow. All went well, until I decided to turn it over and punch from the back as well – the black came through the red as i mentioned above! So … snipped up some leftover bits, and punched those into place to disguise it a bit. Always something to learn!
I’m making a ‘mat’ out of this sample (some side borders, piping and then binding), to put on top of the clear acrylic table when I pack away this machine. Currently I use a little carpet mat, and it’s multipurpose as I use it for the background when I take sample photos. That started me thinking that I’ll need more than one ‘mat’ as I have more than one machine! … oh here goes again – more fun to sew!
‘Artistic Techniques’ – I used a mixture of wool roving and Angelina Fibres for this abstract flower (on top of the centre pink area). The fibres give it a bit of sparkle, and they needle felted in well.
When I was travelling around Australia, I wrote a Blog post for Bernina International and used this accessory to make hot water bottle covers. One was styled on feathers and the other on my logo of a Gypsy Wagon. I had taken a stash of roving and yarns with me (always be prepared!) and used some white ‘eyelash’ type yarn for the fringing effect. I rolled little balls of roving to make the flowers, and only felted the wheels partially to give the effect of spokes. When the feathers were almost finished, I laid some black yarn up the centre like a spine to give them definition. You can read the blog post here at this link …
The third sample I did this week included a machine embroidered quilting motif that I then needle punched over (whilst it was still in the hoop) and lastly finished it off with the motif stitched over the top again. A subtle ‘arty’ finish to an otherwise simple quilted design.
When setting up for a fourth sample I added the yarn guide to the front of the machine, and loaded a reel of fine rayon braid into the slot at the front of the guard and through the needle area. It’s amazing how this turned out so very different from the original ribbon. See the photo for the setup from where I was chatting about the lenses before.
Note: Whether you’re using the Original (CB) or Rotary Needle Punch Accessory, be sure to use the corresponding Needle Punch Stitch Plate when using your Needle Punch Tool – otherwise your needles will hit the stitch plate and break!
4 Series Machines – The Rotary needle punch stitch plate with the three holes that I use on my 5 and 7 series machines (both 9mm stitch width machines), would not sit down properly on my 4 Series machine (5.5mm stitch width machine) due perhaps to the difference in width of the feed dog area (even though it was in the lowered position), so I used the standard 5.5mm stitch plate and went ahead to punch successfully.
B990 Machine – The Rotary needle punch plate I had would not allow me to use the accessory as it did not have a sensor attached to it. Only stitch plates with sensors can be used on the new B990 machine – I reached out to Kerrie from Bernina Australia and was informed the new Needle Punch Plate has been ordered and will be available early next year. I did manage to use the 9mm plate supplied with the machine, and the punching worked out fine. I do believe the specialized plate helps with less needle breakages so I’ll need to get one of those too.
... A Little Something Extra ...
Accessories At A Glance
All of the feet and accessories that I cover in the Blog are contained in the latest Bernina Accessory Catalogue … and at the front of the catalogue, all the categories of machines covered in the book are listed. Simply find your model e.g. my B590E is Category Eb⁴
If I was searching for a part/part number e.g. the Lens Holder Bracket, you can see here how you really need to be certain which one is for your machine, as there are 4 different ones! I have version #3 and I need to purchase Version #4. Your Bernina Dealer will have this information of course, however it’s a good reference to see what is available for YOUR machine.
Each ‘listing’ has a QR Code which you can scan with your smart phone, and it will take you to the Bernina’s Website, and a video of that particular accessory.
Here is a link to the latest online edition, which includes the B990 machine – Category ‘G’ …
are the Accessory Cases for both Sewing Machine feet AND Overlocking Feet 20% off – contact your preferred Bernina Dealer for this fabulous offer. I do hope Santa got my letter about the Overlocking Case, and I’ve added the Free Arm Hoop as well as that other bracket and the new Punch Needle Plate now… Santa – I’ve been very good this year!!
*Australia and New Zealand Promotion Only – ends … 31st December 2024 …
But wait there’s even more machine, feet and accessories on sale!
The PunchWork Tool is included, and remember to order a stitch plate along with it.