The Christmas Tree is up, most of the decorating is done and all is on schedule awaiting the arrival of Santa!
Days are truly flying by fast, and the list of sewing I want to get done before the end of the year seems to get longer each week! I love to sew Christmas gifts for the family, and that means lots of fabric, patterns and notebooks out around the Studio. I enjoy listening to Christmas carols as I sew, with the airconditioning usually on helping keep me focused on only that sewing! I remember when I was Freelance teaching, I never booked any classes in December for that very reason … I want to focus on family sewing at this time. Two of my Grandsons have birthdays in January as well … eeeeek best I get this Blog post written and back to the machines!
So therefore, after this one … the Blog Posts are going to be a lot shorter until the New Year comes around. I’ll stitch the samples and give my thoughts on the foot of course, but less general sewing/machine focused content to read. Sorry Jenny K and KimT … your Friday morning cuppa will be shorter! Jenny’s the first person to message me every Friday, and Kim’s not far behind her … both a bit like ‘Sub-Editors’, letting me know really early if I’ve forgotten something … so much appreciated every week. 🙂
So let’s head straight into this week’s post about all things sewing/ Bernina, and the next foot in my Big Book of Feet Challenge …
... Did You Know? ...
Bernina’s CutWork Tool
Quite some time ago now, around 2012 or so, Bernina introduced us all to the magic of DesignWorks. This system covered different modules/products/accessories – CrystalWork Tool, PaintWork Tool, CutWork Tool and the separate DesignWorkSoftware Package (to create your own designs). I had so much fun with all these new tools! OESD had some fabulous designs to purchase using them, so I decided at the time, not to purchase the DesignWorks Software. Here are some of the samples we created at our Dealer Training on the products … yes I keep everything!! The drawn component was done with the PaintWork tool, leather butterflies and notebook cover with the CutWork tool (and then embroidered into place) … and sparkly crystals added with the CrystalWork tool.
The DesignWorks Software is no longer available for purchase, however my Bernina’s DesignerPlus Software V8.2 included advanced CutWork functions for making appliqué pieces, and the latest DesignerPlus V9 includes enhanced Cutwork function for creating Eyelet Embroidery and Applique, so digitising new designs for the CutWork Tool is still possible. I really need 8 days in EVERY week to play with all my fun Bernina ‘stuff’ … my DesignerPlus V9 is sitting waiting it’s turn …
The three ‘tools’ are still available, (and in December are 20% off) and of course the OESD designs are easily accessed via downloading – no longer do we have to wait for CD’s to arrive in the store/mail! I love my BERNINA CrystalWorks file from the OESD Bernina Collection #82014-45_CR
For some stitch-out samples this week, I used my CutWork Tool (and the Straight Stitch/Cut Plate) along with Foot #44C, and re-discovered an accessory I had not used in a little while. Cutwork doilies abounded in my Mum’s home as I was growing up, and I had cutwork featured on some of my clothes as well. Recently my Mum moved into Residential Care and I haven’t had the opportunity to look through her stash of doilies, however here are some images I found to represent what I’m talking about, in case you were wondering?
It’s quite the ‘classic’ embroidered look, and the Bernina CutWork tool makes the process accurate … and easily created with the use of your embroidery module.
The How to’s … Most designs require some form of ‘staystitching’ down before cutting outlines with this tool. Once you have completed the staystitching part of the design, it’s time to remove the needle and insert the CutWork tool in its place, take the bobbin case out, close the door and enjoy the process of CutWork by machine! Lots of fun, and LOTS of position changes on these samples – each ‘colour change’ was actually a change of blade position.
You can see in these photos the different angles of the cutting blade.
Position 1 cuts at a 90 degree angle
Position 2 cuts at a 135 degree angle
Position 3 cuts at 0 degrees
Position 4 cuts at a 45 degrees angle
Instead of thread changes in the embroidery design you will be turning the dial on the CutWork Tool as required Cut 1, Cut 2, Cut 3 or Cut 4.
After all the cuts are completed, remove the hoop from the machine but do not remove the fabric from the hoop.
Gently remove any cut fabric/felt piece, trimming any threads/fibres that may not have been cut completely. Here’s a little video of me removing another designs cutouts …
I started playing with a free design from the Bernina International Blog… a fun little positive quote to add to my Studio decor! I had saved this one from years ago! The link is below if you want to download it (you will need the CutWork tool of course)…
Yes, another Free-Motion Foot this week, and this one happily ‘buddies up’ with one of Bernina’s great accessories – the CutWork Tool! First, let’s look at the foot …
A clear sole, with concentric circles surrounding the needle opening, making it ideal for echo quilting, and it is spring loaded, designed to sit above the fabric without touching it once lowered. Cross hairs on the clear sole help with accurate stitch placement, and its curved outer edges move easily over raised areas of fabric or stitches.
Options available for the foot – It’s available in one version suitable for all models. The needle opening is 9mm wide, however on machines with maximum stitch width of 5.5mm, that will of course, be your widest stitch capability.
Foot #44C had2 types oftechniques to stitch out, Outline and Echo Quilting, with just the foot … and CutWork, with the addition of the CutWork Tool (instead of a needle) and your embroidery module attached.
... This Week’s Foot Highlights or Challenges ...
My biggest challenge this week was finding the time to write up the blog, as lots happening here at home, and in my ‘Sewing Gypsy’ world – and then stopping at just one stitchout! Loved reconnecting with my CutWork Tool!
Even though I postponed the blog post by a day – I still did not have the time to finish last week’s sample from Foot #43 – Free-Motion Weaving, … maybe next week?
Now to this week’s stitchouts …
‘Outline and Echo Quilting’ – A quick little sample for this one – I used the BISR (Bernina Integrated Stitch Regulator) for the first time on my new B990! What a game-changer that is! I can of course still use my #42 BSR attachment, however now I have the ability to have regulated stitches with any freemotion foot I use. Here’s a simple explanation of the difference in both stitch regulation operations – The BISR located within the bobbin area, detects fabric movement via a hole in the stitch plate. The BSR system located within the attached #42 Foot, reads the surface of the fabric under the presser foot, similar to a wireless mouse, and the sensor in the foot transfers that information to the machine as the fabric is moved, via a cable connection.
CUTWORK – I’ve explained this tool in the ‘Did you know’ section – now let’s have a play with it on our samples for this week …
‘Cutting Shapes’ – Up to 15 layers of quilting weight cotton can be cut at one time. I hooped up one layer of medium weight tearaway stabilizer, two layers of black poly felt and one layer of half yellow/half green wool felt in my Giant hoop, and cut out 24 ‘owl feet’ to use in another sample for next week’s Blog. Had so much fun I repeated the exercise with two layers of offwhite poly felt, and one layer of half purple/half red wool felt. This design was a free download that was featured in Inspirations Magazine 63 from 2015 … I have quite the stash of these magazines and I’ve said before how much value/joy they have given me over the years.
Here’s the link for this particular design download …
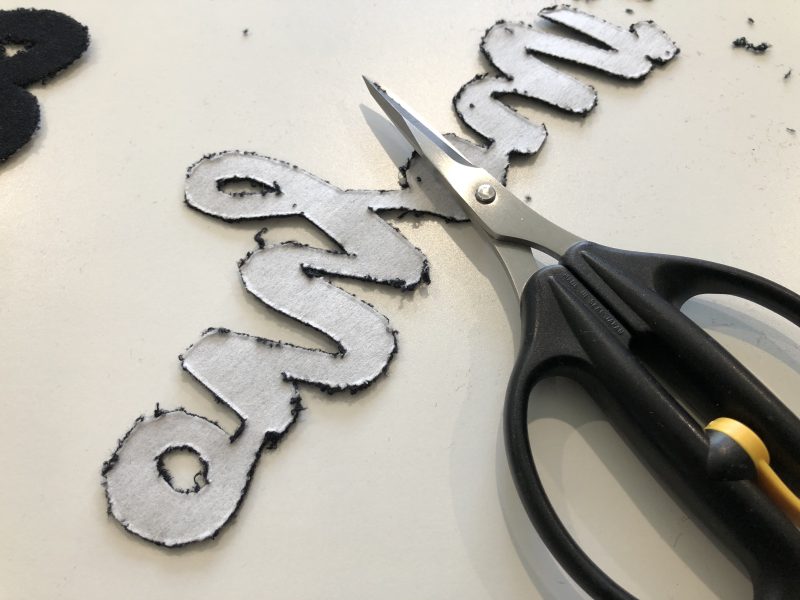
I used some lycra knit out of Sally’s stash for the words, ironed on Vliesofix to the back of the fabric, hooped it up and pushed start. The finished letters are a bit raggy on the edge where it was cut, unlike the nice edges of the felt in the previous sample. Once the appliquéd letters were cut and taken out of the hoop, I ironed some Polymesh (a fusible, cutaway product) to the inside of the front of the $8 Kmart t-shirt, floated the white shirt on the tearaway stabiliser in the hoop, and stitched the outline, then ironed the letters into place onto their outlines, and finally appliquéd them down … perfect alignment. The appliqué stitch covered up the ‘raggy edges’ nicely.
That newish Large Freearm Embroidery Hoop would have been handy this week … might have to whisper in Santas ear … I struggled with keeping the bulk of the shirt out of the way of the embroidering …
‘Embroidered Applique’ – my aim for this sample was to add another design to the T-shirt, (an Eiffel Tower underneath the lettering), however I did the lettering before I realised I’d skipped a step! I’m sure you’ve all done something like this!!! Here’s what it’s like in my Software, so you can see what I was aiming to do.
‘Embroidered Cutwork’ – I did not have an embroidery file to stitch out a new sample, however it is a simple concept adding to what had already been stitched out. There are plenty of files for trimming away the section with your scissors, however I struggled to find one that used the CutWork tool. Guess I’ll have to have that play with my Software V9 and digitise one for myself – won’t be this month! This photo is of a sample I have, from when the DesignWorks packages were released. There is still some of the Washaway stabiliser in the ‘blank’ areas of design.
Don’t forget to clean out under your plate and bobbin area after using the CutWork tool …
... A Little Something Extra ...
Bernina 2024 Advent Calendar
For several years now, Bernina International has hosted an Advent Calendar on the blog. From December 1st to 24th this year, they will be providing us with exciting articles including tutorials, freebies and ideas in the blog Advent Calendar to get us in the festive spirit.
This year the theme is “Create your Magic” inspired by the launch of the incredible BERNINA 990, a machine unlike any other!
Check back every day to see what is hiding behind each door. I just love the magical decorations from Day 2 … just need more time to make them … and more room on the tree!
Here is a link to the first door of Bernina International Blog’s 2024 Advent Calendar
Look what my dear friend Kim, from Kimz Sewing and Patchwork at Warana sent me! Kim and I worked together for a few years and she knows how much I love a new gadget. She has had these 3D printed locally, and they will be available shortly instore. It is like a handle for your little Torx driver – the thing you change your needle out with. Just pop it into the hole at the end, fits perfectly! Thanks Kim XX
are the Accessory Cases for both Sewing Machine feet AND Overlocking Feet 20% off – contact your preferred Bernina Dealer for this fabulous offer. I do hope Santa got my letter about the Overlocking Case … I’ve been very good this year!!
*Australia and New Zealand Promotion Only – ends … 31st December 2024 …
But wait there’s even more machine, feet and accessories on sale!
The CutWork Tool is included and a ‘little birdie’ told me there’s only 2 in stock in Sydney! Get in fast!