As much as it appears to be in this blog, I don’t get to sew ALL DAY … EVERY DAY! So here’s what happened this week …
Time in the garden, is always time well spent! Last Sunday I decided it was way overdue that I attended to the weeds and overgrown plants in the little garden area behind my bedroom here at home. The window I sit at in my room where I use my laptop, opens onto this paved area, and for months now it’s been ‘speaking to me’ … and I’ve only ‘thought’ about doing a little maintenance out there. It’s been a busy few months, and I just didn’t make it a priority. So keeping it ‘real’ … here are the before photos …
I cut back the Birds Nest Fern, pulled out a lot of what I call ‘Hens and Chickens’, the purple and green leaved plants, as well as thinning out the Spider Plants. I’m no expert gardener; believe me … so it was quite the haphazard day I spent in the garden. Some ‘after’ photos, show the day’s end result …
Yes, although it’s a lot tidier, I still have in between the pavers to ‘weed’. That will have to wait a week or so … I could hardly move after all the bending and lifting etc!! Oh I’m sooo out of condition! Might be a result of sitting long hours at my machines?? Must try to get outdoors more often, as it was such a joy!
... Did You Know? ...
Personal Program
Last week, I mentioned the Personal Program feature of the machine I was using, the B790PRO. All of my machines except the little B215 have this function. It’s the little ‘heart’ at the bottom of the main icons on the screen. Here’s the B435 machine screen, and circled is the function.
Use the Personal Program to store your favourite stitches, most often used stitches, or perhaps a group of stitches needed for a particular technique or project. There are four Personal Program folders, so lots can be stored longer term here.
Saving a Stitch to Personal Program
Here’s how to ‘Save a Stitch’. You can see Stitch #110 here that I used last week in the example, with changed settings highlighted in Yellow. Select the Personal Program Icon, and a new ‘window’ will open with three options ** – StitchPattern Selection, Save Stitch in Personal Memory, and Delete Stitch Pattern in Personal Memory. (That’s reading from top to bottom in the photo below)
Touch Save Stitch (centre icon in above photo), and another section opens with four ‘Folders’ to save into.
I selected Folder 1 for this example, and another ‘window’ opened showing the picture of the stitch with a yellow box around it – touching the green Check Mark will save this stitch with those changed settings, into the folder.
Retrieving a Stitch from Personal Program
Select the Personal Program Icon, and a new ‘window’ will open with the three options again.
Touch Stitch Pattern Selection, and another section opens with those four ‘Folders’ where any stitches have been saved. Select Folder One, and another window opens … with any stitches saved showing up, with settings next to the stitch picture. This is important to note, as you can save the same Stitch several times in here, with different settings, e.g. length, width etc.
Explore this section of your machine, as it’s a fabulous feature particularly if you are doing a project with a lot of different stitches, and want to recall those altered setting after turning off your machine.
** When selecting the Personal Program in Combination Mode, there is an additional option, which is Stitch Pattern Combination Selection.
... More Freemotion Fun ...
Freehand Embroidery Foot#24
Another spring-loaded freemotion foot to play with this week, similar to Darning Foot #9 (left in photo below) and Embroidery Foot #15 (centre in photo below), however the front section has been cutaway. This means you have a clearer view of the needle and exactly where it is stitching. The round design of Foot #15 (right in photo below) allows both straight and zigzag stitches, maximum width of 5.5mm
I also change out to a 5.5mm stitch plate when using this foot, altering the Security Setting in the machine at the same time.
Options available for the foot – It’s available in a regular version suitable for all models.
Foot #24 had5 differenttechniques to stitch out, some I used straight stitch and some Zigzag.
... This Week’s Foot Highlights or Challenges ...
As I mentioned before, I changed out to a 5.5mm Stitch Plate for all these samples.
‘Free-Motion Stitching’ – Bobbinfil in Bobbin, Varigated Sew Easy Cotton Thread #50 in needle – Straight Stitch #1 – changed my tension to 4.0 and used gloves to help grip the fabric as I stitched. Just like drawing with a pencil.
‘Freehand Monogramming’ – Bobbinfil in Bobbin, Varigated Sew Easy Cotton Thread #50 in needle – Zigzag Stitch #2 – changed my tension to 2.0 and used gloves to help grip the fabric as I stitched. Stitched the letter twice – first pass SW 3, then second pass SW 4 to get good coverage.
Always fun ‘writing’ with a needle and thread!
‘Needle Sketching – Bobbinfil in Bobbin, Varigated Sew Easy Cotton Thread #50 in needle – Straight Stitch #1 – changed my tension to 3.0 and used a wooden hoop to keep the surface taut as I stitched. Limited to hoop area, but could rehoop if needed.
‘Thread Painting’ – Varigated Sew Easy Cotton Thread #50 in needle and bobbin – Straight Stitch #1 – tension default, and used gloves to help grip the fabric as I stitched again. Raw edge appliquéd the flower to finish off
‘Freehand Cutwork’ – my least favourite sample so far in this challenge – and I only stitched 1/3 of the design I’d drawn as the book detailed! Hooping may have helped perhaps.
The lines of the design I drew, would have been better stitched with last week’s foot #23, or even #20D foot, Feed Dog up of course, and Stitch #1315 in my opinion. Freehand stitching this gave inconsistent stitches and rough outlines. I really prefer to do Cutwork with my Embroidery Unit and the Cutwork Attachment! It cuts the area out! More about that attachment, much later in the blogs.
... A Little Something Extra – Tool Tip ...
As I stitch out samples every week, I use so many different ‘tools’ that I have gathered over the years in the Studio and this group of tools, along with our irons, give us the quality finish we are all seeking with our patchwork, and garment making in particular. Let’s welcome … the Pressing Aids!
Here’s what I used to press the French Seams on the produce bags last week … yes, I press almost every seam I stitch! You can see how this wooden Tailors Point Presser helps press the whole length of the seam. Great for collar seams!!
I have three Ikea RASKOG wheeled trolleys and two smaller RASHULT wheeled trolleys in use up in the Studio. They all have their individual ‘jobs’ to do … one Raskog holds the majority of my vintage-style basket making supplies, another has my ‘Current Projects’ in (gosh, can’t remember the last time I took one OUT of there to finish!), and the third one has been ‘hacked’ to create a Storage Trolley for longer rolls of vinyl, stabilizers, interfacings etc. I’ll share the details on that one another time as it’s another of my ‘Sewing Gypsy Hacks’ …
One smaller Rashult is mostly empty and I use it from one little project to the next as a W.I.P. trolley, as it keeps my bench clear of all the little bits and pieces I get out. It currently has three plastic folders in it with cut samples ready for the next three Blog posts. The second one is my Pressing Trolley – its soo well used! All the Pressing Aids in ONE place … well sort of, if you know me well J
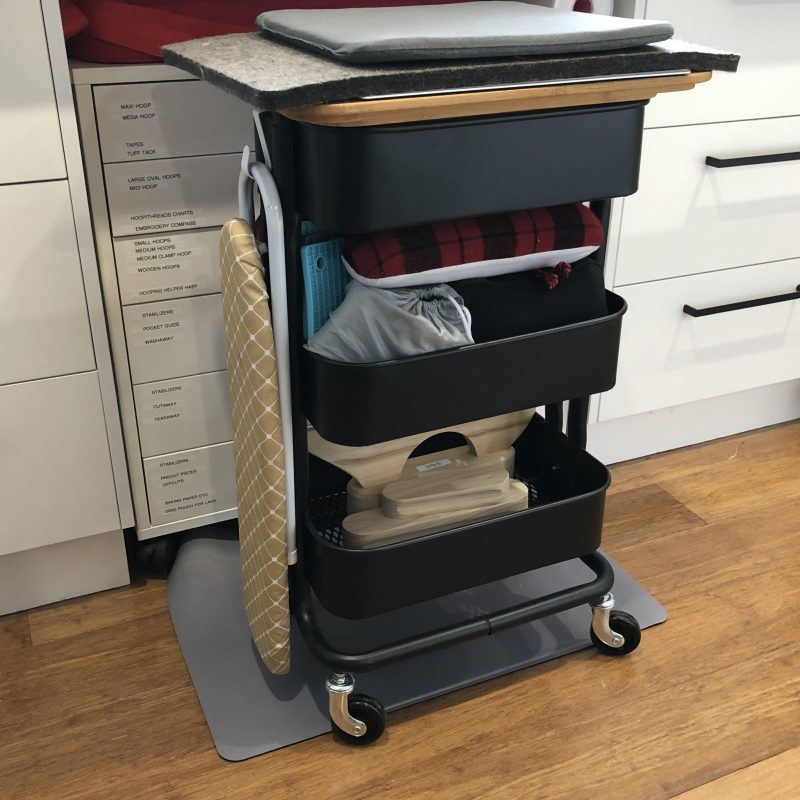
Here’s the Pressing Trolley all set up in photos … the front, including one side (where I hang my Sleeve Pressing Board), and the back to show how its all stacked … it’s my most used trolley!
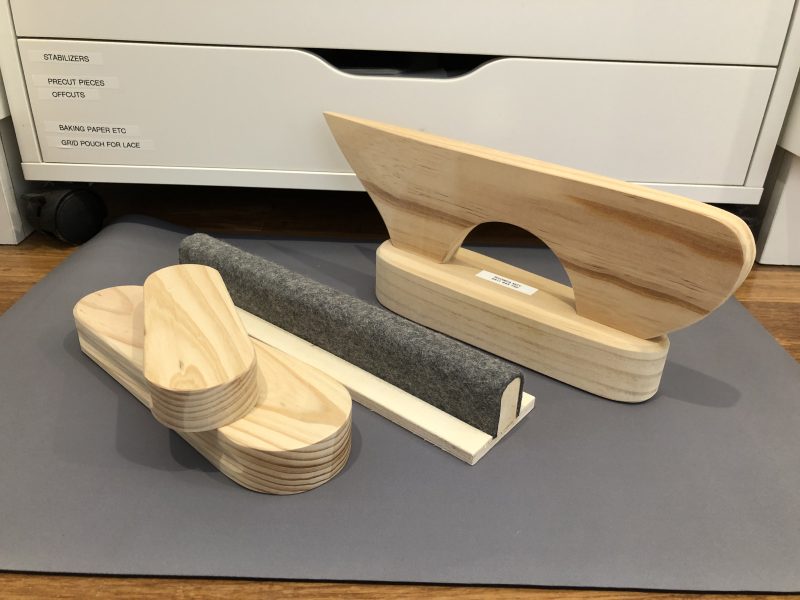
Bottom shelf contains my wooden Tailors Point Presser and Clapper (a combination tool), a large and a smaller Wooden Clapper, and a wool covered Seam Pressing Bar.
Middle shelf contains a lot! Two Pressing Hams, Two Pressing Mitts, and a Sleeve Roll, two small travel irons and silicon mats for them. I had bought Sally a pressing ham and mitt, long before I moved in to our shared studio, that’s why there are two!
The top section stores a couple of smaller travel irons, like the Clover mini iron and one I’ve had for years as well. Still use it every now and then. On top I have two Ikea Hogsma bamboo cutting boards, (smaller glued underneath larger one), a small 12” square Fiskars cutting mat, a wool pressing mat, and a covered ironing pad. And no, I never leave the cutting mat underneath when I’m pressing – it’s there as a quick rotary cutting setup!
Here’s a photo of the two cutting boards underneath, and now that they are secured together, I have a larger top area to work on, and a well fitting bottom piece that sits into the top of the trolley, to stop it from moving.
Lastly, a photo showing where the trolley ‘lives’ when it’s not in use … rolls under my bench where my B790PRO sits, next to my ‘stash’ of Tutto Trolley bags I travel with … that’s the Red 20” Overlocker Bag with two XL Sewing Machine Bags folded and stored inside ready for use. (There’s a red one behind the black one) My countertop at this area is 770mm deep (about 30”), so there is still plenty of room for my long legs … and foot control to sit and sew with 🙂
... A Little Reminder ...
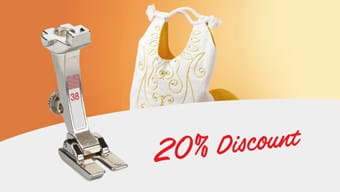
Bernina’s Foot of the Month August 2024 *
is Piping Foot # 38 – 20% off – contact your preferred Bernina Dealer for this fabulous offer. … this foot is often also termed the “uneven foot”, owing to the different thicknesses of the two halves of its sole. I’ll be covering this foot later in the Blog.
*Australia and New Zealand Promotion Only – ends … 31st August 2024 …
AND … this month there are even more Special Offers on selected machines, software and accessories. Here’s a link to all the details …