Back home now for over a week, and settling back into the Studio to keep on track with the Blog has been a bit of a task – I find it a challenge to get started after a little break. Do you ever have times like that? Luckily, once I’m into the fabric cutting, choosing threads etc, the hours just slip by so fast!
That’s the fun part for me along with sewing up the samples. The writing up after, does not come as easy. However, once I get started, it’s hard to know where to stop! Promise this post won’t be as long as the last one! That one was a bit of a Marathon!
Although I’m not a big ‘sport watcher’ on the telly, I did manage to catch a few ‘big moments’ of the Paris 2024 Olympic Games recaps during dinner sit down times this last week. Truly remarkable individuals and achievements showcased in a magical part of the world. The women’s marathon was sensational to watch … 42kms and they ran to the finish line!
What’s the connection you ask with this foot and Paris? Our Bernina Big Book of Feet had 5 different techniques for this foot … and I’ve added in a little bonus one I use as well – French Seams! It’s one of my ‘Gold Medal’ feet … used many, many times over the years!
But I get sidetracked here so easily … best I dive straight into the ‘educational part’ – first some machine features, and then Foot #23 and all its great features and the techniques.
French Seams … Piping … appliqué … edging … couching – almost like an Olympic Pentathlon!
... Did You Know? ...
Stitch History Function
and Temporary Altered Memory
Switching between stitches when doing lots of samples, used to mean writing down what stitches I had used and their settings, so that I could refer to them either later that day, or on another day. However the ‘History Function’ on my B790PRO enables me to recall the 15 previously sewn stitch patterns, and I used this a lot this week!
Here’s where you will find that … (this is on my simulator … B790PRO machine has all the spots filled!)
This function is available on all current 7 and 8 Series machines, and the new 9 Series machine, to be released in Sydney next month at Bernina Academy.
For these and any other models, if you are switching between stitches on the same day, the BerninaTemporary Altered Memory, an exclusive feature of Bernina sewing machines remembers the last stitch alterations made to any stitch. These alterations will remain in effect until manually changed, until the CLR (Clear button) is touched, or until the power to the machine is turned off.
Use the Personal Program to store your favourite stitches, most often used stitches, or perhaps a group of stitches needed for a particular technique or project. There are four Personal Program folders, so lots can be stored longer term here. I’ll cover that subject next week.
... A ‘Gold Medal’ Foot ...
Clear Appliqué Foot #23
This foot is ideal for satin stitching and appliqué, and when combined with 2mm or narrower cord running underneath, a perfect foot for couching, reinforcing an edge and mini piping. I also use it for French seaming, combined with a rolled edge stitched on my overlocker. More about that later, in the next section.
Being a clear foot you have an unobstructed view of the needle and the stitching area, and as it is also quite a short foot, it manoeuvres easily around curves and corners.
The channel underneath suits cords/yarns 2mm or less, and the cutout area behind the needle area, is wider to allow bulky stitches to pass under the foot without the fabric bunching up.
Options available for the foot – It’s available in a regular version only, suitable for all models, allowing a stitch width of 5.5mm.
Foot #23 had5 differenttechniques to stitch out, and I added an extra sample of how I do a French Seam with this foot.
... This Week’s Foot Highlights or Challenges ...
‘Satin Stitching’ and ‘Satin Stitch Appliqué ’ – I chose to combine both these techniques in the one sample, a little pink checked Bunny, with a white shadow behind, and a pink outline stitched echo.
For the Satin Stitch sample, I used Satin Stitch #1315 (Bernina’s built in settings) instead of zigzag and changing the default settings. I decreased the Presser Foot Pressure to 30 so that it was easier to move around the curves and into the corners. I stitched an ‘echo’ of the white shadow, and laid some DMC Pearl #3 thread underneath the foot as I sewed. It moved freely and was guided easily in the channel. I used a large eyed needle to take the Pearl thread through to the back of the sample at the beginning, and also at the end.
For the Satin Stitch Appliqué , (checked bunny) I used the same settings as above. This is a beautiful stitch that I’ve used often. The lighter Foot Pressure made those tight curves very easy.
On the white shadow appliquéd piece, I changed to Blanket Stitch #1309 Stitch Width 2.3 Stitch Length 2.6 (both default settings) , again adding the Pearl Thread underneath the stitches. Although not a Satin Stitch sample, I really like how this stitch defined the edge.
‘Reinforced Edge’ – I stitched two edges on this sample, a raw edge and then a folded fabric edge. Zigzag Stitch #2, SW 2.0 and SL 1.0, over DMC Pearl #3 Thread for both edges.
I liked the flded edge one the best, and thought it could also be a substitute for an overlocked rolled hem edge in some areas of garments
‘Couching’ – for this sample I used Zigzag Stitch #2, and trialed two different settings. The setting from the reinforced edge sample was too narrow and short, so I changed to SW 2.5 and SL 2.0 for a more open coverage. The cord was actually a 2.5mm one, a bit larger than recommended, however still stitched out ok. There’s always a ‘stitch sampler’ used every week, and here’s this weeks!
‘Mini Piping’ – This is a two step process – make the piping first and then a second row of stitching to enclose it in a seam. First row of stitching on the bias strip with some Rattail Cord between the layers, and raw edges on the right hand side of the foot, was Straight Stitch #1, SL 2.5 Needle Position +5 (to the right). Second row of stitching to enclose the bias strip between, and again raw edges on the right hand side of the foot, was Straight Stitch #1, Sl 2.5 Needle Position +4 (to the right). I often use this technique with contrasting piping to define seams in a garment, removing the piping cord afterwards, leaving a narrow contrast trim.
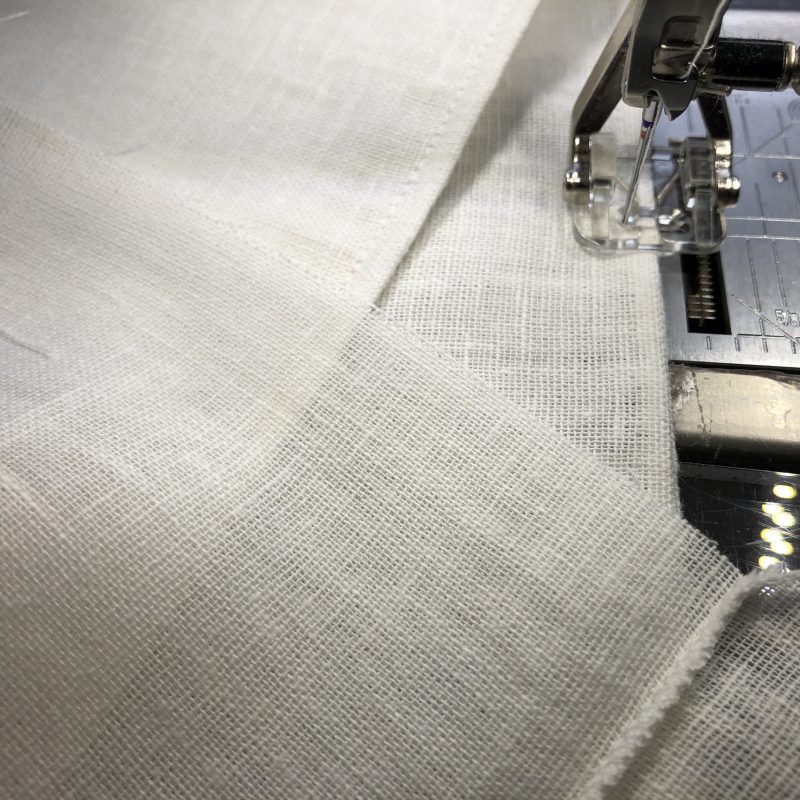
BONUS … ‘French Seam’ – traditionally a French Seam is created when you sew two fabrics, wrong sides together on a sewing machine with a narrow first seam. Next, press seam to one side, refold with right sides together, press again with seam on edge, then stitch a second row enclosing the previous one to create a beautifully finished inside seam. Here’s how I do it …
First set up your overlocker for a 3 thread rolled hem … I use the default settings on my Bernina L890 and stitch wrong sides together, trimming off a little as you go. Right hand needle mark should guide you on about the ¼” seam line.
Press rolled hem seam to one side, refold with right sides together, press again with seam on edge, it’s back to the sewing machine and using Clear Appliqué Foot #23, place the rolled edge under into the channel, and stitch with Needle Position -5 (to the left), enclosing the previous seam to finish.
I was making reusable market produce bags with left over curtain cutoffs, so I stitched the two sides with French Seams for strength, then to reinforce the opening at the bottom edge of the casing area, I couched down a bit of leftover rolled hem chain from the overlocker using Foot #23 … Satin Stitch #1315 default settings
Then I used the L890 to roll hem the top edge, pressed the hem into place and used Zigzag Stitch #2 SW 2.5 and SL 1.0 to stitch it down. The zigzagged edge sat beautifully in the channel as I sewed.
Here’s some of the finished reusable produce bags, with their rainbow cord ties and yellow closures. I had long narrow curtain offcuts for these, so there is an extra French seam up the centre of one to make it wide enough, and the others across the centres to make them long enough … waste not, want not!
... A Little Something Extra ...
Fabulous Educational Resources
Previously I’ve added links to ‘Just SEW It Machine Applique’ – Foot #6, ‘Just SEW It ABC’s of Couching’ – Foot #21 and ‘Just SEW It Piping Fundamentals’ – Foot #12. Yet another eBook to add to your collection, which must be growing now, this time covering a large variety of feet, is one titled ‘Just SEW ItMixed Media Stitching’! Some feet we’ve already looked at are in this one, as well as this week’s Clear Appliqué Foot #23.
Here’s the link to ‘Just SEW it Mixed Media Stitching eBook’ …
is Piping Foot # 38 – 20% off – contact your preferred Bernina Dealer for this fabulous offer. … this foot is often also termed the “uneven foot”, owing to the different thicknesses of the two halves of its sole. I’ll be covering this foot later in the Blog.
*Australia and New Zealand Promotion Only – ends … 31st March 2024 …
AND … this month there are even more Special Offers on selected machines, software and accessories. Here’s a link to all the details …
It’s Ekka Week here in Brisbane, and we have had windy, wet and rather cool weather this week … hoping for some sunshine on the weekend to escape into the ‘Great Outdoors’ … and maybe even get my toes in the sand again! It’s been waaaaaay too long!