Shared fun times with friends, are always good! Last week I packed up my car and took a road trip up to Bribie Island, to spend a few days away with two dear friends Marion, and Rachel … sewing, socialising, sleeping and generally filling the days without any of us having time restraints of any kind … except maybe ‘kitchen closing’ times at the local pub!
The weather was fabulous, a bit chilly at night, but nothing a pair of flannelette pjs and a warm pair of Ugg boots can’t fix!
We sewed, chatted, op-shopped, ate and ‘rebonded’ throughout three whole days in the lovely surrounds of our friend Kerry’s Ladybug Retreat … the best fitted out sewing room on Bribie I’m sure!
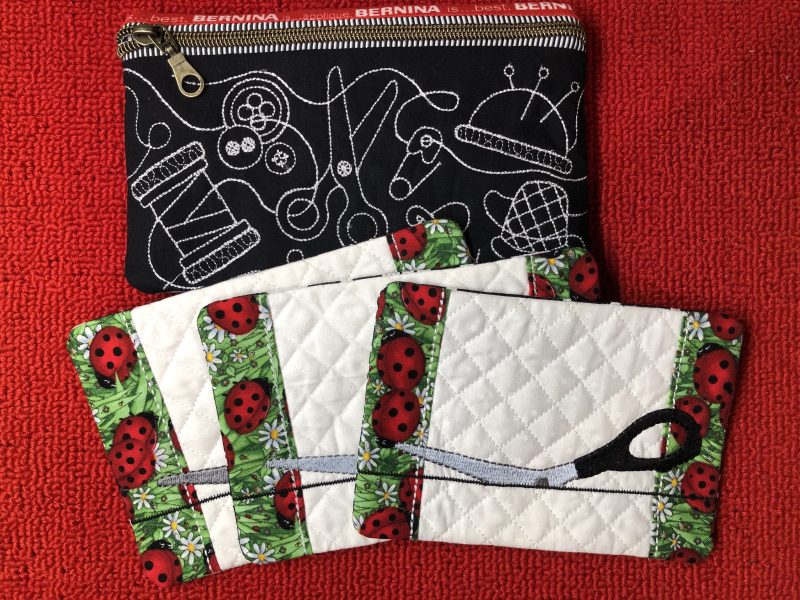
I took my B590 along as well as the embroidery module, and managed to make a small zippered pouch in the hoop, and three mug rugs … more of those to come.
I hand-sewed down some seams on a quilt-as-you-go log cabin quilt I had started at our last retreat in Warwick, only borders to add now, and then cut out, quilted and started putting together a By Annie Backseat Babysitter 2.0 for my grandson Bobby. I forgot the fasteners, webbing, stabiliser and clear vinyl, so only could go so far.
Lastly, I finished crocheting an edge on another teatowel … quite a successful time up there!
From Bribie, I headed north to the Sunshine Coast for a few days with my dear friend Kim, from Kimz Patchwork and Sewing at Warana. No photos from then, but just picture a quick Friday afternoon shop visit, surprising Lindsay of Sew To Grow who had taught a class that morning, followed with lots of laughter, Negronis in the garage, Eumundi Markets, a gin distillery, great restaurant for lunch, coffee with bacon and egg brioche for breakfast the next morning, catchups with her Mum Joan, her gorgeous daughter Mads and family, a Prize Home visit, a sneaky ‘private shopping experience’ at her shop before I left, and hours of chatting! Thanks Kim, I had a great time! Loved that we spent time with your beautiful sister, Vrana too! A whirlwind two and a bit days … with NO SEWING!
... The Studio Update ...
Well, this section of the Blog has been ‘missing’ since way back at Foot #7 … and that’s because not a lot has changed since then. Ben has been busy laying artificial grass turf and paving the outdoor area near the pool, and trimming back all the garden beds. Big areas … so a big job .. and it all looks great!
However, progress is now being made on the outside front of the Studio. The old patio roof was removed a while ago, and now the channel for the new patio roof has been installed, the sensor lights shifted and some timber battens were affixed to the front wall to create a bit of a feature there. The next step will be filling the nail holes, and then painting all the outside to match the Cabin. The patio roof can then be erected.
Busy times ahead, with lots to do – retaining walls and paved pathways the biggest tasks … getting ready for the summer sun, and no doubt, our share of the typical Queensland wet season rain as well.
... Did You Know? ...
The Stitch Altering Area - What you See, is What you Get!
I was hoping that this would be a shorter Blog Post as I’ve so much to do at the moment … well, you all know what I mean … other stuff I WANT TO DO! But … the more I did the samples, the more things came up that I thought you might ‘need to know’ on this journey of not only discovering the Feet for your machines, but the features and functions that help make the journey a lot easier/quicker/more efficient. I guess, I could drag all this information out over the whole 70+ posts, but I’ve always believed in the old ‘need to know’ time of learning … and that putting it all into practice just makes it more understandable.
Wanting to play along with me on this one? I find the Bernina Simulator is ideal to use when working out which stitch settings will work best. Here’s a link to download the B790PRO Simulator to either a laptop or desktop computer. Other model simulators are available via the ‘Support Tab’ of each machine on the Bernina Website. The new B990’s simulator has not been released yet.
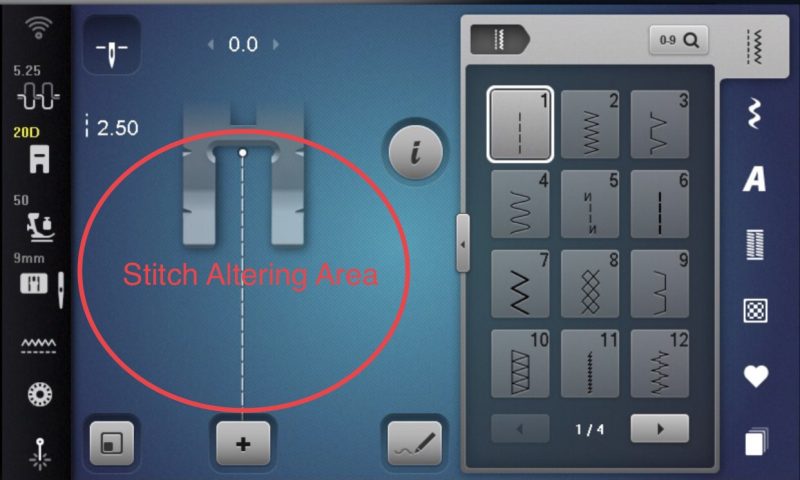
So here goes for this week’s first ‘need to know’ … it’s the Stitch Altering Area of your machine … and how it helps ‘audition’ stitches when using twin or triple needles. Just to make it clear, here’s the area I am referring to … (photos show my B790PRO machine – the 4 and 5 Series machines, which have smaller screens, will not have the foot picture at the top)
When I select a stitch (this was #405), and have a single needle in (not a Twin, Triple or Wing) this is how the stitch looks in the Stitch Altering Area …
Then I changed to a Twin Needle in the Security Section (you will notice it has changed to yellow) and the view of the stitch is now ‘double’.
How the stitch looks depends on what width of Twin Needle you are using, and have selected in the Security area. Here’s a few photos of some different stitches and Twin needle width changes I made to show just what can ‘happen’ to the stitch you have selected.
Next, I’d like to show you how I ‘push the boundaries’ of the settings to get that ‘Goldilocks’ stitch … not too big … not too small … just perfect!
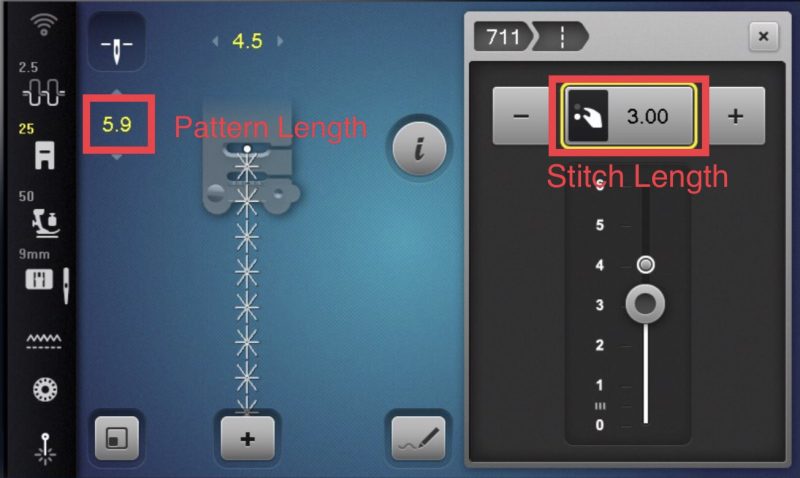
Stitch #711 (often referred to as the Daisy or Star Stitch) is my ‘go to’ for Hemstitching. I had already selected Foot #25 on the machine and here is a photo of the Stitch Altering Area of the machine, with the default setting for the stitch.
Next I went into the Security Settings, and changed my needle selection to a Wing needle. Now the maximum stitch width is 3.5mm, a little too narrow for what I wanted, which was a corded edge to crochet into.
At this point I knew that I could ‘possibly’ push the ‘stitch width boundary’ just a bit, so back into the security settings, change back to single needle, touch on the Stitch Width at top of screen, a display appears and enables me to fine tune that setting to 4.5mm, which I knew would not have the needle hitting the foot. Couldn’t utilise the Laser here … Yes, I handwheeled this – the laser shows the needle point – not the outside flange of the needle! The stitch is now looking a little too ‘long and narrow’ for my project.
The setting of 7.9 on the left hand side of the screen in the photo above, is actually the ‘Pattern Length’ (whole daisy or star), however when I touch that setting, a display appears (see photo below) and the ‘stitch length’ can then be altered. I changed to 3.0, giving an overall Pattern Length of 5.9mm. I was aiming for around 6mm (length of 3.05 does give that, exactly 6mm … but hey …)
If ever you are unsure of what a setting/icon means, simply touch the ‘?’ first, (it’s called the Help Function) … then the setting/icon you’d like info on, (in this case it was Stitch Length 5.9) and a display will appear giving you an answer … and yes, just sometimes it says … ‘No help available for this function’.
... Slots, Channels, Latches and Bridges ...
Cording Feet #22 and #25
There seems to be a lot of ‘bang for your buck’ with these two feet! The feet are made to hold several strands of yarn at once, keeping them neatly aligned and preventing them from tangling as they go under the needle.
Each foot has two slots on the right hand side: one for the needle thread and one for loading the decorative yarn.
On the front ‘bridge’ part of the foot between the toes, Foot #22 has three grooves, while Foot #25 has five smaller ones for positioning the cord or threads.
A black latch, hinged on the left hand side helps keep everything in place.
Beneath the foot, on the ‘bridge’ just before the needle opening area, again Foot #22 has three grooves, while Foot #25 has five grooves keeping the cords or threads aligned.
The large cut-out in the sole lets the yarn pass under without altering the feed of the fabric. The foot keeps the yarn flat on the fabric, giving a nice, braided look.
All the ‘features’ add up to a foot with secure guiding of threads or yarns for couching.
Options available for these feet – Both are available in only one version suitable for all models, allowing a stitch width of 5.5mm.
Feet #22 and #25 had4 differenttechniques to stitch out, however only three were detailed with actual samples. There was no information for the Hemstitching sample. The previous set of foot reference books I own … Bernina’s ‘Feetures Vols 1 – 3’ … had details/samples regarding Hemstitching, so I have included these.
... This Week’s Foot Highlights or Challenges ...
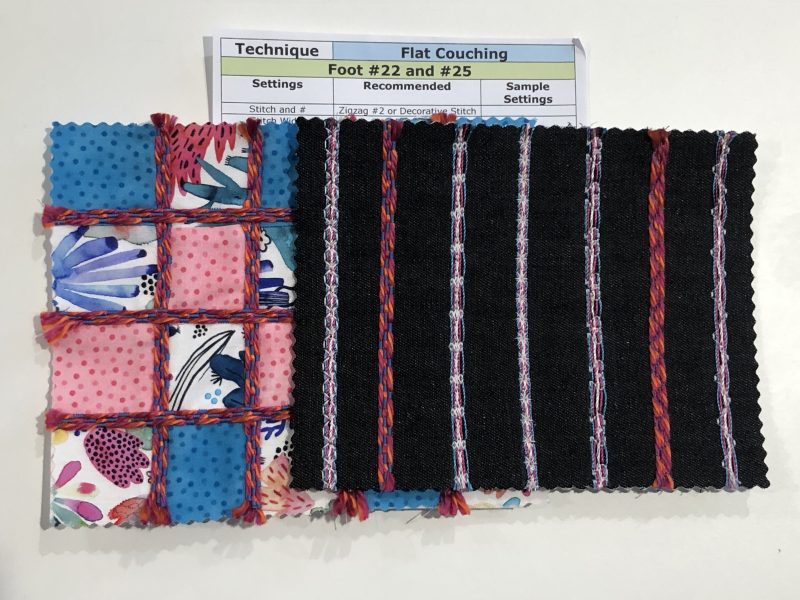
‘Flat Couching’ – Sample #1 … I pieced together a few squares and couched down some crochet yarn I had – was about 8 ply acrylic – Used Foot #22 (3 strands) and Stitch #422, a favourite of mine for couching as it shows through the yarn as well as the stitches. Default setting for stitch.
Sample #2 … Love my decorative stitches (and all my different thread weights in my stash to choose from!!) … and had lots of fun stitching this sample out. All default settings for stitches.
Foot #22 with 3 strands acrylic yarn
Row 2 – Stitch #422 … Row 6 – Stitch #1336
Foot #25 with 4 strands Crown Rayon Thread and 1 strand Wonderfil Dazzle Thread (8wt)
‘Corded Appliqué’ – I used Foot #25 for this one with a mixture of Wonderfil threads through the foot – 3 x Glamore (12wt), 1 x Spagetti (12wt) and 1 x Dazzle for a bit of sparkle (8wt).
Machine Settings – Running Stitch #4, Stitch Width 5.5mm and Stitch Length 0.5mm which is the default setting. I also decreased my Presser Foot Pressure to 30 as there were rounded corners to stitch. All the threads remained in their grooves and stitched out nicely.
‘Double/Triple Needle Couching’ – For row #5 on the sample, I used Foot #22 (3 grooves) and for the rest of the rows I used Foot #25 (5 grooves – and only 4 decorative threads all Wonderfil Dazzle 8wt – Raspberry and White – leaving the centre one blank). I used a 1.6mm twin needle, with white Rasant thread in the left needle, and pink Rasant thread in the right for all the rows. It does alter the look which needles are threaded with which colour … together with what colour decorative threads are used in which groove, i.e. needle thread and decorative thread same colour, or needle thread and decorative thread opposite colours.
To highlight this, I stitched Row #1 with 2 pink decorative threads in the first two grooves of the foot, left a space and then 2 white decorative threads in the last two grooves of the foot. Needles White and Pink – Decorative threads Pink and White i.e. opposite colours. Stitch #417 really highlighted the difference thread colours can make! I then swapped the decorative thread order for Row #2, i.e. same colours, using the same stitch.
For the remainder of the Foot #25 rows, 3, 4 and 6, I swapped back to opposite colours. Perhaps Row #6 would have looked better with the decorative threads same as Row #2 ?
And then to finish this sample, I changed over to Foot #22, same colour needle threads as before, and decorative threads white on left, pink in centre and pink also on right. Row #5 – Stitch#405
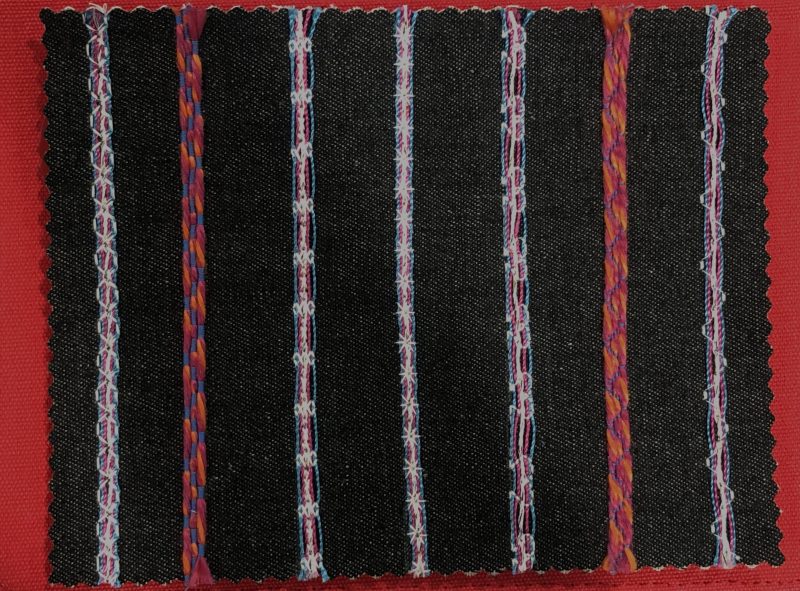
‘Hemstitching’ – there was no information for this technique after it was included in the ‘Technique Settings’ section. It stated to use stitch width 5mm and Daisy or Star stitch … well, if you used a wing needle with this, 5mm stitch width is not allowed. However, I thought I’d have a little play with this technique, after going back to my old Bernina ‘Feetures’ book and seeing it all in there. It’s an Heirloom technique, and I have used it many times over the years either as a stitched feature on a garment, or as an edge to crochet into.
Some of the notes I made for a hemstitched edge were … Machine Setup – Foot #25, Stitch #711, #10 crochet cotton in the 4th groove on the foot, Size 100/16 Wing Needle, not programmed into the Security Function area of the machine, Stitch Width 4.5mm and Stitch Length 3.0mm. (All ‘how-to’s discussed in the ‘Did you Know’ section)
Stitch along on the wrong side of a single layer of well starched linen/cotton with right hand edge of foot aligned with raw edge.
Trim back close to corded edge, and using a 1.25mm steel crochet hook, make 2 double crochet stitches (dc) into each ‘hole’. Turn and repeat 1 dc into each dc of previous row, turn and add patterned edge. I used my current favourite that I’ve been ‘hooking’ onto teatowel edges.
Note: you could add a second length of #10 cotton in the 2nd groove, and I do this if it is a Decorative feature on a blouse etc, (refer centre photo above and stitching down centre of fabric) but I find that not necessary for a hemstitched edge, as the one row does stabilise and strengthen the fabric enough to support the crocheted trim. (Note: I used the same #10 Crochet Cotton to do the patterned edge)
And a final ‘tip’ before we leave this section … When using multiple yarns/decorative threads together, knot them at one end before placing them into the foot slot, loading the grooves and finally closing the latch. Hold gently at the back as you start. This will ensure they keep within the grooves as you start to stitch.
... A Little Something Extra ...
This post’s eBook to download, discusses the anatomy of the twin needle, the different sizes and types, how to set up the sewing machine to operate with this type of needle, and different sewing techniques that are enhanced with the twin needle.
Here’s the link to another eBook for your collection …
is Piping Foot # 38 – 20% off – contact your preferred Bernina Dealer for this fabulous offer. This foot is often also called the “uneven foot”, owing to the different thicknesses of the two halves of its sole. I’ll be covering this foot later in the Blog.
*Australia and New Zealand Promotion Only – ends … 31st August 2024 …
AND … this month there are even more Special Offers on selected machines, software and accessories. Here’s a link to all the details …