The cooler weather has definitely arrived here now — I even had long sleeves on today, which felt like quite the milestone after such a long stretch of warm days. It’s been a busy and very satisfying week in the studio, with the biggest achievement being finally finishing another patchworked Laura Jacket. There was so much preparation involved before I could even begin constructing the jacket itself: cutting, piecing, quilting, trimming … one of those projects where the groundwork takes just as much time as the sewing. Seeing it all come together in the end made every step worthwhile. The lining was fussy cut from a fabulous piece of fabric – worth all the manoeuvring of pieces to get it ‘just right’.
I was also very happy to welcome my L890 back from the technician this week. It’s always surprising how much you miss a machine until it’s away for a while, and it has certainly been getting a workout since returning to the studio. Mind you, I did have my dear friend Deb’s L890 to work with whilst mine was in getting ‘tweaked’. Thanks again Deb!
Along with plenty of this week’s sample stitching, I used my L890 to bind some clear display folders into a handy little A5 booklet — a simple project with the Binder #C21 from last week, and just a bit of fun! It’s ready to pack away with my wax beads and seal for some fun later on next week! Never enough time to sew, craft or create other stuff here in the Studio …
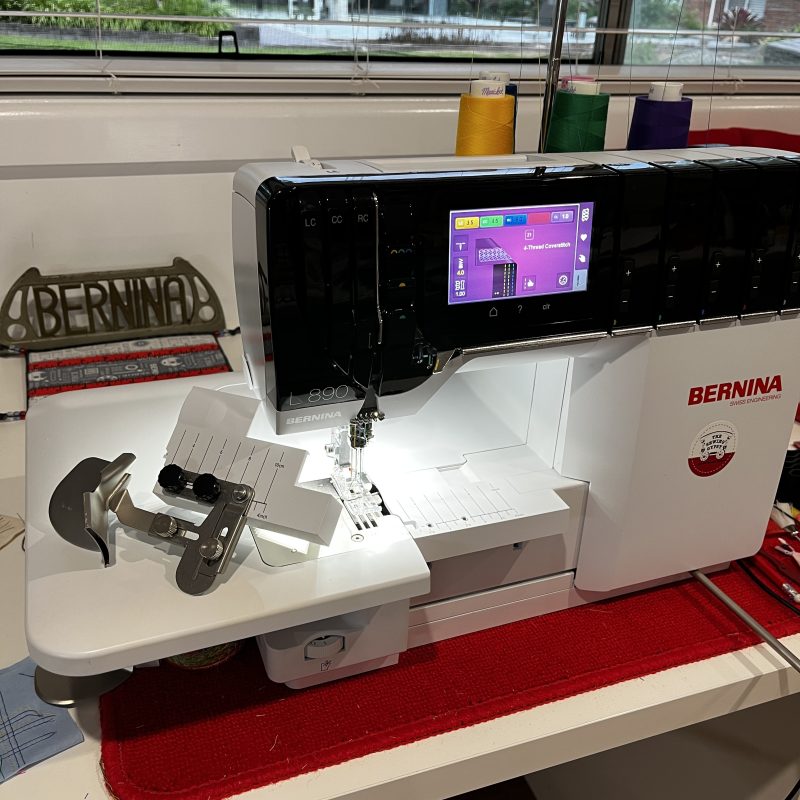
There have been lots of machine/feet/accessory/thread changes happening around here lately as projects shifted from one task or machine to the next. Every new month also brings with it my task of checking for any Firmware Updates for all my machines … and this month I updated my Bernina B790PRO to the latest version V46.01.04 which included optimizing positioning of the sock embroidery hoop inserts during threading. I do have some to embroider on the weekend – so that was timely for that machine!
On the Bernina website you’ll find the V46.01.04 files available to download, along with full download instructions. Each update also includes a document outlining all performance and functional improvements, plus details of any new accessories that have been added. The section will look like this …
Here is a link to the latest update information for the B790PRO.
Now, it’s time to settle into this week’s topics, including the Single Fold Binder #C22.
... Did You Know? ...
4-Thread Overlocking Stitch
Following along from previous stitch-type posts, we are now up to the 4-Thread Stitch – which there is only one, in the Overlock Mode of the machine! A 4-Thread Coverstitch will be discussed when I do the Cover-/Chainstitch category of stitches. So a much shorter segment this week.
4-Thread Overlock with Integrated Safety Seam uses two needles and two loopers to create a strong, stretchy seam while also finishing the fabric edge at the same time. It’s one of the most commonly used overlocker stitches for garment construction because it sews, trims and overcasts in a single step. The extra needle thread gives the seam added strength, making it ideal for knit fabrics, activewear and everyday sewing projects.
In this stitch formation, the thread tensions are balanced. It is Stitch #1on all Bernina/Bernette Overlockers.
I can confidently say, it’s the most used stitch in everyone’s overlocker repertoire.
... The ‘Piecemaker’ ...
Patchwork Piecing and Quilting with your Overlocker
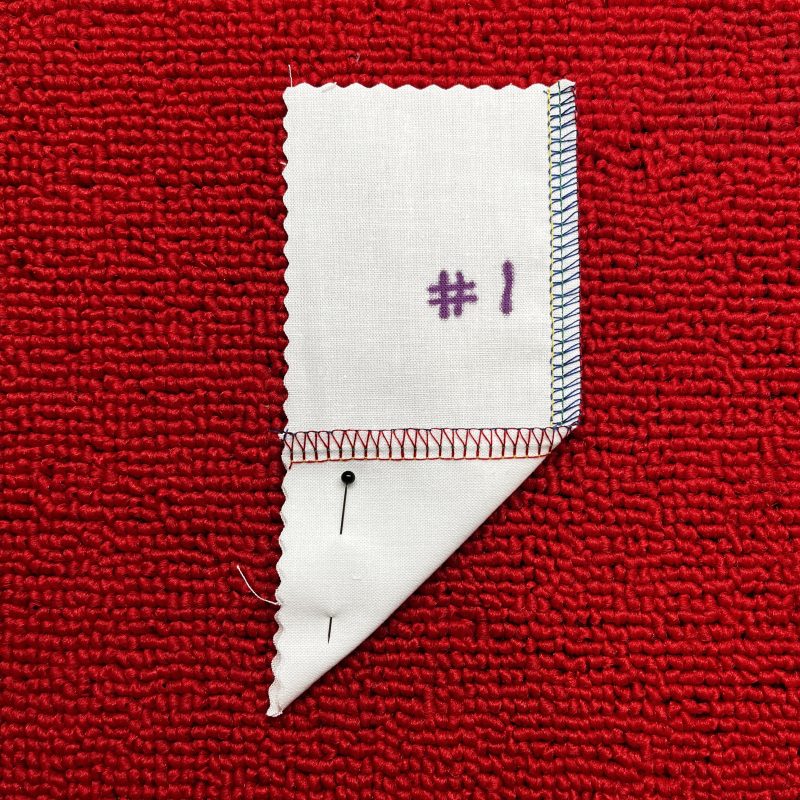
This week’s first quilting technique is Serge and Flip. This is a Quilt-As-You-Go type technique, starting with 2 ½” strips I had leftover from a Strip Roll I had, so I cut 10” lengths for the front, and 10” lengths from a neutral fabric I had in my stash. Lastly, I cut 2 ½” strips of cotton batting. I love this technique with the sewing machine, so it is an easy transition to the overlocker for this.
Full instructions are in the Big Book of Serger Quilting Page and in the Big Book of Serging on Page 137, although there it is referred to as ‘Reversible Quilting’.
Machine Setup: 4-Thread Overlock Stitch #1 SL 2.5 CW 5 – rest are Default settings. Seracor Overlocking Thread in all thread paths. The 4-Thread stitch compresses all the seam allowances.
The first step is to overlock together a top piece, batting and a backing piece with the above machine setup. I changed the CW to 5 from the default of 6 so that the next section I stitched on would cover the first line of stitching. Rest of the strips were added with CW 6. Layer as follows: top – right sides together, backing – right sides together, then add a batting strip to the underneath – overlock all together. Press top strip out, then press the bottom section out – raw edges should now be aligned.
The finished sample is shown below with the backing turned up – I did place one strip of the backing upside down, which you can’t see in the photograph!! This is a great technique for making placemats and coasters.
The second quilting technique is Chain/Coverstitch Quilting. I pieced together a 9-Patch Block (this has been covered before in the blog), then layered it on a piece of batting, with a plain backing underneath.
Machine Setup: 4-Thread Overlock Stitch #1 All default settings. Seracor Overlocking Thread in all thread paths.
Next step was to place sewing pins along the seam lines as a guide for marking where they are from the backing, where the quilting is stitched from. I drew the lines with a Frixion Pen, then placed safety pins to hold all the layers together – I could have also sprayed this with Basting Spray 505.
Then it was time to quilt – I did have an issue with my machine randomly changing stitch length and ‘bogging’ as it sewed – very frustrating – I persevered and the sample looks ‘okay’ but I did put a call into my Tech Gareth. More about that later …
Machine Setup: 4-Thread Coverstitch Stitch #21 I used Default setting except for the Chain Looper which I reduced to 1.0 – Seracor Overlocking Thread in all needle thread paths, and Wonderfil Spagetti 12wt in the Chain Looper. I used Foot #28 Clear Cover/Chain Foot
Lastly in this section was using a 3-Thread Coverstitch and a 2-Thread Chainstitch combined in the one sample to create a decorative quilting design on a plain fabric. Stitching lines were marked on the backing.
Machine Setup #1: 3-Thread Coverstitch Stitch #24 I used Default setting except for the Chain Looper which I reduced to 1.0 – Seracor Overlocking Thread in both needle thread paths, and Wonderfil Spagetti 12wt in the Chain Looper (Pink). I used Foot #28 Clear Cover/Chain Foot
Machine Setup #2: 2-Thread Chainstitch Stitch #16 I used Default setting except for the Chain Looper which I reduced to 1.0 – Seracor Overlocking Thread in needle thread path, and Wonderfil Spagetti 12wt in the Chain Looper (Yellow) – ensure you have Needle Stop Down selected. I used Foot #28 Clear Cover/Chain Foot
As you can see from the sample, I turned corners with the Chainstitch, and if you do this, just lift the foot slightly to pivot, do not lift fully. I ‘nudge’ my knee lifter at the corners to make this easy.
When working around the centre square, start with threads separated, not in a corner.
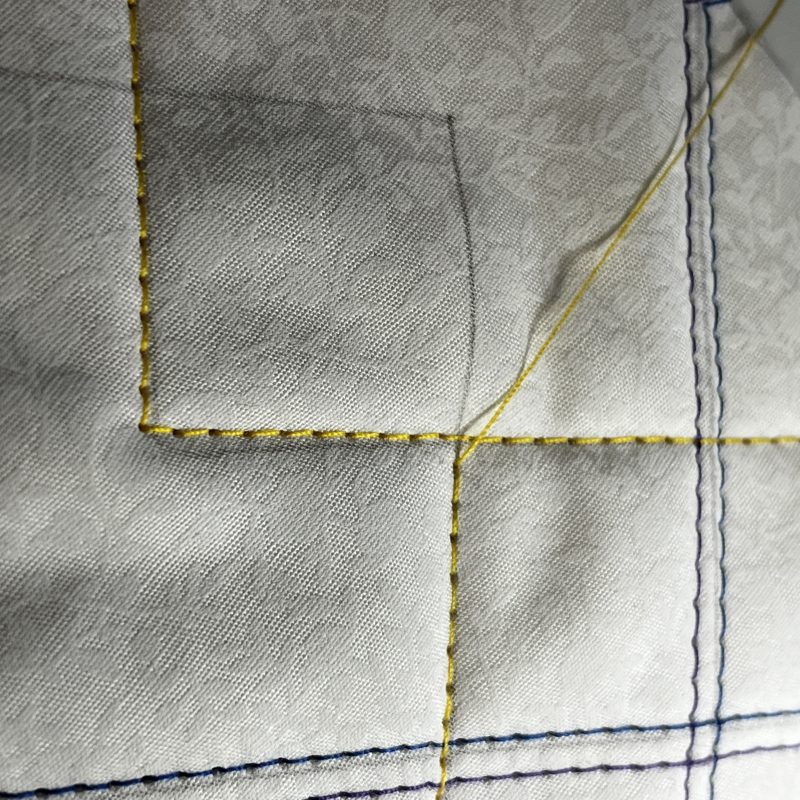
When you get to the end (Photo 1 below), raise presser foot, ‘drag’ needle thread from underneath with Coverlock tool, cut the thread, then finish off by pulling the needle thread to the back, lastly cutting the Chain looper thread.
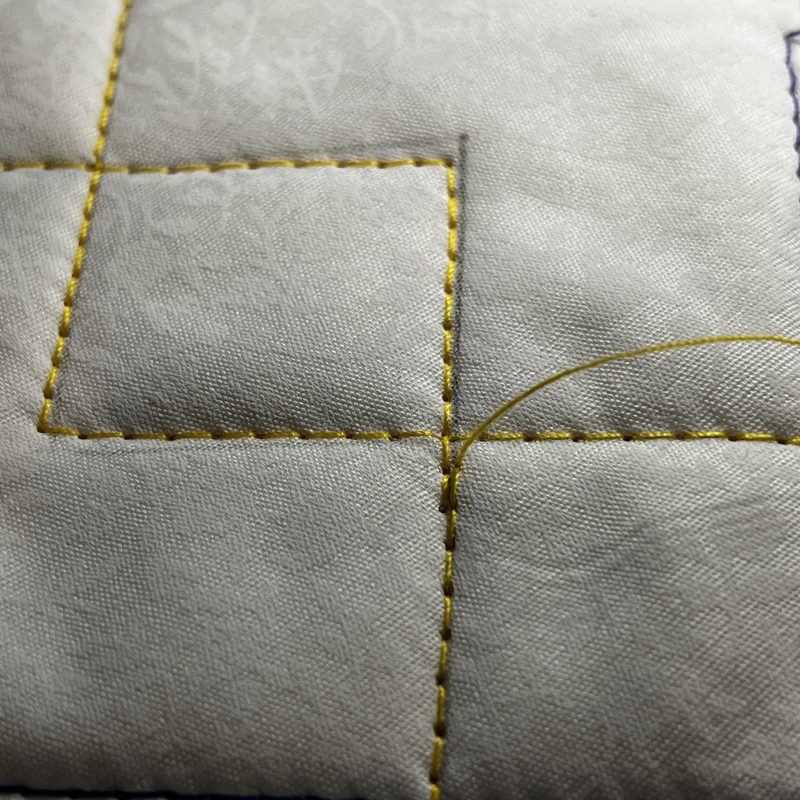
Only the needle thread from the start will be on the top (Photo 2 below) – thread into a hand sewing needle and take it to the back – four threads should then be at the back, ready to secure now (Photo 3 below).
Knot all these together, and use a large eyed needle to take all the threads from the back of your work to the front, and slide the threads and needle back into the batting. Trim. The join is hidden! … and what was the bottom of your work, now becomes a decorative quilted piece.
The Pinwheel Block
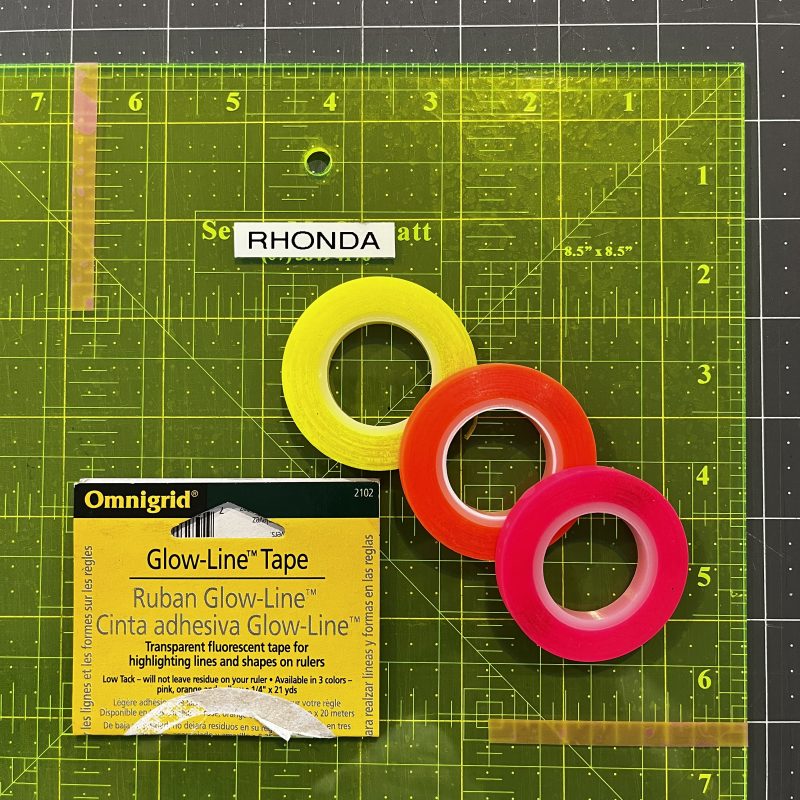
This week’s first patchwork block is the Pinwheel Block. Refer Big Book of Serger Quilting – Pages 133. (**see notes at bottom of section re errors in instructions I found) The block consists of four Half Square Triangle sections, which I covered in the Blog Post on Foot #17 and again in the post about Foot #18. This week I’d like to add another quick way of trimming these blocks to size, using some Glow-Line Tape placed on your ruler. I bought mine many years ago, have it stored in a little vinyl pouch I made and I’m unsure how many stores still stock it, however I did find ‘Punch with Judy’ has some in stock online.
Machine Setup: 2-Thread Chainstitch Stitch #32 All Default settings. Seracor Overlocking Thread in needle thread path, and Chain Looper. I used Foot #28 Clear Cover/Chain Foot
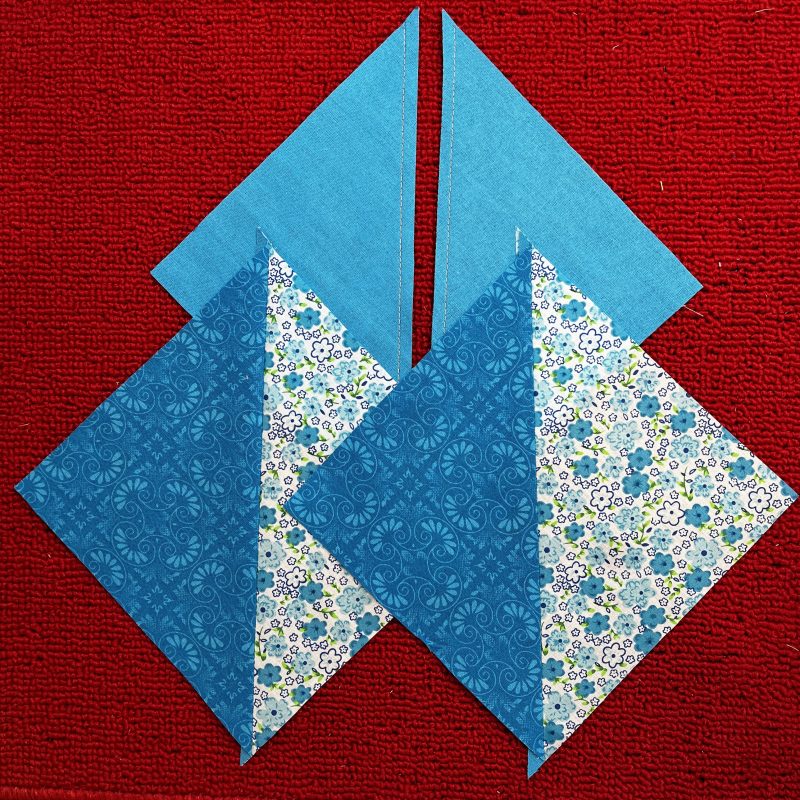
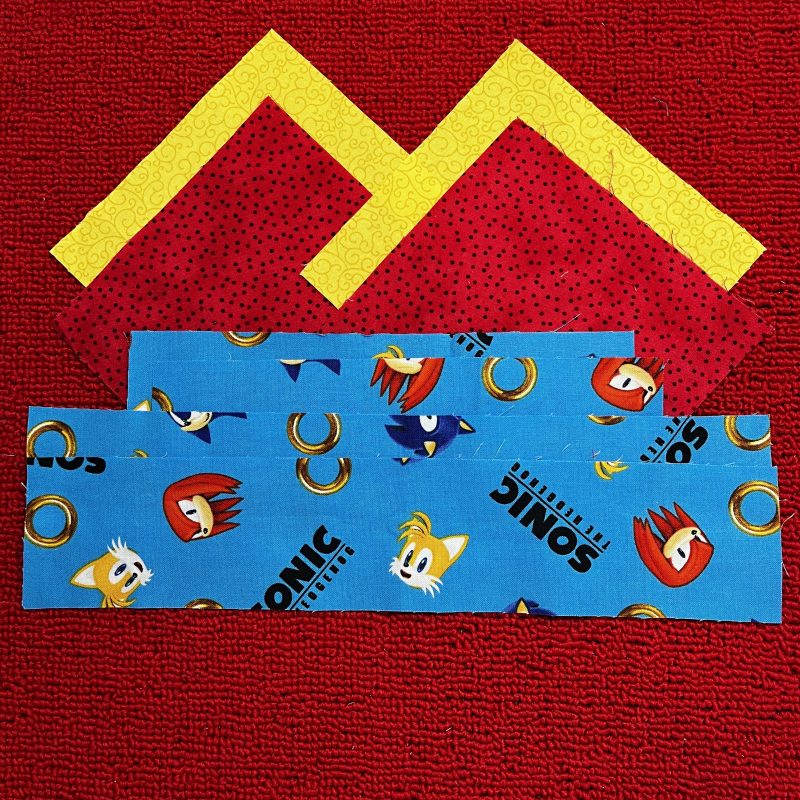
Cut the squares, mark the diagonals with the ¼” Plus ruler, stitch with chainstitch, cutting apart on the second line of stitching. Do not press yet.
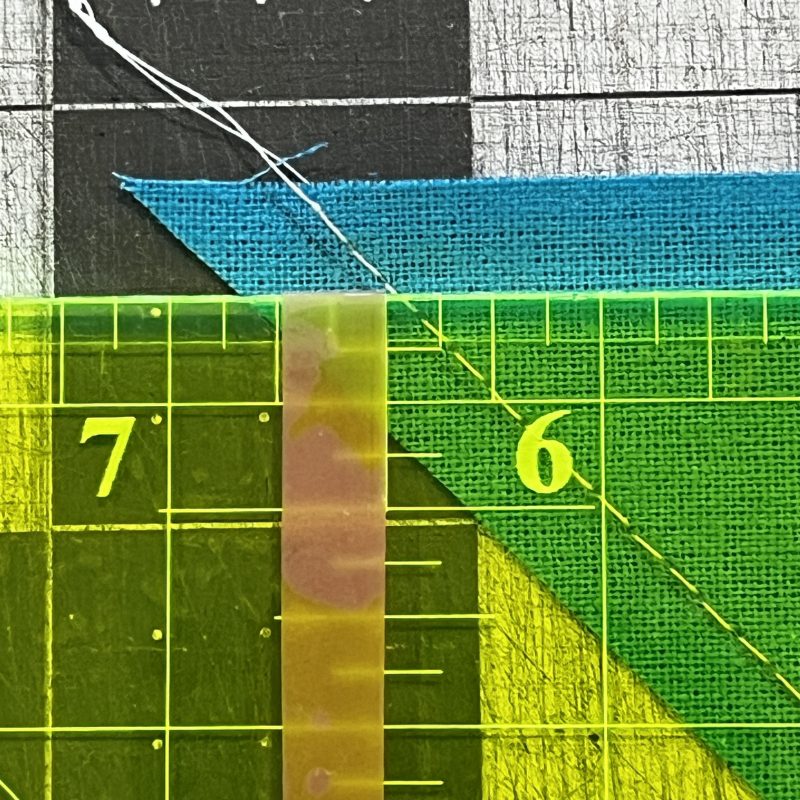
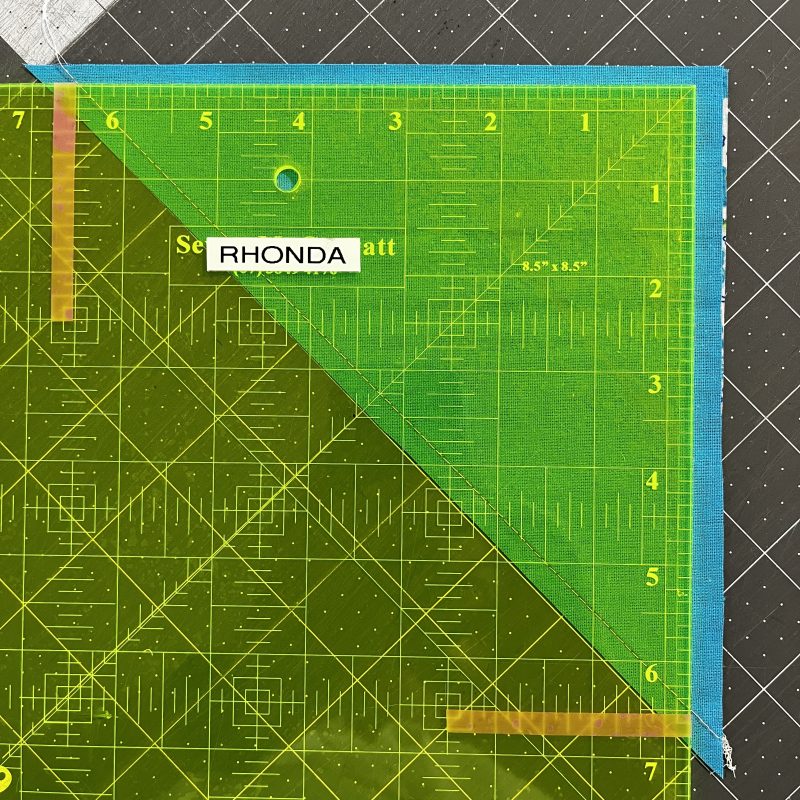
Now place some Glow-Tape at the 6 ½” mark on two adjoining edges of your ruler, and place that mark on the seam line as per photo below, trimming off excess.
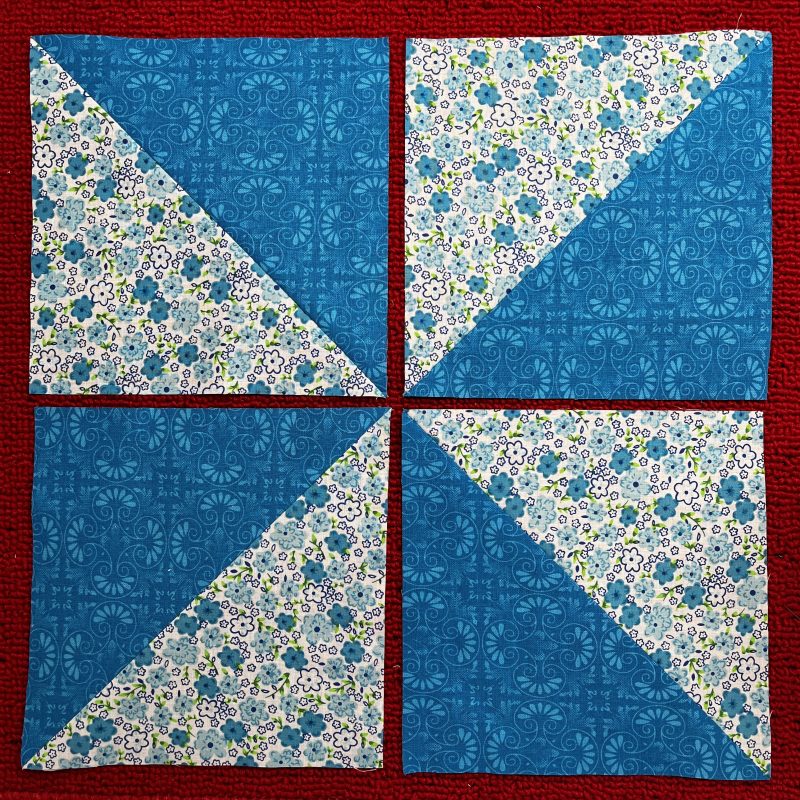
Press the seam now to reveal your 6 ½” blocks! Two cuts instead of the usual four to square up your block.
Join together to form a Pinwheel Block.
The Framed Pinwheel Block
This week’s second patchwork block is the Framed Pinwheel Block. Refer Big Book of Serger Quilting – Pages 134. (** See note below re errors) The block consists of a pinwheel block in the centre and borders around each side to form a frame. The photos show how I added the borders, sides first then top and bottom.
... Take Note of some Changes Needed ...
** The Pinwheel Block appears on Page 133 in the Big Book of Serger Quilting – the instructions are a little confusing at Point 2 … “Make four 7 ½” half square triangles to make four half square triangles. See Page 103 for half square triangle directions” … well the directions on Page 103 are clear, so follow along with those, or just Cut four 7 ½” squares to make four half square triangles. These will need to be trimmed back to 6 ½” afterwards.
This error is also in the directions for Framed Pinwheel Block Page 134, and as well, there was an error in the cutting measurements for the ‘side borders’ – they need to be 8 ½” NOT 12 ½” as stated in the book.
... Bound to Impress ...
Single Folder Binder #C22
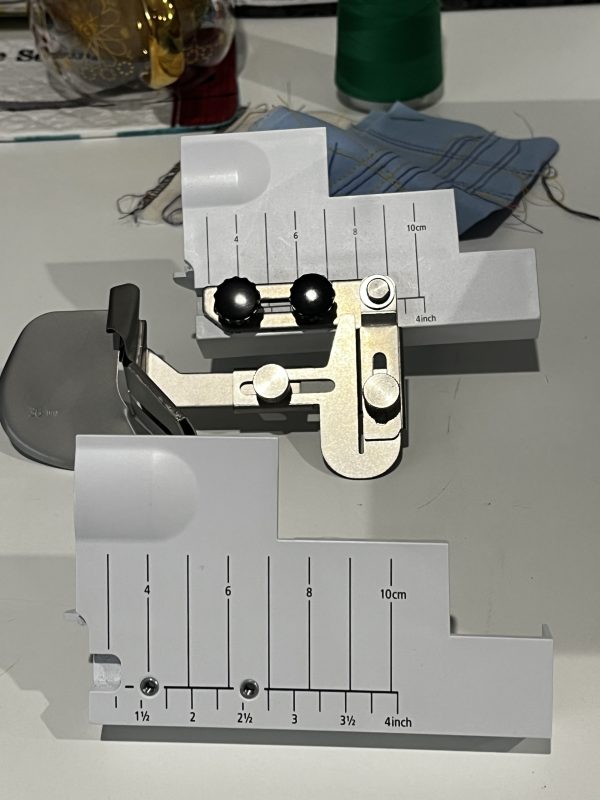
With the Single Fold Binder, fabric edges and necklines can be perfectly bordered with bias tape. The unfolded tape is inserted through the attached guide rail, folded over twice on the upper side while the underside remains open, and is then sewn on with a cover- or chainstitch. This reduces the bulk on a finished edge. The swing-out feature makes it easy to insert fabric strips.
Fabric strips are cut 40 mm wide, (1 ½”) resulting in a finished binding of approx. 10 mm (3/8”). I have labels attached to the back of all my Binders showing the width to cut the strips. When using knit fabrics I cut a scant 1 5/8” strip for the binder so that it runs a little tighter in the channel, giving a better finish I think.
For this finished edge, used mainly on knit fabrics, cut your binding strips across the width of the knit fabric, from one selvedge to the other (maximum stretch). You can also use woven fabric cut on the bias grain. Accurate cutting is essential to achieve a smooth bound edge.
This attachment is only suitable for machines that perform Coverstitch and Chainstitch functions.
A separate accessories holder is required to attach the binder to the machine.
Binder attachments may require some practice before you can fully master this tool. I have purchased an extra Coverstitch Insert and I leave the accessory holder attached to this to save setup time.
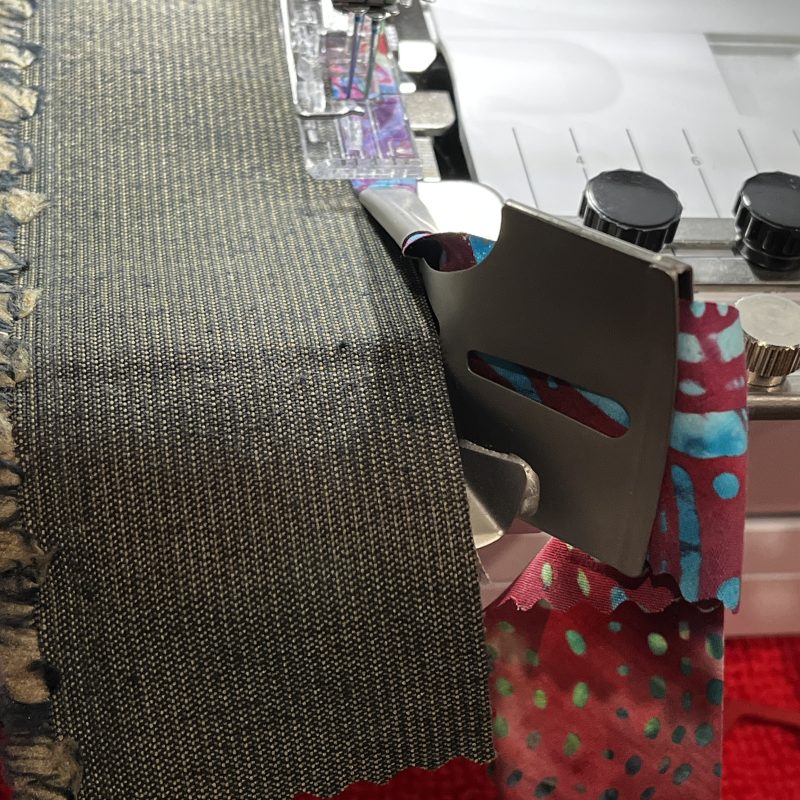
Binder #C22 was used to stitch out samples of bound edge finishes on slight curves, and deeper curves such as a neckline. I also had a play with some bias strips with one edge cut with a wavy/pinking blade. This was on the unfolded edge, and I then used this as a feature on the right side of the sample – coverstitching reverse side out.
Here is a link to the Bernina International video for this accessory.
Bernina L850 and L860 – not suitable for these machines
Bernina L450 and L460 – not suitable for these machines
Bernette Funlock 40 Series (b44) and Airlock 60 Series (b64) – not suitable for these machines
Bernette Funlock 40 Series (b42 and b48) and Airlock 60 Series (b62 and b68) – the # C21 Double Fold Binder can be used on these machines. The Bernina Accessory Holder includes M4 size screws to suit the Bernette machines.
... This Week’s Foot Highlights or Challenges ...
This is not an accessory that I use a lot in the Studio, as I prefer to sew woven fabrics over stretch fabrics, therefore I have much more need to use the Double Fold Binder #C21. However, when wanting to reduce that bulk when binding a neckline of a stretch garment, I find this attachment really comes into its own! And … I did a sample with a bias cut strip, wavy cut on the underside for a decorative finish on an edge.
‘Binding Gentle Curves’ – I trialled two different Coverstitch settings on this sample, one edge was a 3-Thread Wide and the other a 3-Thread Narrow.
This was too wide a finish for the binding I thought.
Machine Setup #2: 3-Thread Coverstitch Narrow Stitch #23 Default Settings LC and CC Needle (Left Cover-Centre Cover) and 3 cones of Overlocking Thread
I cut my strips from some long pieces of leftover knit fabric I had, however it was not on the crossgrain of the fabric – however I did use it … with less than ideal results! The binding curled out from the edge when it was finished and would not sit flat.
I then cut some matching fabric strips (across the grain) and the finish was a lot better! The stitches even look better, and they do not ‘bury’ into the grain on the fabric.
‘Binding Neckline Curves’ – continuing on with the same piece of matching binding strip, and as it was a lot curvier, it also did not sit flat after binding.
Machine Setup #2: 3-Thread Coverstitch Narrow Stitch #23 Default Settings LC and CC Needle (Left Cover-Centre Cover) and 3 cones of Overlocking Thread
I made a second sample, and held onto the binding strip just lightly, creating tension on it (thereby stretching it as it sewed on) and the result was a lovely flat finish to the neck edge. I started off with less tension and finished with slightly more. You can see how flat it is on the right hand side where I finished the sample. I trimmed away the excess of the underneath fabric as well.
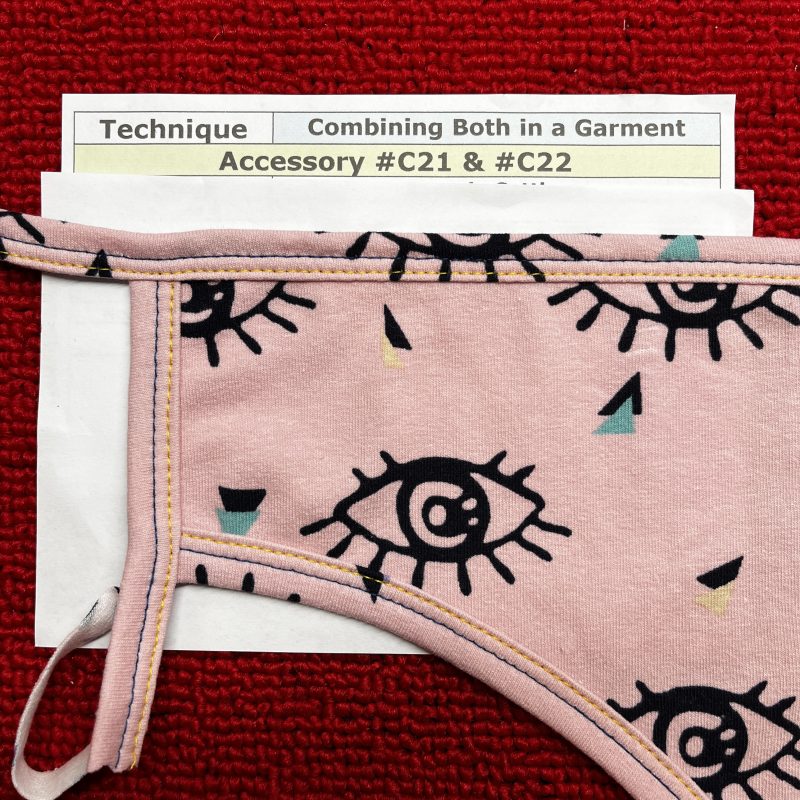
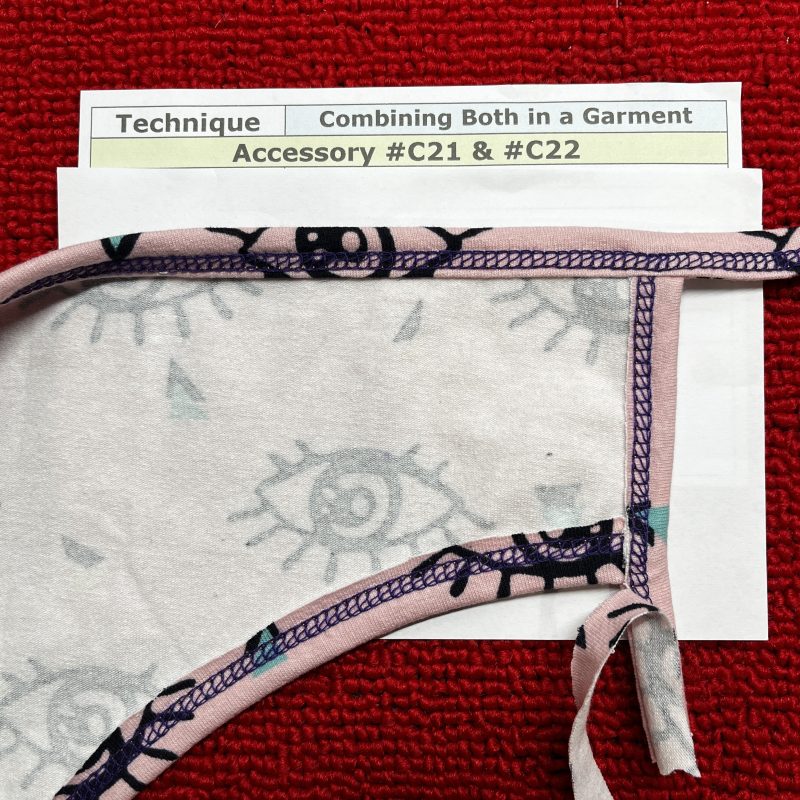
‘Combining both #C21 and #C22 in a Garment’ – When constructing a garment like a tank top, consider which of the binders will give you the best finish. For example, I would firstly use the #C22 Single Fold Binder on the front and back neck edges, trimming away the excess once stitched on. Armholes could then be bound with the #C21 Double Fold Binder, commencing at the side seam edge of the underarm front, continuing on to create straps after reaching the top neck edge, (bulk has been reduced here by previously using the #C22 Binder), then once the strap is at the required length, binding the back armhole edges down to the side seam. Close the side seam afterwards. I hope this makes sense to those who garment make. Of course, you could make ties at the shoulders as well from the Double Fold Binder straps.
Machine Setup #2: 3-Thread Coverstitch Narrow Stitch #23 Default Settings LC and CC Needle (Left Cover-Centre Cover) and 3 cones of Overlocking Thread
‘A little bit of Reverse Fun’ – for this sample I cut a bias strip of fabric, using my wavy rotary blade on one edge. I had some 2 1/2″ wide cut lengths of quilt binding leftover from a project, so it came in handy – I’m sure you’ll find bits and pieces around to play with like this. Simply cut into the new size needed … 1 1/2″ wide. I had Wonderfil 12wt Spagetti Thread in the Chain Looper to give a decorative finish to the underside of the stitch – which I intended to be the ‘on show/public’ side once finished … alongside the wavy fabric excess trim.
Machine Setup : 3-Thread Coverstitch Narrow Stitch #24 SL 4.0 – Tensions, CW and DF Default Settings – CC and RC Needles
You can see the wavy edge here on the batik when I started, and I played thread chicken to finish this sample … only just made it!!
Points to remember for both #C21 and #C22 Binders
Ensure you have Needle Stop Down selected on your machine.
Always sew a piece with just the strip itself to check where the needles hit on the folded band. Move the binder sideways slightly until you are satisfied with the stitch placement on the folded band. It also can take a few centimetres of sewing before the strip folds correctly.
Sew smoothly and evenly at the start, making sure the binding strip feeds cleanly without folding, catching or stretching too much.
... A Little Something Extra ...
Foot User Manuals
On the Bernina Website, you can download a User Manual for the Single Fold Binder #C22
Bernina have THE best educational tools available that you can download free, from the website. One of the best series is the Mastery Books, available over the years for many different models of sewing and embroidery machines, as well as overlockers, including the Bernette range as well.
Each Workbook can be printed out so you can stitch the samples and gain understanding of all the features and functions of your machine.
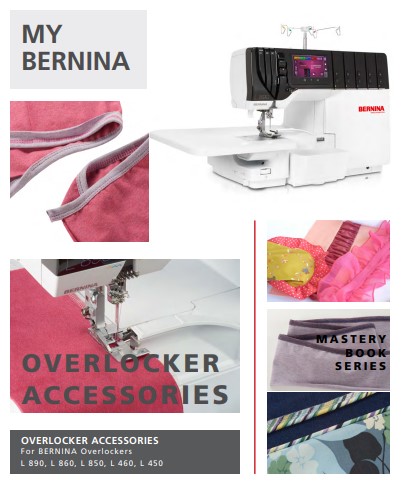
There is one in particular you will find useful throughout this Blog, (and I forgot to mention it right at the beginning) … and that’s the Overlocker Accessories Book. It was produced in 2022 so covers nearly all of the accessories available now for the L Series Overlockers (L450, L460, L850, L860 and L890), with the exception of those introduced afterwards of course, like the Belt Loop Folders. It sets out exercises for you to complete, and is a great tool for referring back to after completion.
is Zipper Foot #54 with Non-Stick Sole – 20% off – contact your preferred Bernina Dealer for this fabulous offer … for accurately sewing in zippers of all sizes and slides smoothly on plastic, vinyl and leather
20% off other Accessories still available until end of the month as well!
*Australia and New Zealand Promotion Only – ends … 31st May 2026
Discover limited-time offers on selected BERNINA machines and accessories. Whether you’re upgrading or starting your sewing journey, there’s something special waiting for you.
Here’s a link to details on this month’s promotion …
‘Foot’note: when using the Binders, there are a couple of different feet you can use. Love the new Clear Cover/Chain Foot #C28, however the Clear Curve Foot #C23 (next week’s foot), Cover-/Chainstitch Foot #C13 and Clear Combo Foot #C27 could also be used. I like the clear feet as they give a good view togetting the binding in the right position.