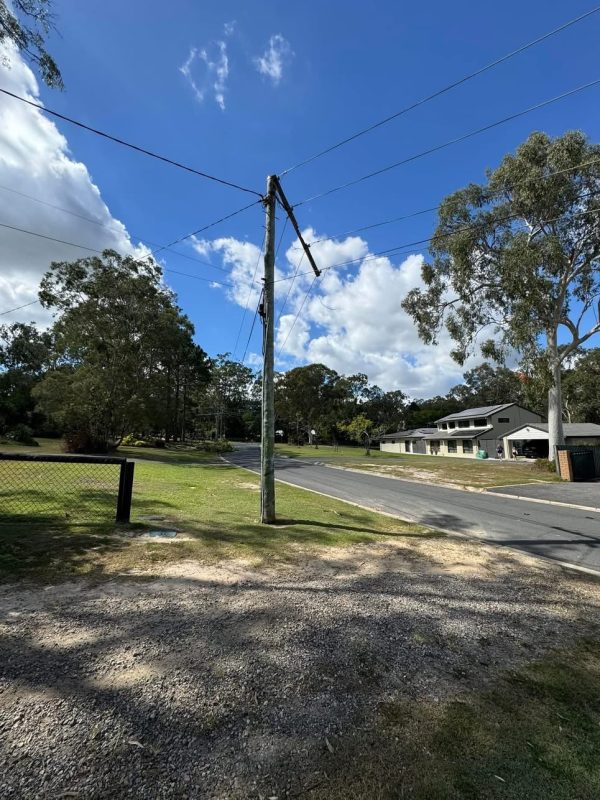
This week’s blog post is arriving a little later than planned, thanks to an unexpected “power down” day when a tree took out the lines and left us without electricity for almost an entire working day. Not exactly ideal—but sometimes these interruptions have a way of reshaping the rhythm of the week.
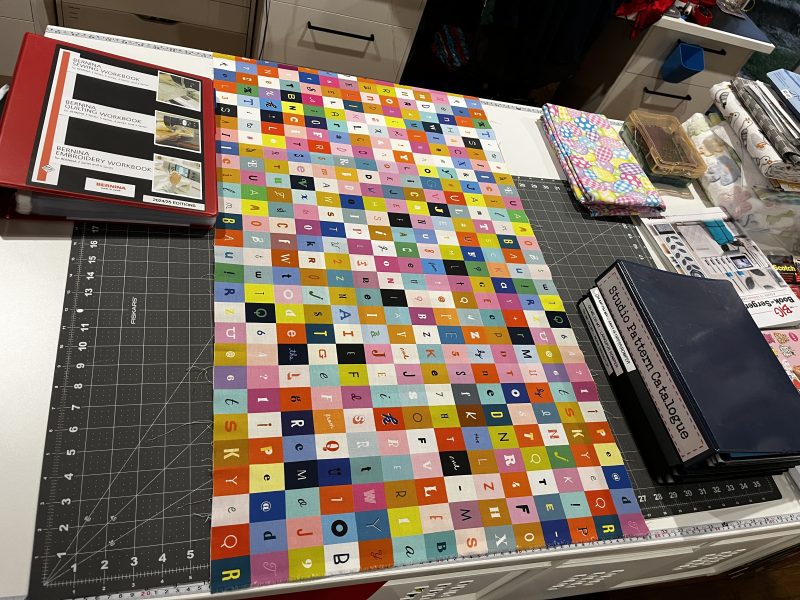
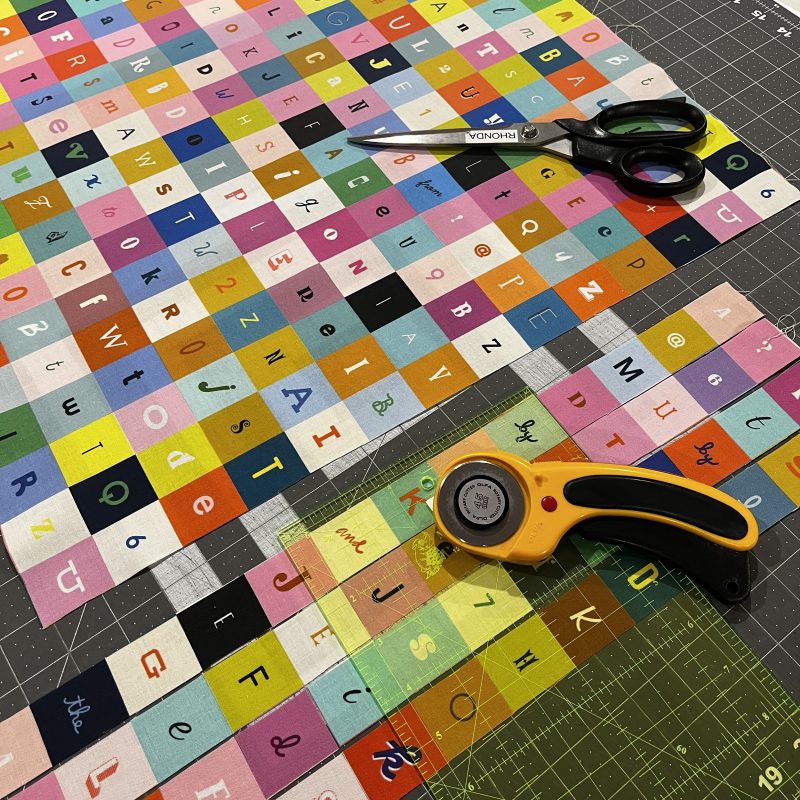
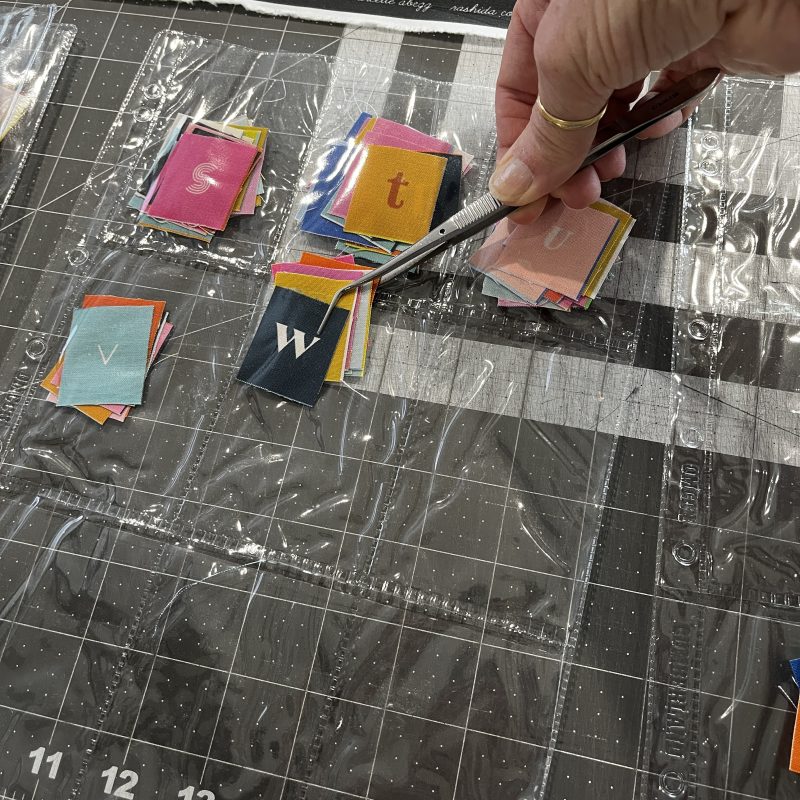
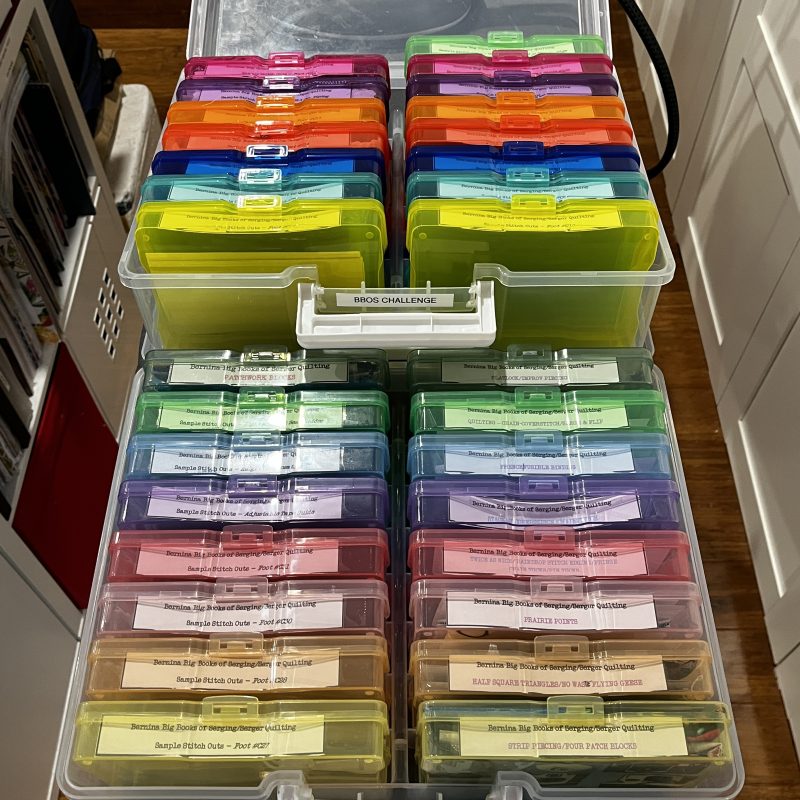
Without the usual distractions, I turned to quieter, hands-on tasks. I spent a satisfying stretch of time cutting up some fabulous Ruby Star fabric letters and sorting them neatly into folders, and finally printed and labelled the rest of my little boxes for all the blog posts to come. There’s something deeply reassuring about getting organised like that—future projects quietly lining up, ready to go.
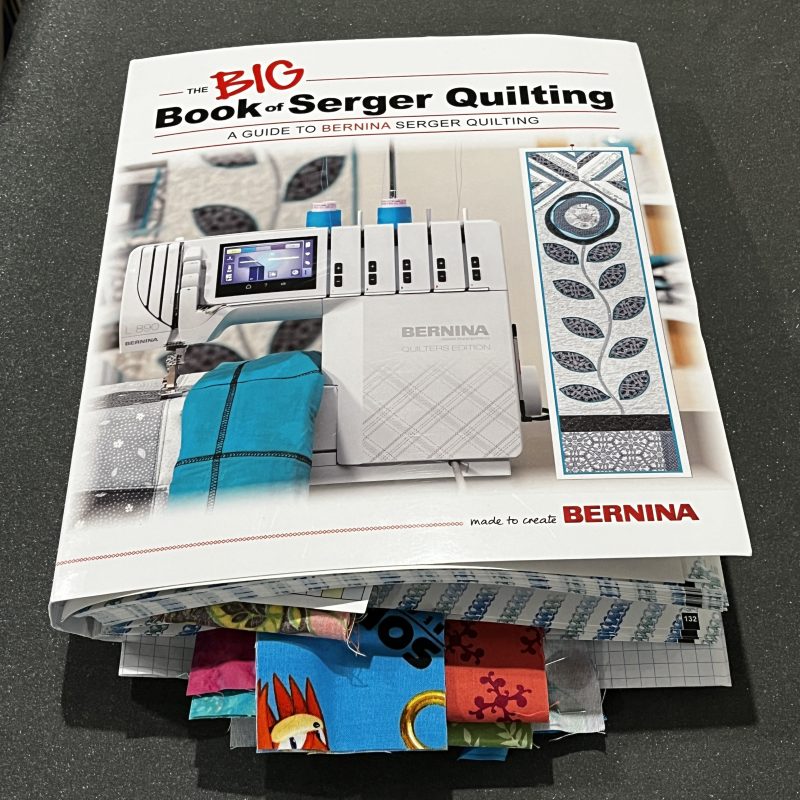
I also prepped ahead for the “Piecemaker” section, cutting all the samples so they’re ready to sew. It feels good to be at that stage—everything poised for the stitching to begin. My book is bulging!
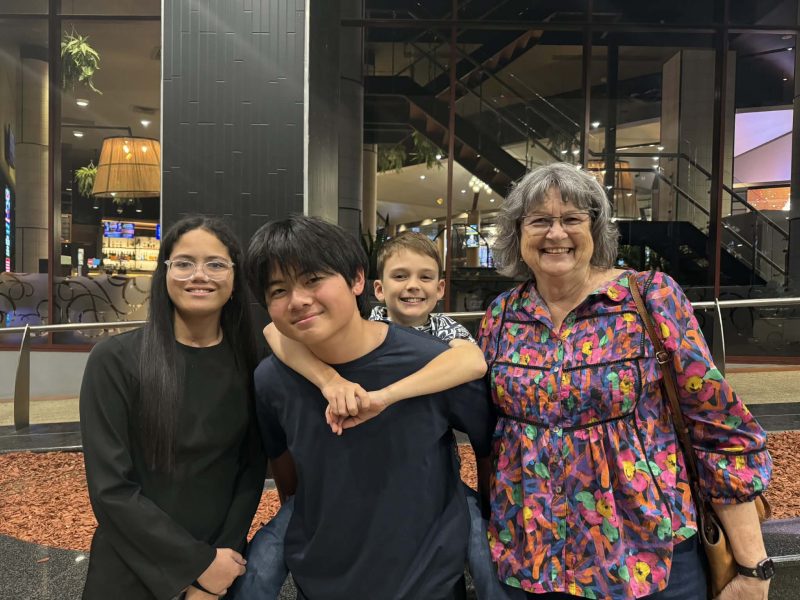
Outside of sewing, it was a week filled with celebration. I had a lovely birthday, marked with lunch and dinner out with family (here’s a photo of me with Ambah, Lucas and Leo), I even wore my Liberty blouse —the one I made for the Melbourne Liberty Showcase event—(Sally had only seen it in a photo she said) and I felt absolutely wonderful in it, which is really what it’s all about, isn’t it? The fabric feels so beautiful on.
Before we left for dinner I had a cheerful FaceTime singalong from Bobby that made the day feel complete. Little Summer wasn’t too sure what was happening – sorry poor quality pic from a screenshot!
A slightly slower, slightly different week—but full in its own way.
... Did You Know? ...
Differential Feed
This week’s #C18 samples were all stitched with the Differential Feed altered. This is a function on the overlocker that changes the way the fabric is fed under the presser foot. You can use it with all the feet, and it is not limited to just creating a gather, although it does that fabulously!
Rather than going into an in-depth explanation of how it works and why you would use it, I will include here a link to a very informative video by a Canadian Bernina expert, which was posted on the We All Sew Blog some time ago.
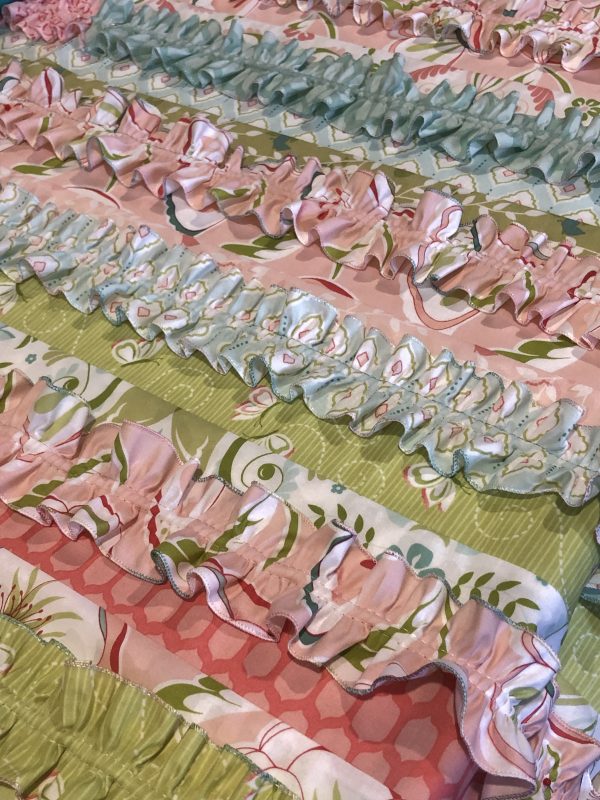
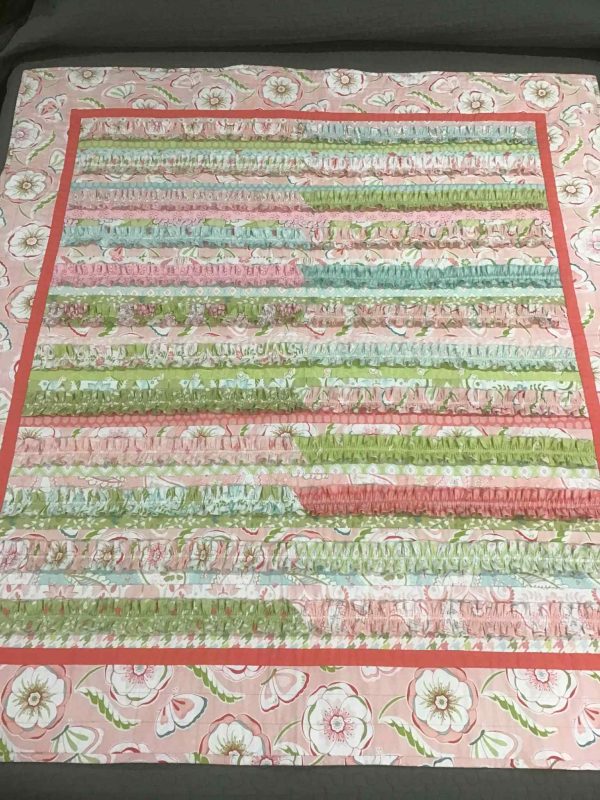
Bernina Overlocker Gathering Feet can only be used whilst in the overlocking mode, however you can still gather fabric in Coverstitch or Chainstitch mode by engaging the Differential Feed to a setting of 2.0 and using one of the feet suitable for these stitches, e.g. #C11 Combination Foot, #C13 Coverstitch/Chainstitch Foot or the clear versions of these feet #C27 or the new #C28. I made a lovely quilt some time last year and made ruffles to attach to the top. I roll hemmed the edges first, and then gathered them with a 3-Thread Wide Coverstitch. Here’s some photos to show you how lovely those ruffles turned out. I ‘quilted’ them onto the quilt, with my B990 Sewing Machine and Walking Foot #50.
... The ‘Piecemaker’ ...
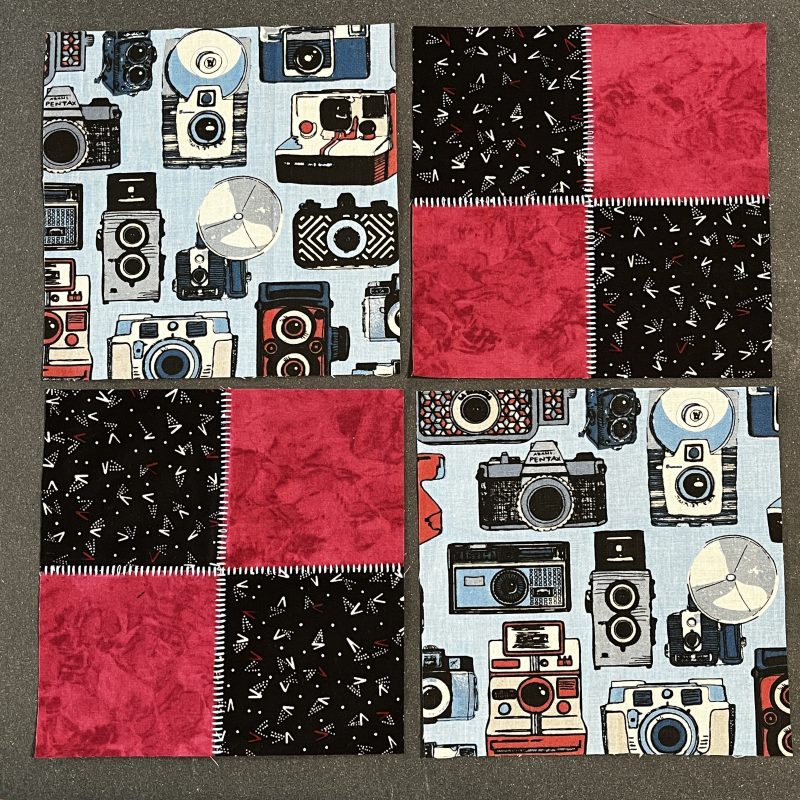
When I was cutting samples this week for this section, I noticed I had left out a block two weeks ago! So here’s the Double Four Patch Block (Big Book of Serger Quilting Page 127) that should have been included within the Piping Feet #C16S etc Blog Post.
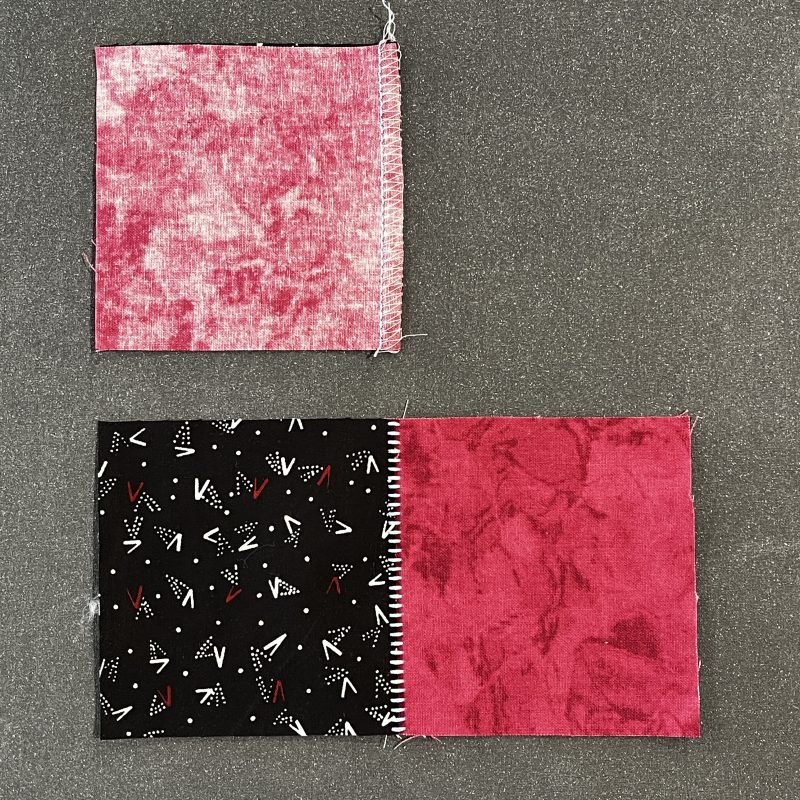
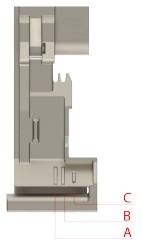
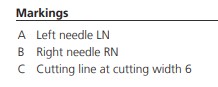
Machine Setup: 3-Thread Flatlock Wide Stitch #5 SL 2.5 LN 1.5, UL 4.0 LL 7.0 CW 6. Wonderfil Fruitti 12wt thread in LN (Topstitch #90 Needle) and Seracor OL Thread in LL. This gives a lovely variegated finish to the finished outside seam.
Step One: Construct two 4-Patch small blocks using the eight 3 ½” squares as per 4-Patch Block’s technique – fabrics RST to stitch – gently pull seams apart to see decorative ladders on right side of the fabric. Press.
Machine Setup: 4-Thread Overlock Stitch #1 all Default Settings – 4 x Seracor Overlocking Threads
Step Two: Stitch the two 4-Patch Blocks and the two 6 ½” squares together to form a Double Four-Patch.
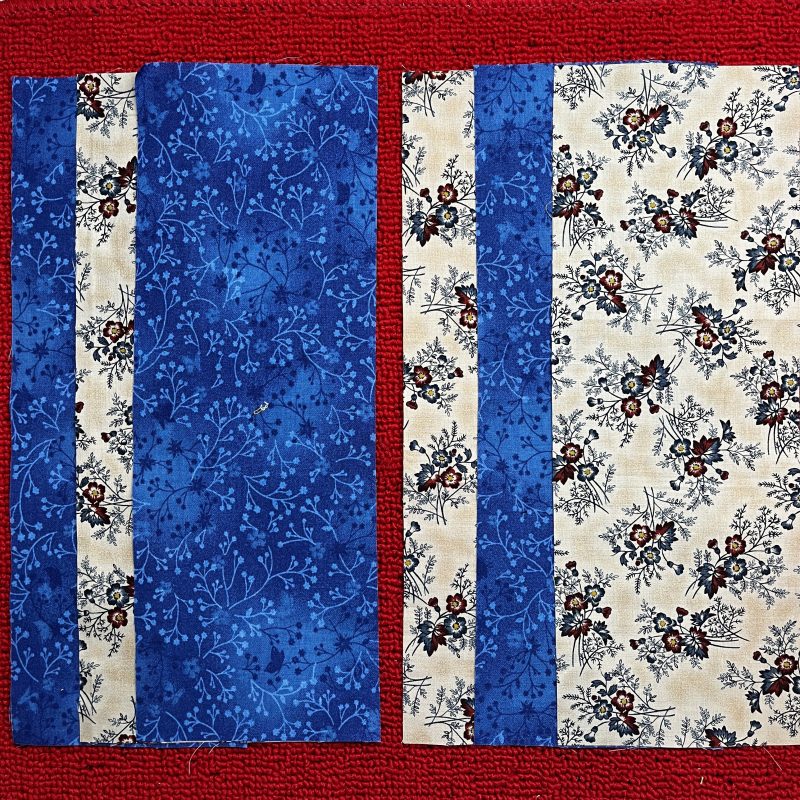
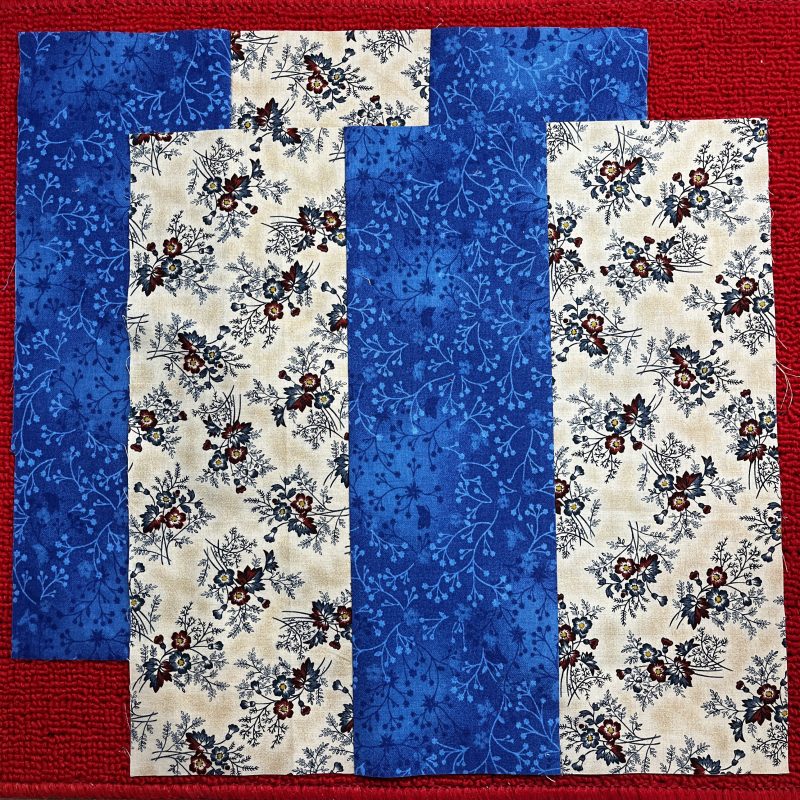
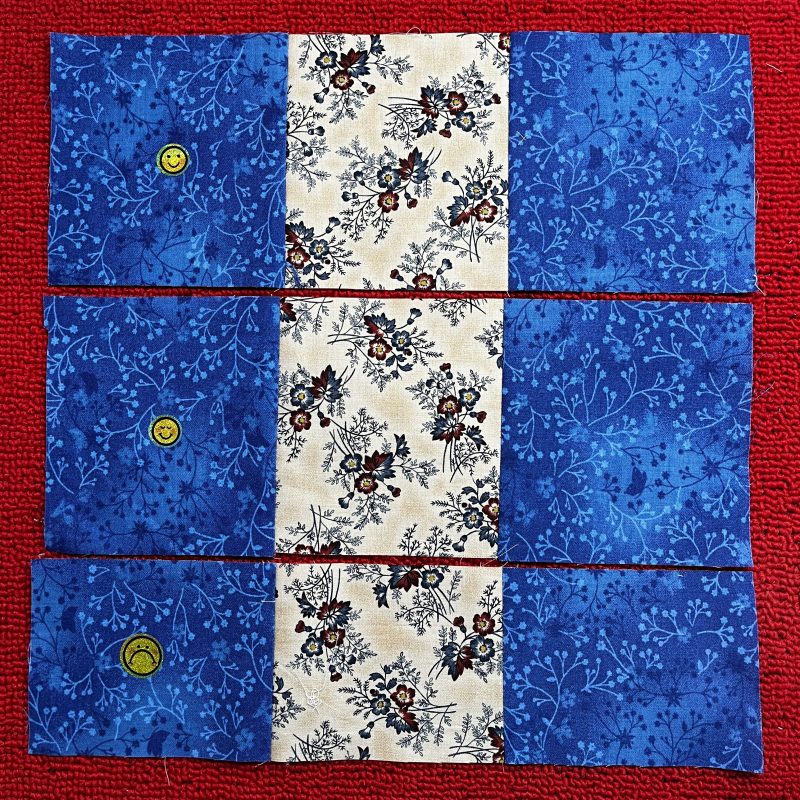
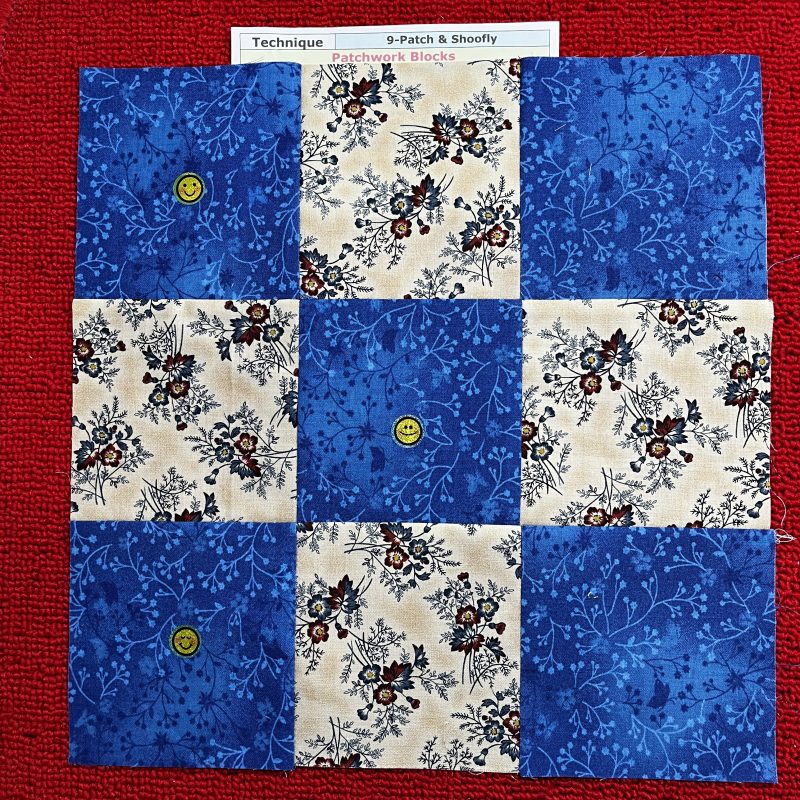
This week’s first patchwork block is the Nine Patch.
Sample Prep: Cut 3 Strips of Dark fabric – 4 ½” x 13 ½” and 3 Strips of Light fabric – 4 ½” x 13 ½” … Please note the BBOSQ has an error!! Page 129 –measurement read 4 ½” x 12 ½” … Strips should be 4 ½” x 13 ½”
Machine Setup: 4-Thread Overlock Stitch #1 all Default Settings – 4 x Seracor Overlocking Threads
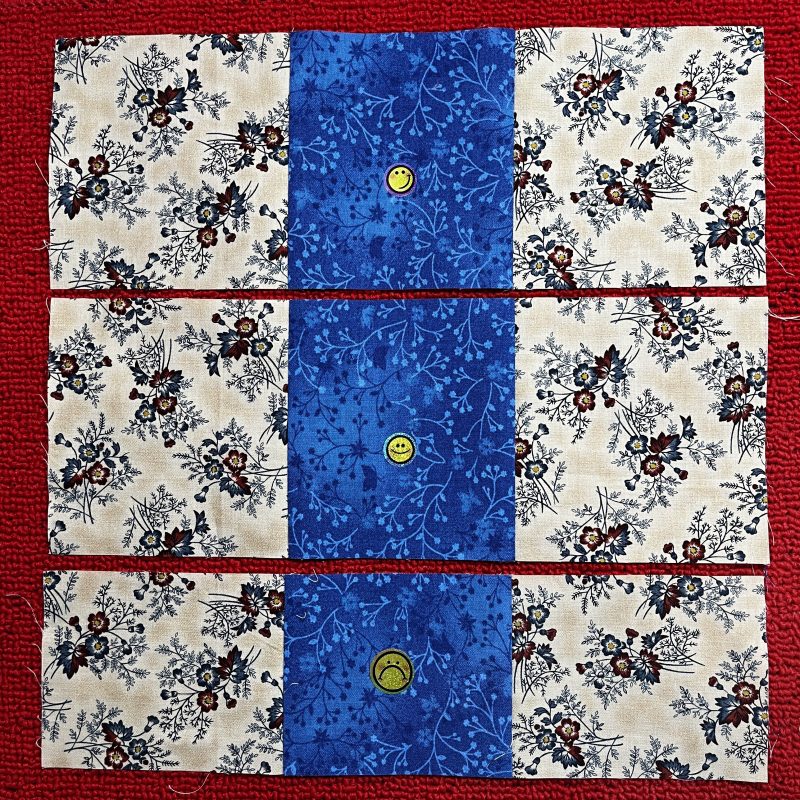
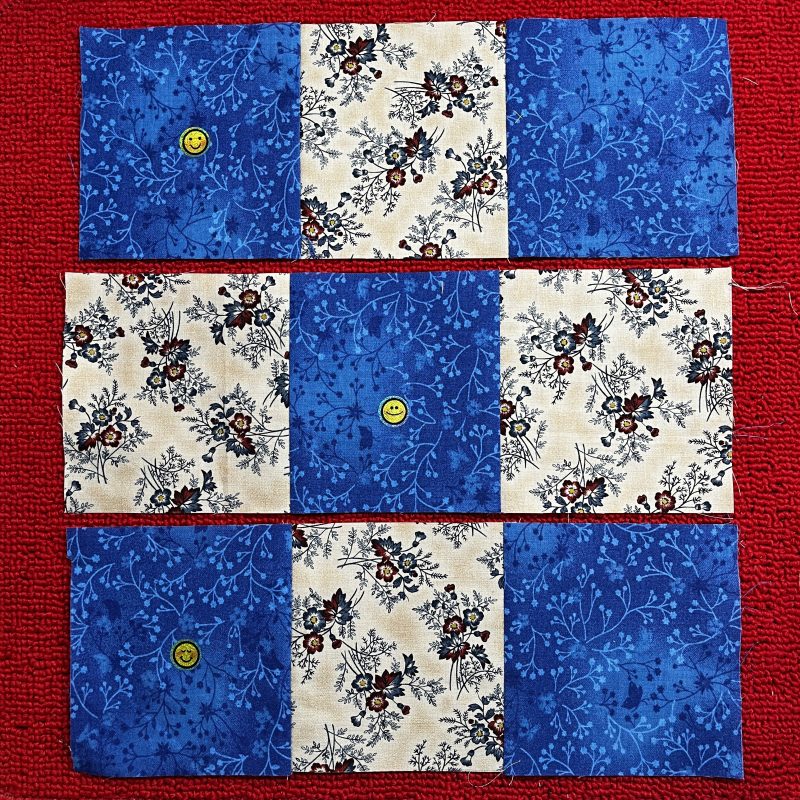
Step One: Divide Strips into two sets – Stitch with RST. Cut each stitched group into thirds. (3 strips @ 4 ½” = 13 ½” … not 12 ½” as per in the book!) I had precut all my strips as per the books instructions – so my three strips were … two @ 4 ½” and one @ 3 ½” – photos with smiley faces are correct – other one is not!
Step Two: Complete the block by stitching together three sets of strips. Press. I only managed one correct full block, instead of two.
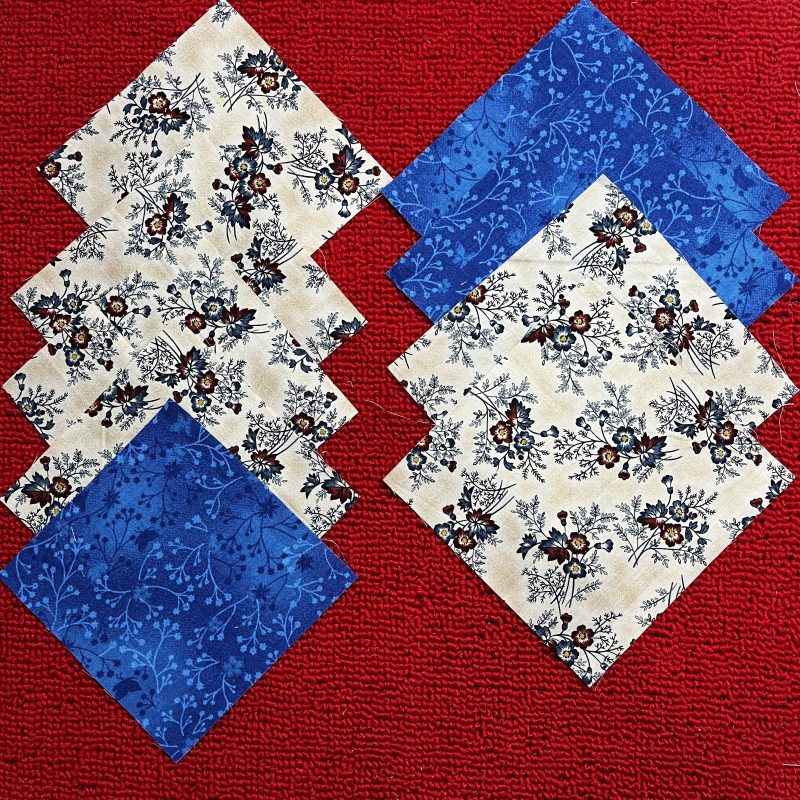
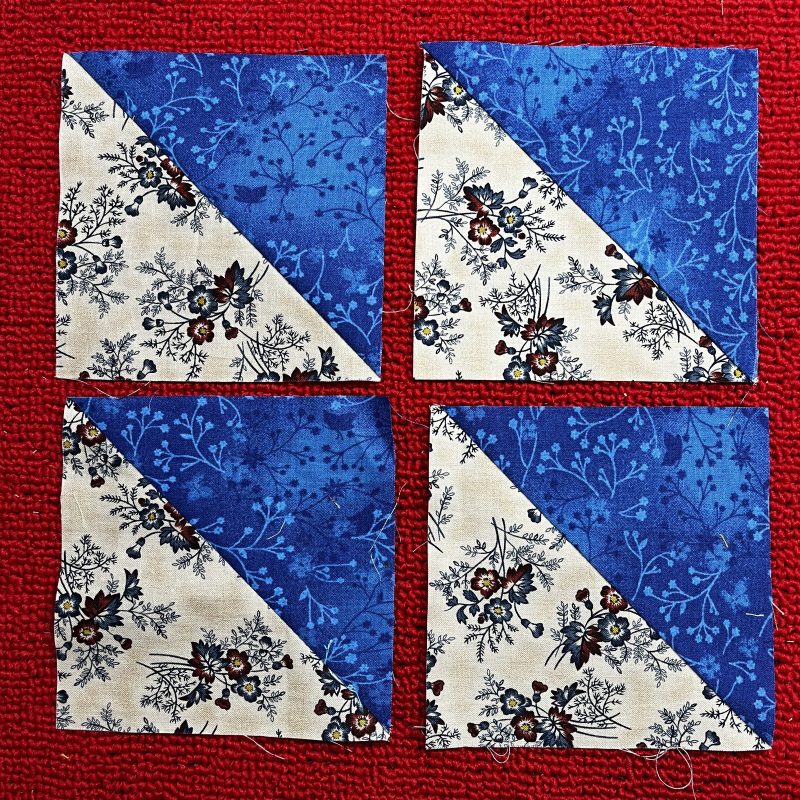
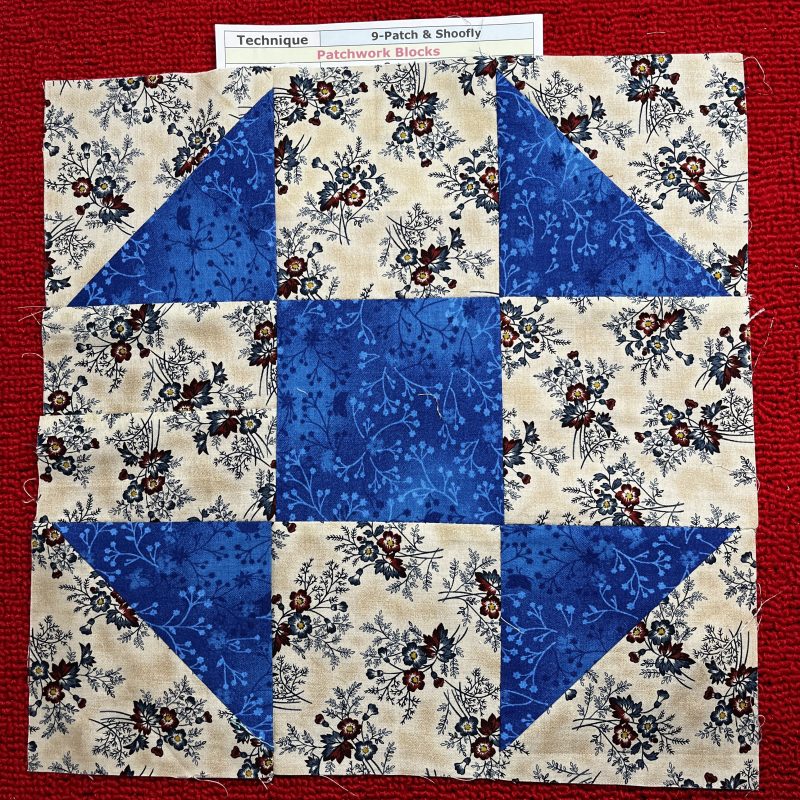
This week’s second patchwork block is the Shoofly.
Sample Prep: Cut 4 squares @ 4 ½” Light fabric, and 1 square @ 4 ½” Dark fabric (Centre square in this case) + 2 squares @ 5 ½” light fabric and 2 squares @ 5 ½” dark fabric for Half Square Triangles for corners of block.
Machine Setup: 2-Thread Chainstitch Stitch #16 all Default Settings – 2 x Seracor Overlocking Threads
Step One: Create two 4 ½” Half Square Triangles as per the technique and settings used in previous post.
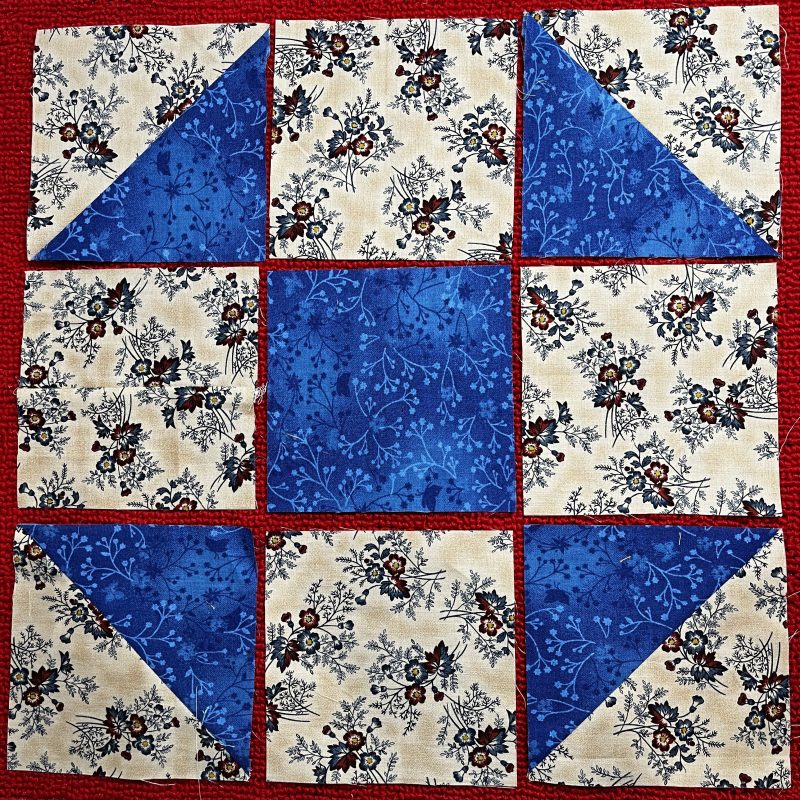
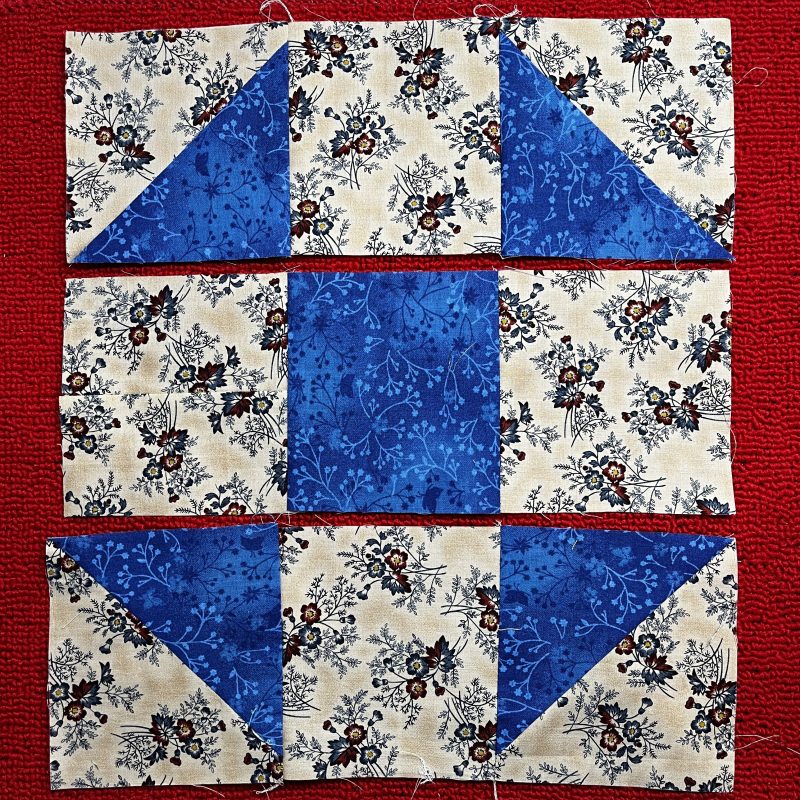
Step Two: Arrange the 9 squares into a Shoofly Block.
Step Three: Stitch the top three ‘squares’ into a strip. Repeat for the centre squares, and lastly, the bottom row of ‘squares’.
Step Four: Now stitch those three strips together to form a complete unit. I stitched with the 2-Thread Chainstitch Stitch #16 as the machine was already set up for that. You could change to a 4-Thread Overlock Stitch #1 if you prefer.
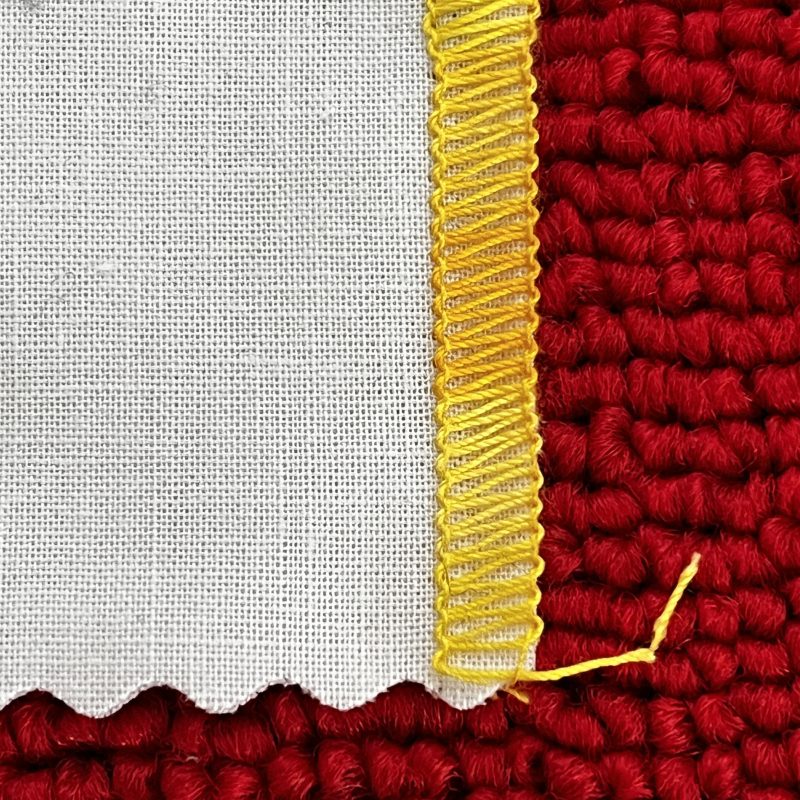
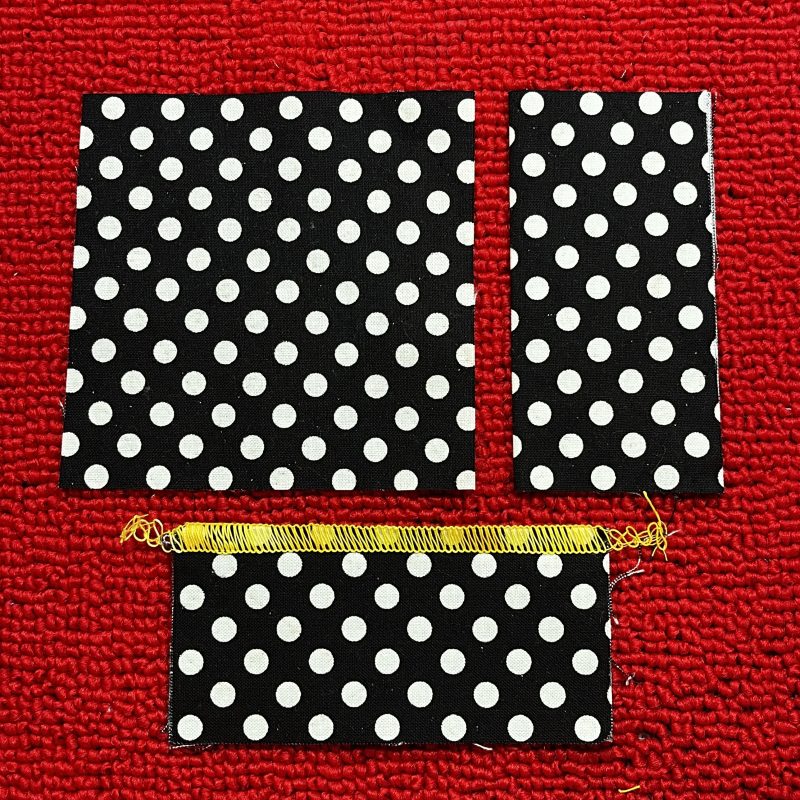
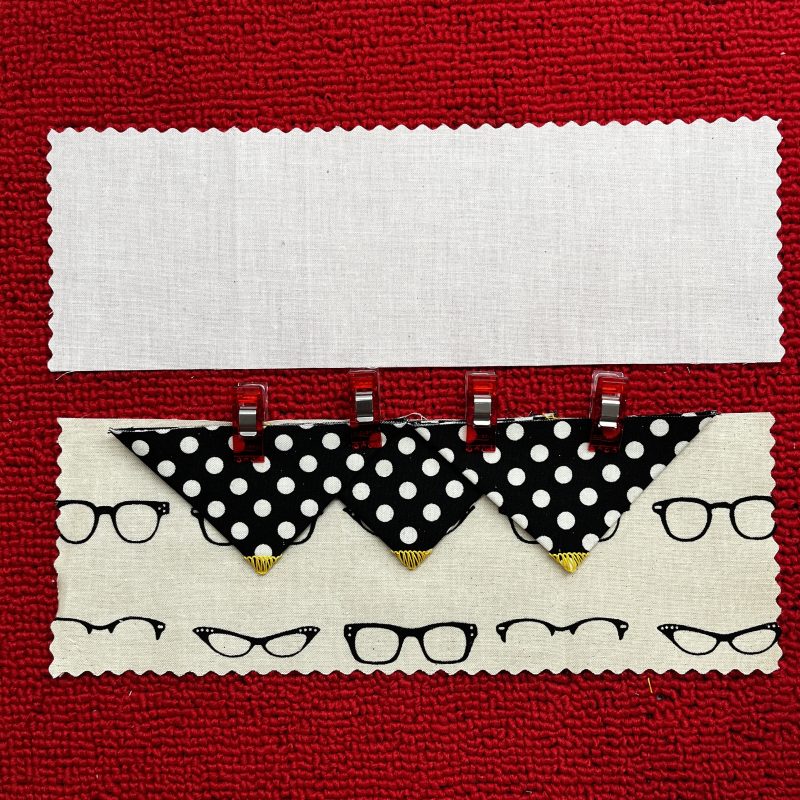
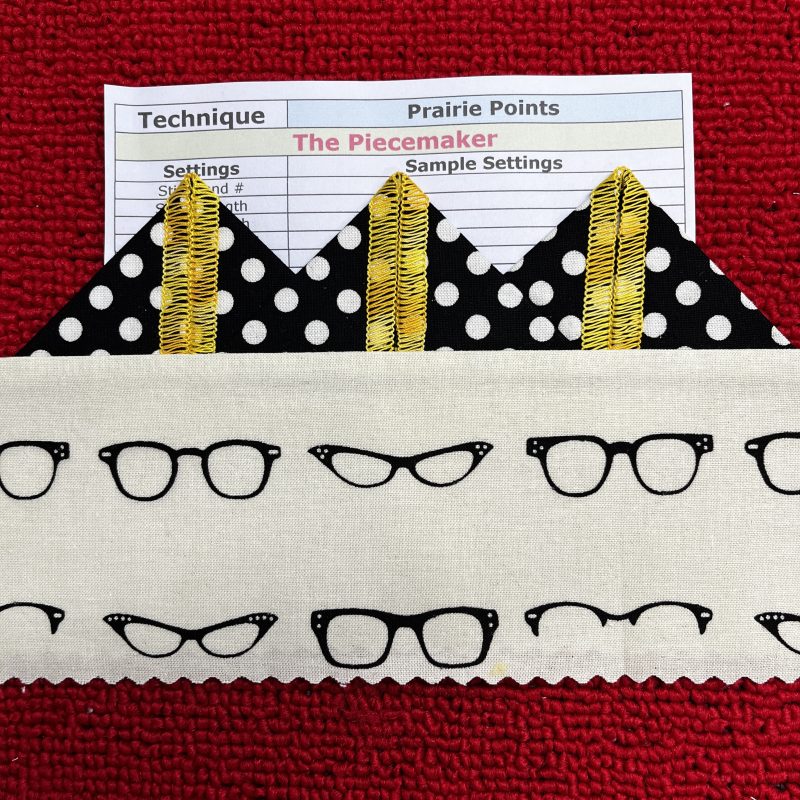
This week’s embellishment is Prairie Points.
Sample Prep: Cut 3 squares @ 4”, 1 rectangle of main fabric 9” x 4” and 1 rectangle of backing fabric 9” x 4”
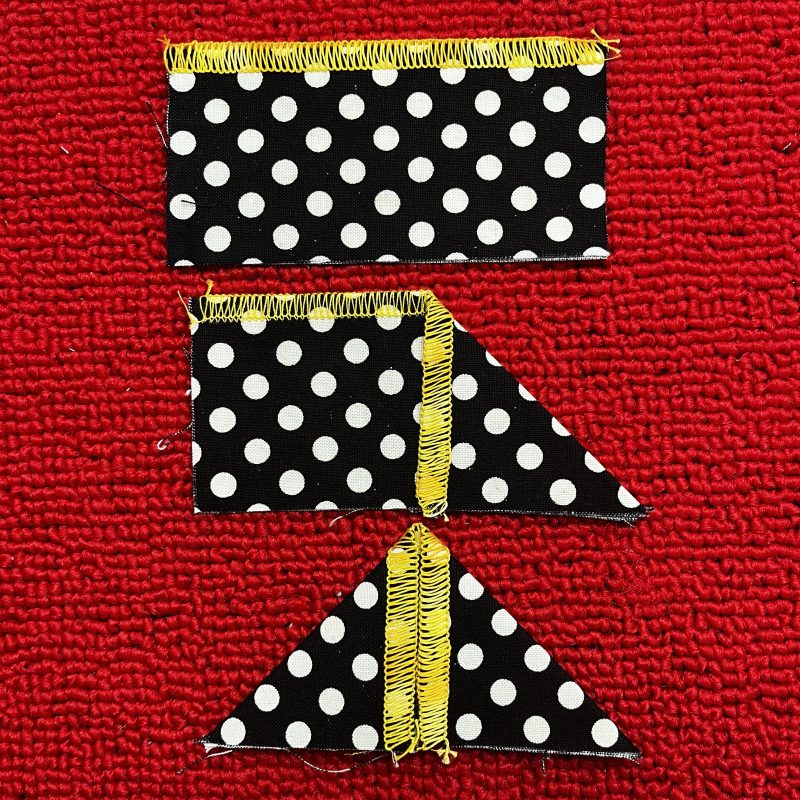
Step One: Fold each of the squares in half, wrong sides together and press. Stitch along the fold without cutting to create a trimmed edge. Fold again into triangles with the right side of the stitch now on top.
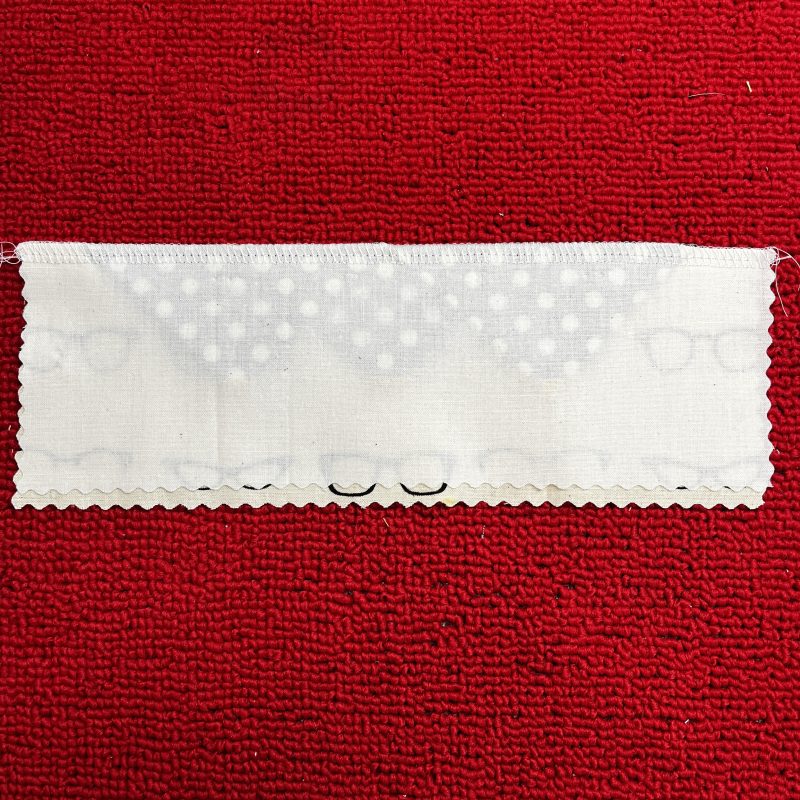
Step Two: Arrange along one long edge of the main fabric, overlapping if you wish, right sides facing, and place backing piece on top, wrong side up.
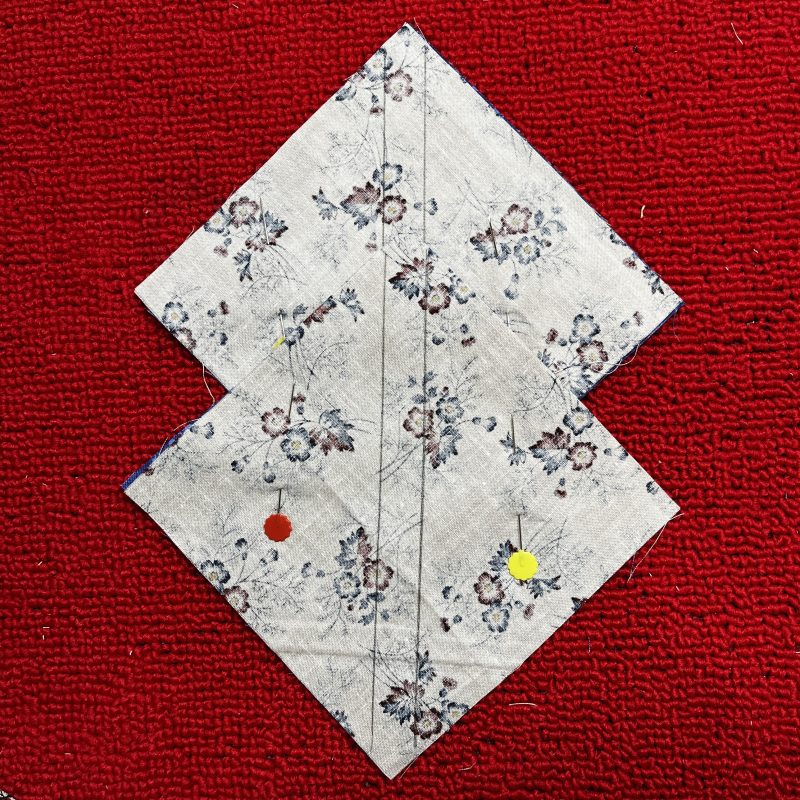
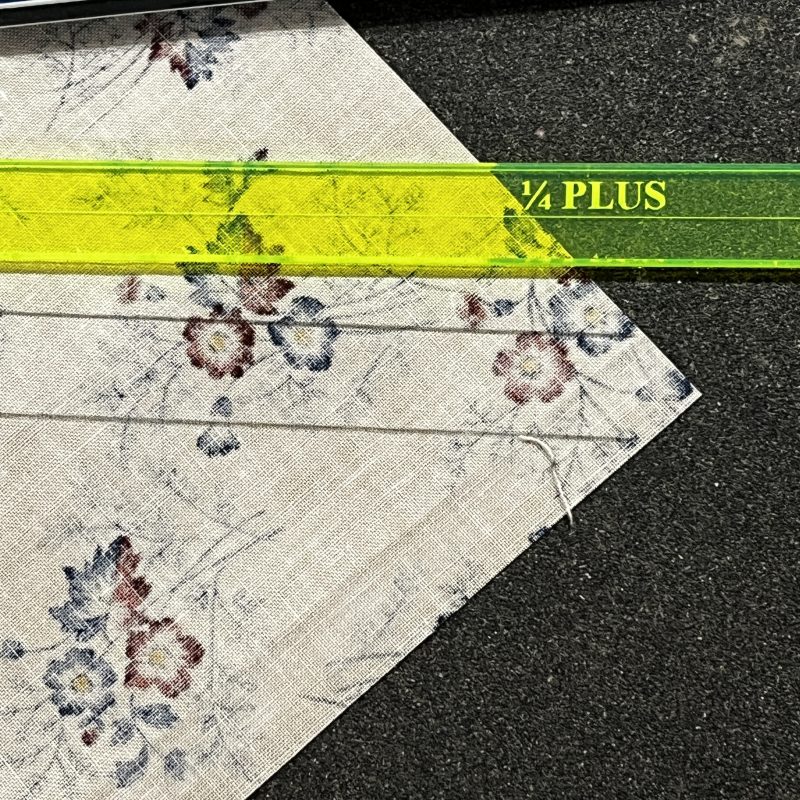
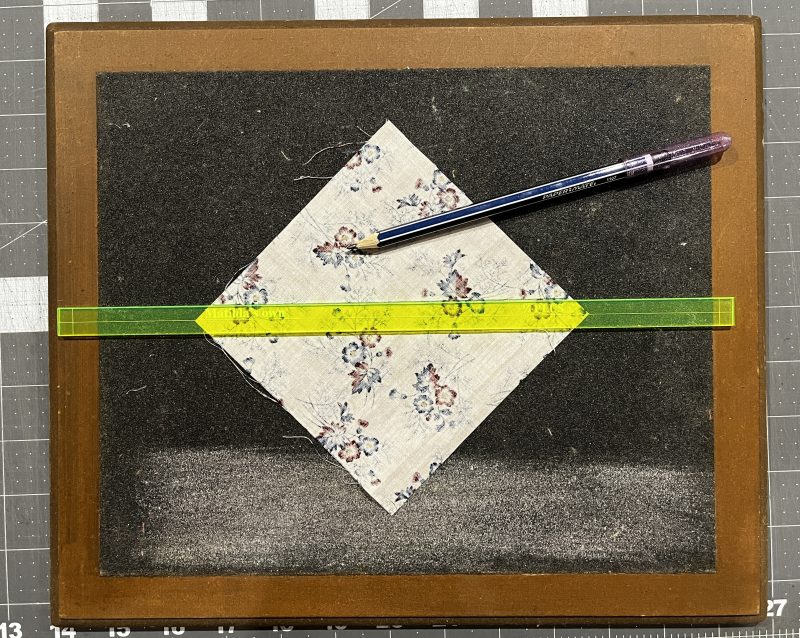
This week I took out my ‘trusty sandpaper board’ my dear Dad made me many years ago – (sadly passed away in 2013, aged 70) – it is a well used and loved tool here in the Studio. Together with my little ¼” Plus ruler, drawing the lines across the block this week, I aligned the centre marking with two opposite diagonal points, and drew either side for the stitching lines, which is all you need as the blade will cut them apart when stitching the second line. The sandpaper board grips the fabric when drawing on the block. These two ‘tools’ though so simple, truly make a huge difference!
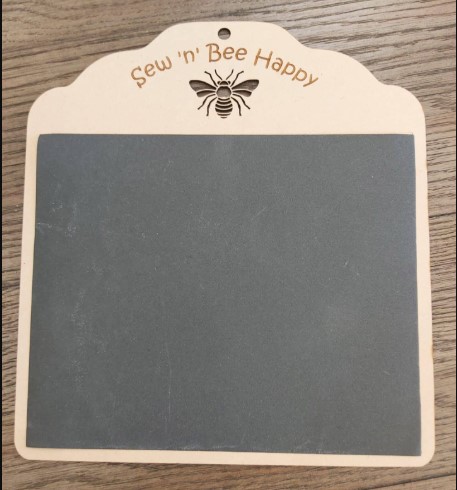
Google Search ‘Matildas Own Quarter Plus Ruler’ and you will find several Australian distributers for them – less than $10! As for the Sandpaper Board – here’s a cute one I found …
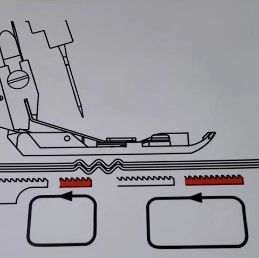
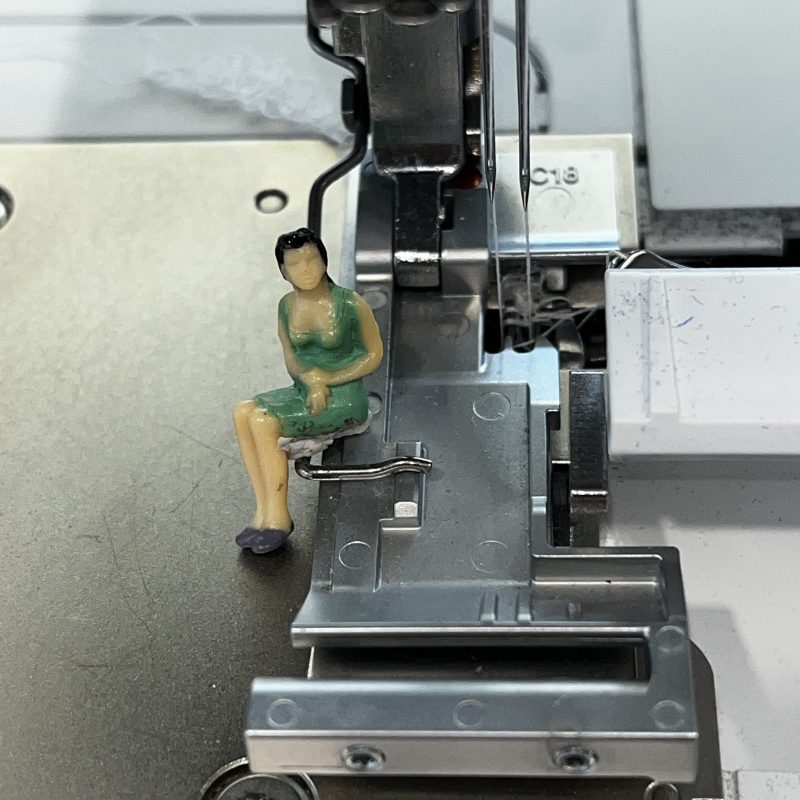
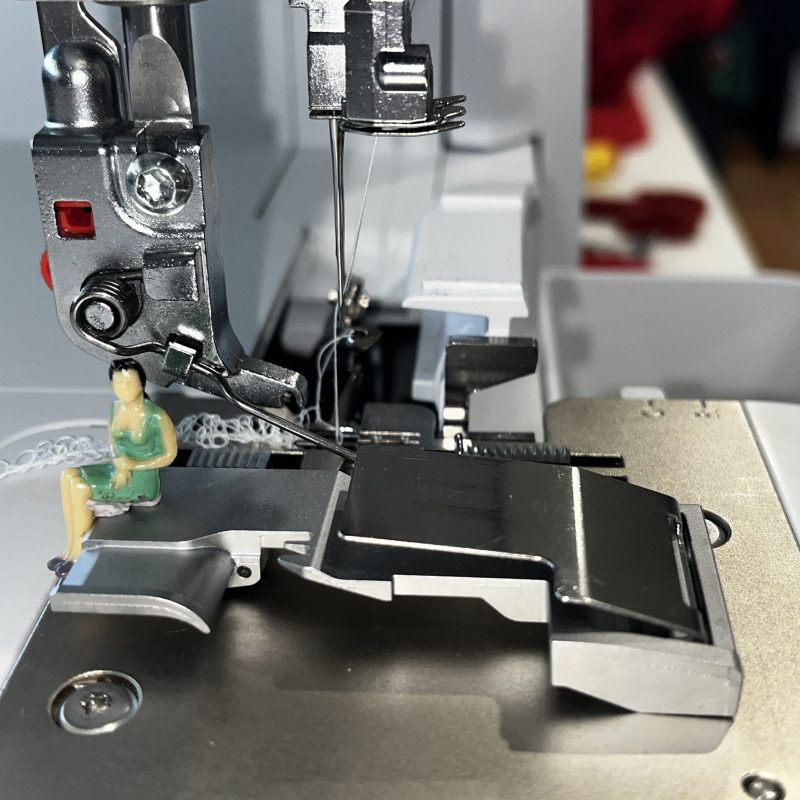
The gathering foot, designed for use with machines in the Overlocking mode only, has an opening that guides fabric between the top portion of the foot and the gathering plate. This allows you to gather one layer of fabric while attaching it to the fabric that will not be gathered.
There is a cutout section underneath the foot after the needle area where the gathered fabric can smoothly flow through.
Foot #C18 can be used with either one layer of fabric or for attaching a flat layer to a gathered layer.
Here is a link to the Bernina International video for this foot.
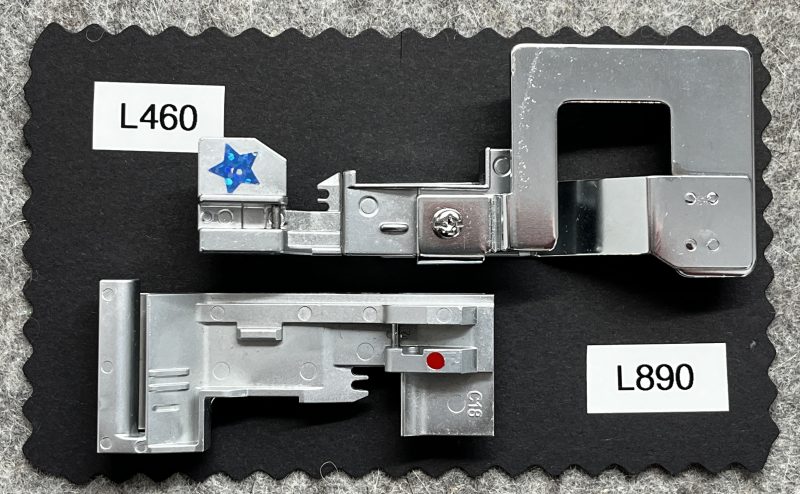
Bernina L450 and L460 – foot is called the Gathering Foot
Bernette Funlock 40 Series (b44, b48) and Airlock 60 Series (b64 and b68), machines with overlock function, foot is called the Gathering Foot.
... This Week’s Foot Highlights or Challenges ...
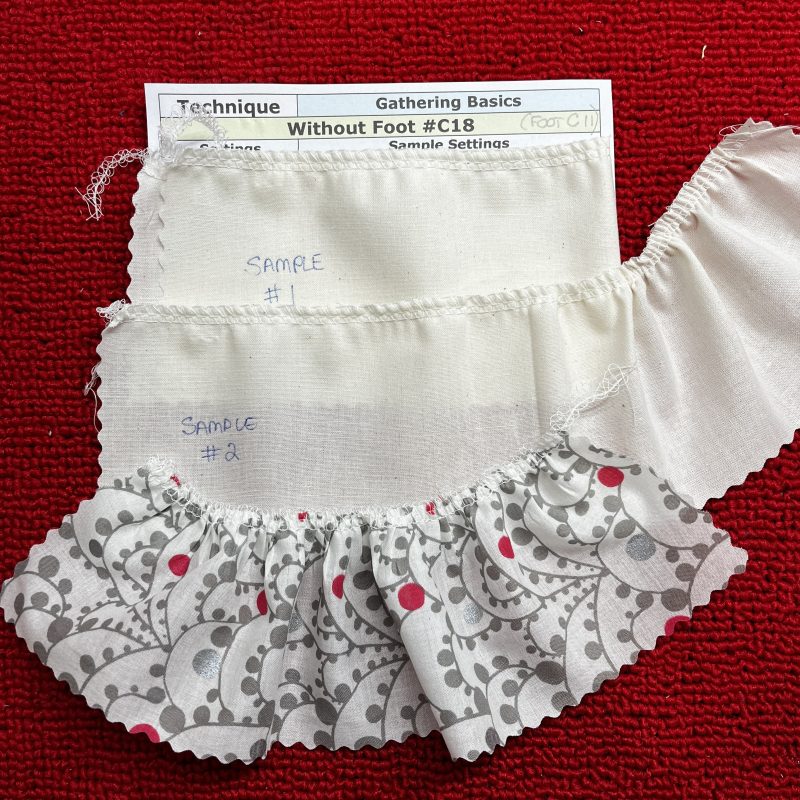
4-Thread Overlock Stitch #1 for all samples this week, and 4 cones of Seracor Overlocking thread. Settings noted in sample descriptions. I started with Gathering Basic samples using Foot #C11 to show the difference Gathering Foot #C18 makes. Single layers sample pieces were cut 12” long.
‘Gathering Basics – Using Foot #C11’ – Sample #1 SL 4.5 DF 2 results in a very slight gather. Sample #2 I pulled up the needle threads to create a fuller gathered edge. Sample #3 i changed to a finer weight fabric, and increased both needle tensions to 6.0, resulting in a nice gather on this fabric just with the machine.
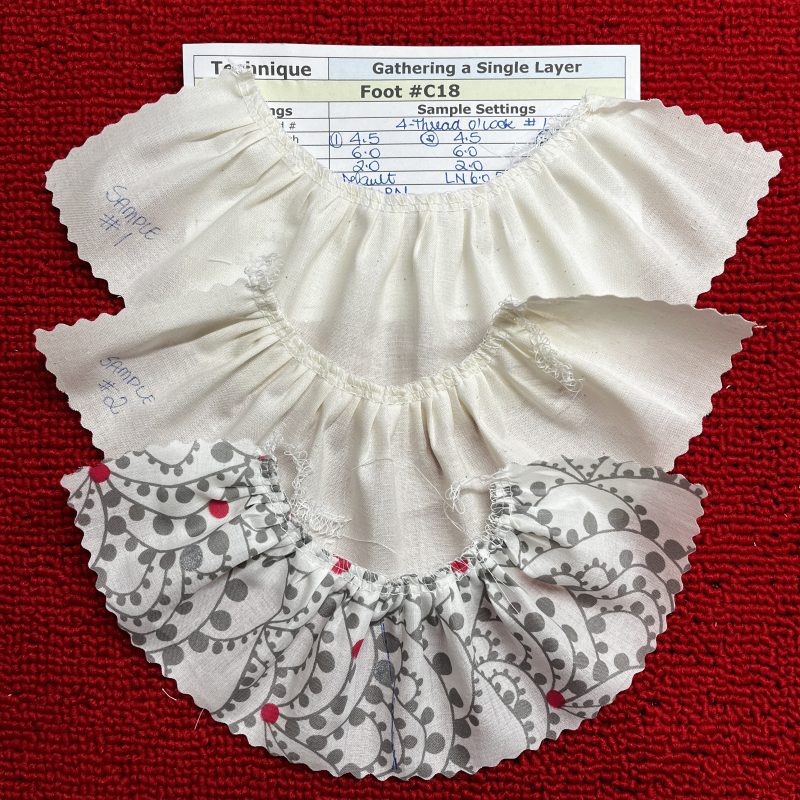
‘Gathering a Single Layer’ – stitched using the Gathering Foot # C18 … Sample #1 SL 4.5 DF 2 results in a lovely gather. Sample #2 increased both needle tensions to 6.0, resulting in a fuller gather on the same fabric Sample #3 I changed to a finer weight fabric, SL 4.5, DF 2 on half, then increased both LN and RN tensions to 6 for an even fuller gather. This foot creates gathering so easily.
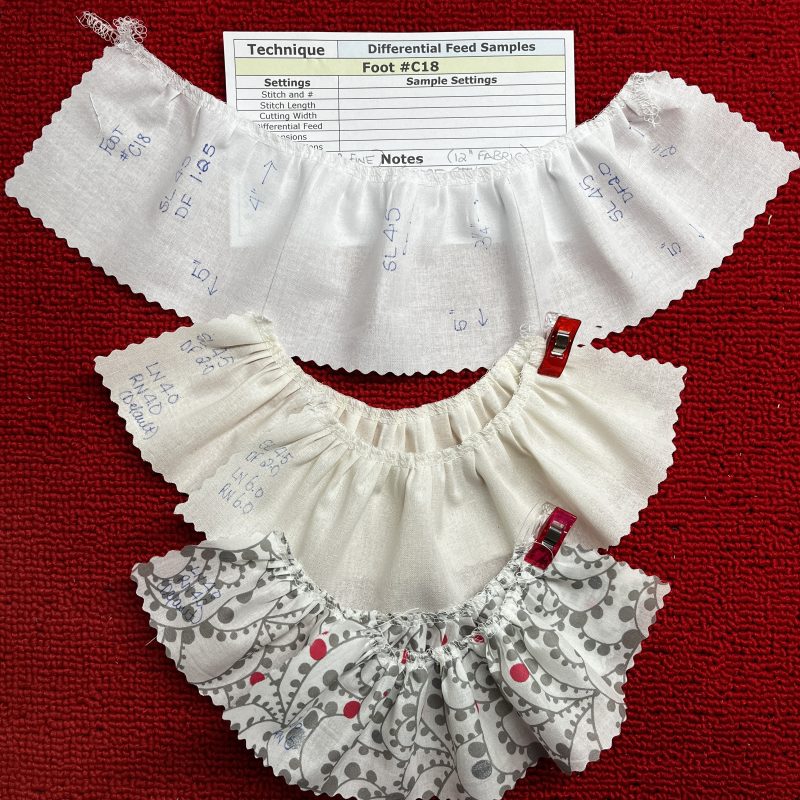
‘Differential Feed Samples’ – these were to showcase increasing the ratio on the Differential Feed to increase the gather. I measured off in 5” segments – DF 1.2 resulted in 4” of gathered fabric, DF 1.5 resulted in 3 ¼” of gathered fabric and DF 2 resulted in 2” of gathered fabric.
The two cream homespun samples show where I increased the needle tensions from the default of 4.0 to 6.0 resulting in a tighter gather.
The two printed finer fabric samples show the difference where I again increased the needle tensions from the default of 4.0 to 6.0.
Always test your settings on fabric that is the same as what you are using in your project. Your results will differ depending on what weight fabric you are gathering, and what settings you choose.
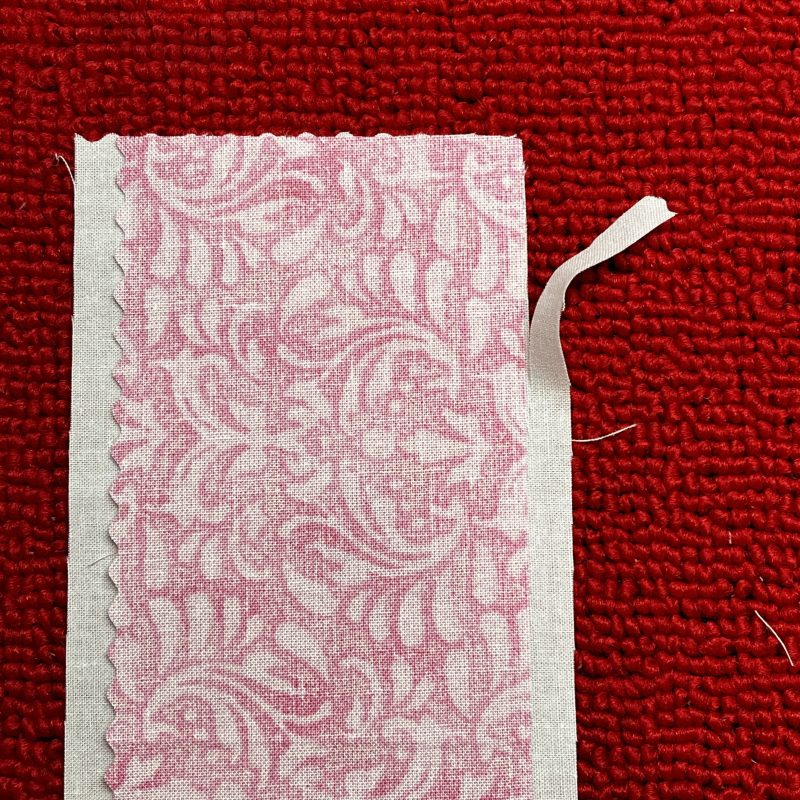
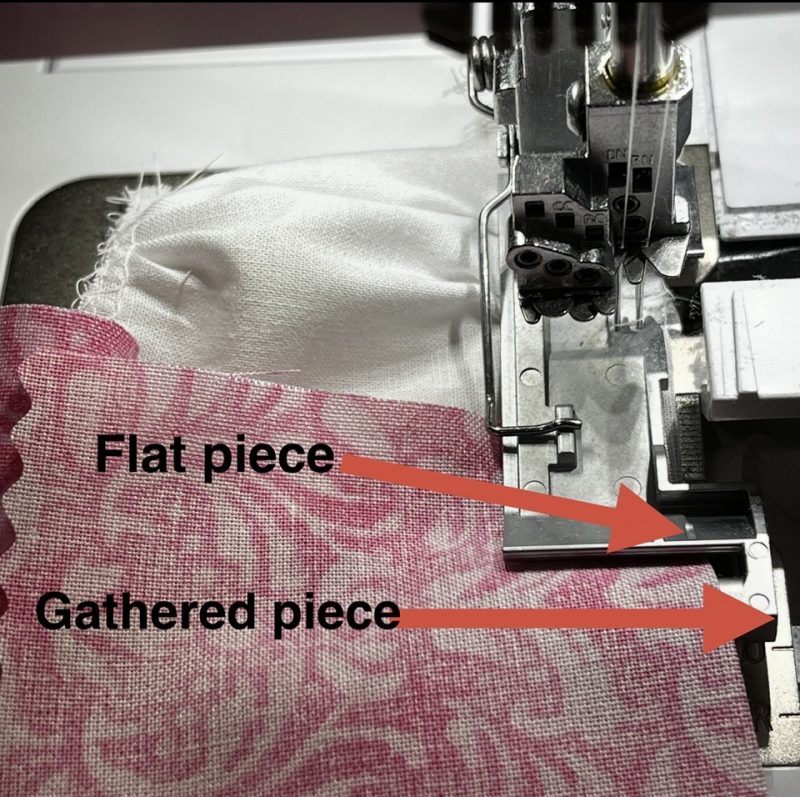
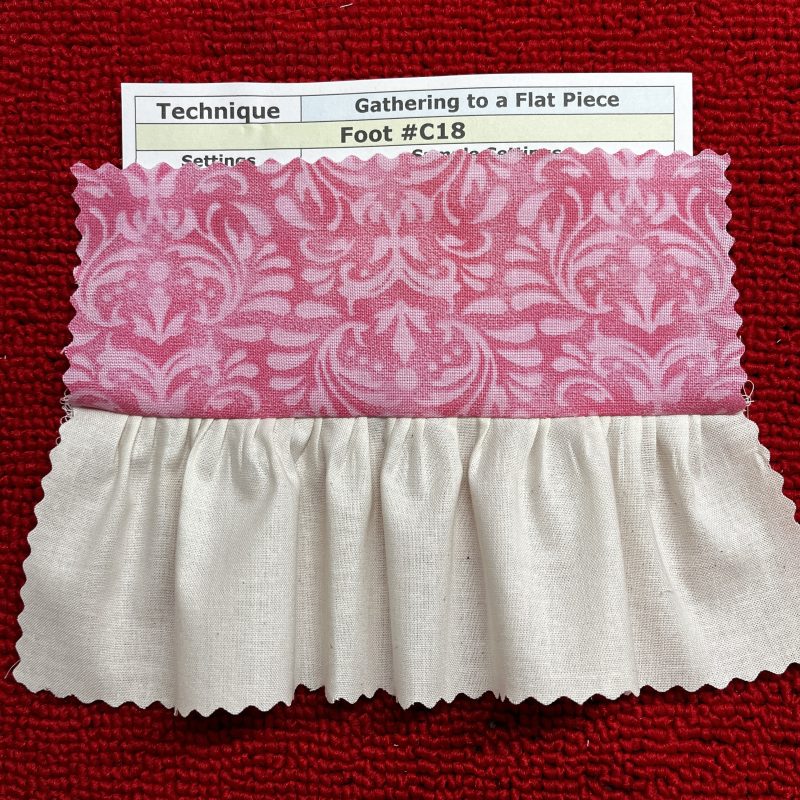
‘Gathering to a Flat Piece’ – start with two layers right sides together under the foot, and handwheel or needle up/needle down to hold them together. SL 4.5 DF 2.0 CW 6.0 – rest of settings Default. I trim off a small section from the underneath fabric, about the length of the foot, and approx 1/4” wide. Here is where I place them under the foot – flat fabric lines up with the marking for the blade on the foot … and lower fabric to be gathered is lined up to right hand edge of foot. STITCH SLOWLY! The bottom layer of fabric will want to ‘gallop’ in, so guide gently.
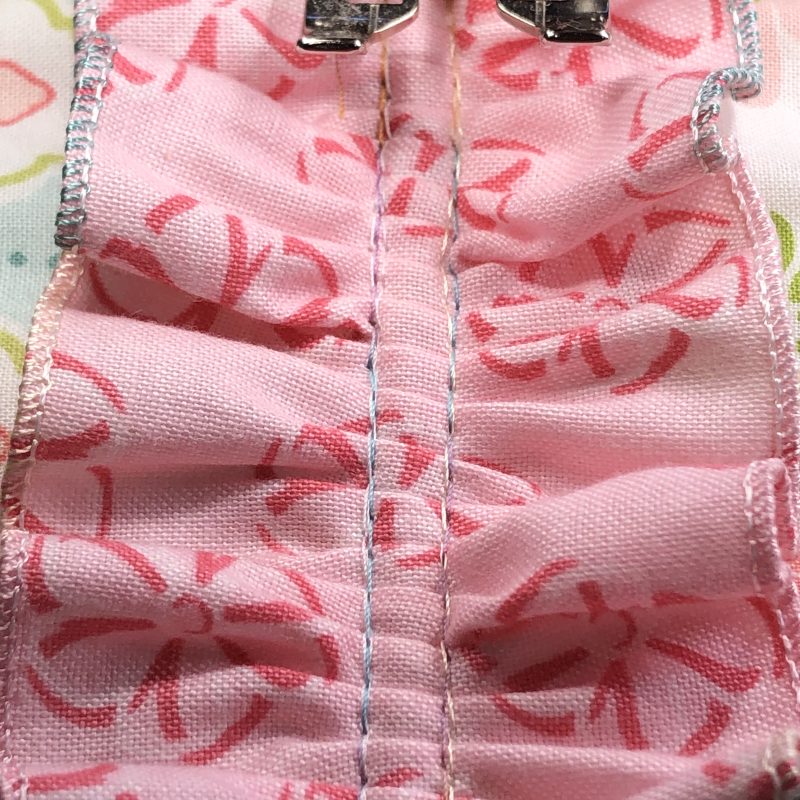
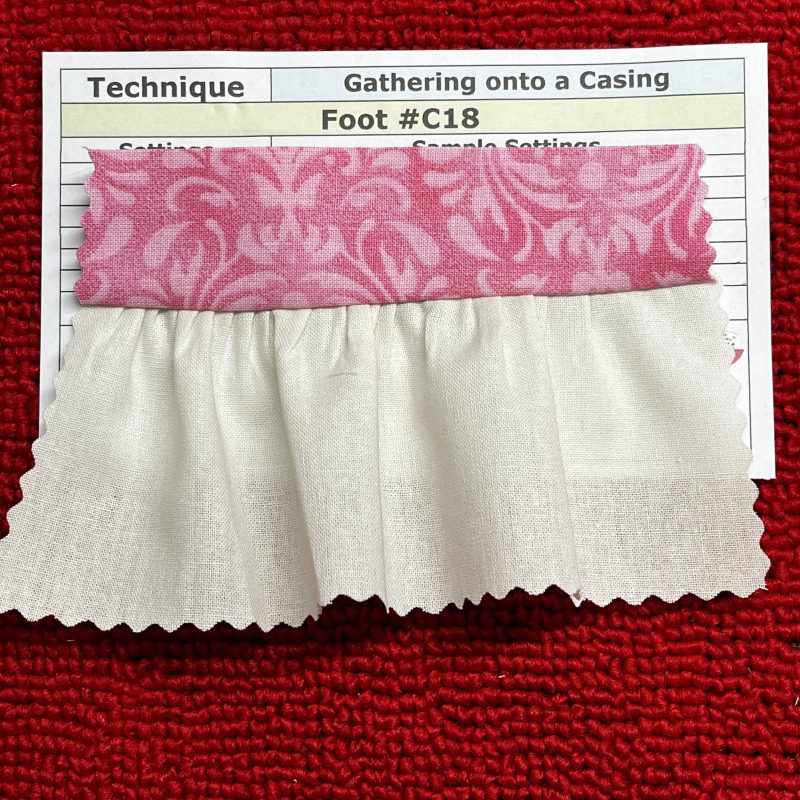
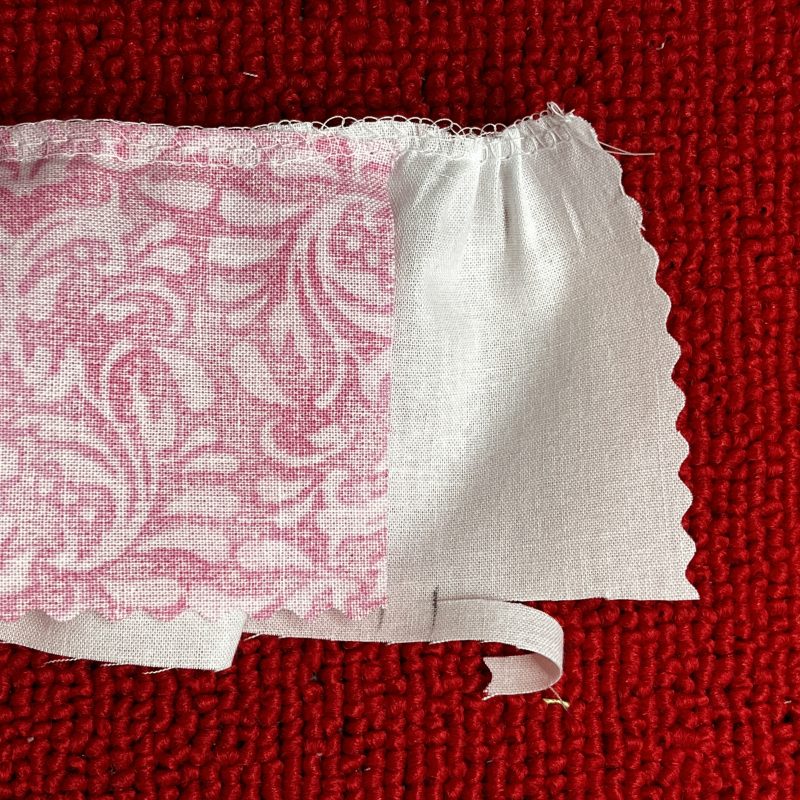
‘Gathering onto a Casing’ – same technique as ‘Gathering to a Flat Piece’ however the top fabric is folded right sides together to create a casing for elastic etc.
‘Puffing’ – Stitch first side as per ‘Gathering to a Flat piece’. Fold the flat piece over onto the gathered piece and mark where the second flat piece will start to be attached. Again I trim off a section, stitch the underneath piece until I reach the marking, then place the next flat piece through the guide up to the needle, use the handwheel to secure and stitch slowly, guiding the two layers carefully.
Gathering Foot #C18, or indeed most Gathering Feet for overlockers, do make the process of gathering a lot easier than using just the differential feed and pulling up the stitches. Again, please test your settings and techniques prior to applying to a project for best results.
... A Little Something Extra ...
Foot User Manuals
On the Bernina Website, you can download a User Manual for the Gathering Foot #C18.
is the Overlocker Cording Foot, used e.g. for sewing thin cord, wire, fishline, perle yarn or fine yarn into a rolled hem. Ideal for reinforced edges, decorative ruffles and shapeable knitted bands. Get a 20% discount at your preferred BERNINA dealer during the whole month!
*Australia and New Zealand Promotion Only – ends … 30th April, 2026 …
Bernina Academy is open to everyone, whether you’re a beginner looking to learn new skills or an experienced sewist aiming to refine your techniques. It’s the perfect skill-building even, no matter what sewing machine … or overlocker you own.
It is being held in Sydney at the Wenty Leagues Club, 12th – 15th August, 2026. Pop onto the Academy website to see what classes are still available – there are some fabulous Australian and overseas tutors presenting throughout the event. I’m so looking forward to it!