Wednesday, 5th August 2026
... Winter Visitors, Sewing Stories & Busy Days ...
Winter has certainly been putting on a show lately. Crisp mornings, beautiful sunny days, and just the sort of weather that makes spending time in my ‘Happy Place’ even more enjoyable, once the reverse cycle air-conditioning kicks in. It’s often very cool inside the Studio – yes that’s 12 degrees Celsius – coolest day in here yet!

It has also been one of those weeks where there has been plenty happening, both inside and outside the sewing room. One morning I looked out to find one of our regular kangaroo visitors grazing in the yard, complete with a growing joey tucked safely away in Mum’s pouch. At first, all I could see was a tiny tail sticking out, but before long a curious little head appeared as well. I suspect the joey was just checking to see what all the excitement was about!

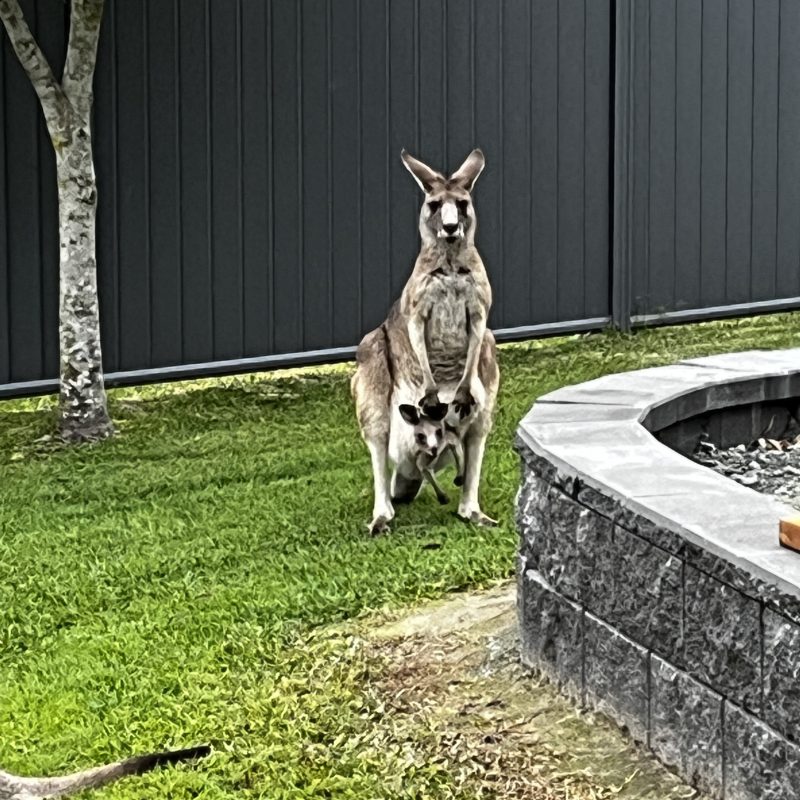
A week or so ago, Sally managed to capture a wonderful little video of the joey out of the pouch, happily pestering Mum by bouncing onto her head as she nibbled on the grass—just like any playful youngster testing Mum’s patience! I’ll include the video below, as it’s far too cute not to share.
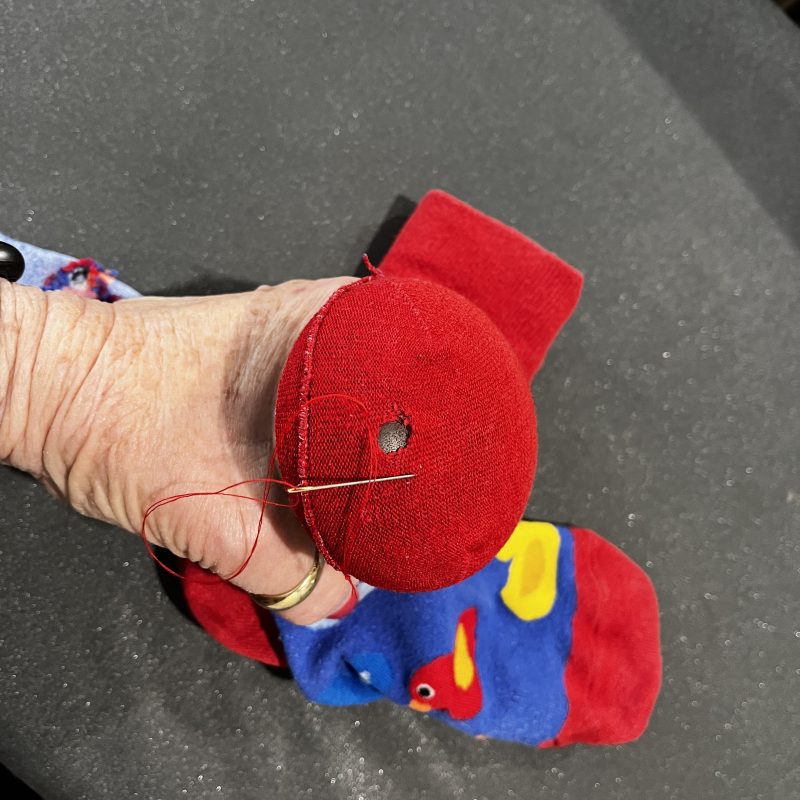
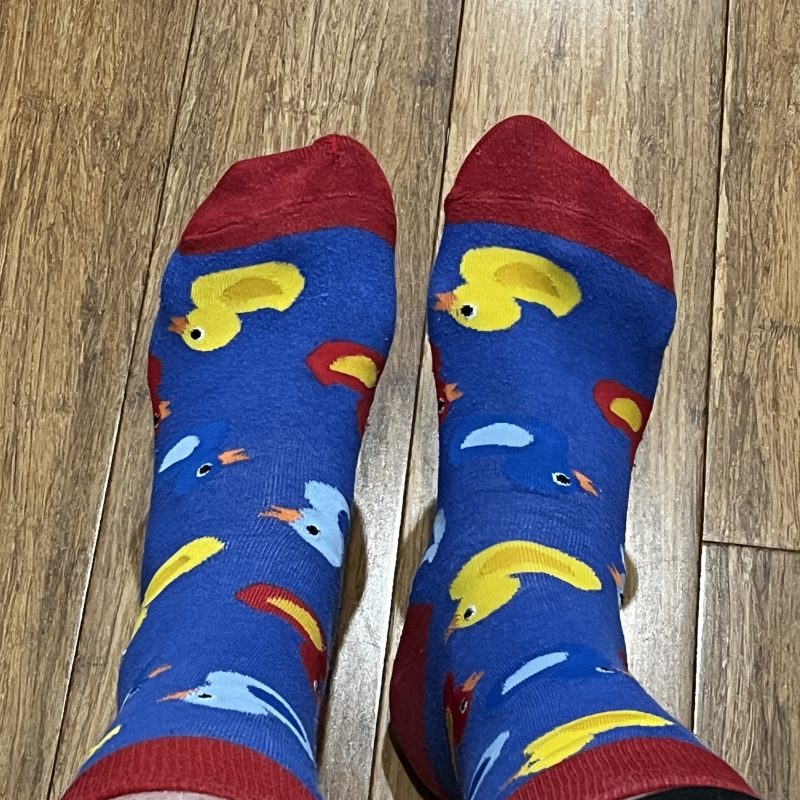
Later in the week we had a lovely gathering here at home, and as often happens when a group of sewists get together, the conversation wandered from one topic to another. While I was telling the girls about me mending socks on my wooden darning mushroom, Sandy casually suggested that an old light bulb would probably work just as well. It certainly gave us a laugh and reminded me that sewists have always had a knack for finding clever uses for everyday household items.

In between enjoying the winter sunshine, unexpected wildlife visitors and good company, I’ve also been busy cutting kits for an upcoming presentation to the Sewing Guild group at The Gap. There’s always something satisfying about seeing neat little piles of fabric ready to become a project, even if it does leave the cutting table looking like a fabric explosion has just occurred.
It’s all part of the fun, and I wouldn’t have it any other way. Now, let’s get on with the long ago promised chat about Decorative Threads … and this week’s accessory – the #C31 Coverstitch Hemmer.
Just wanted to add it’s a LONG post this week!!!
... Did You Know? ...
Decorative/Speciality Threads
A couple of weeks ago, I mentioned I’d add section on Decorative/Speciality Threads … not a real deep dive, but some things for you to consider when choosing which ones to use on your overlockers/coverstitch machines. As well as regular sewing or overlocking threads, there’s machine embroidery thread and a vast range of other types that are suitable to stitch with.
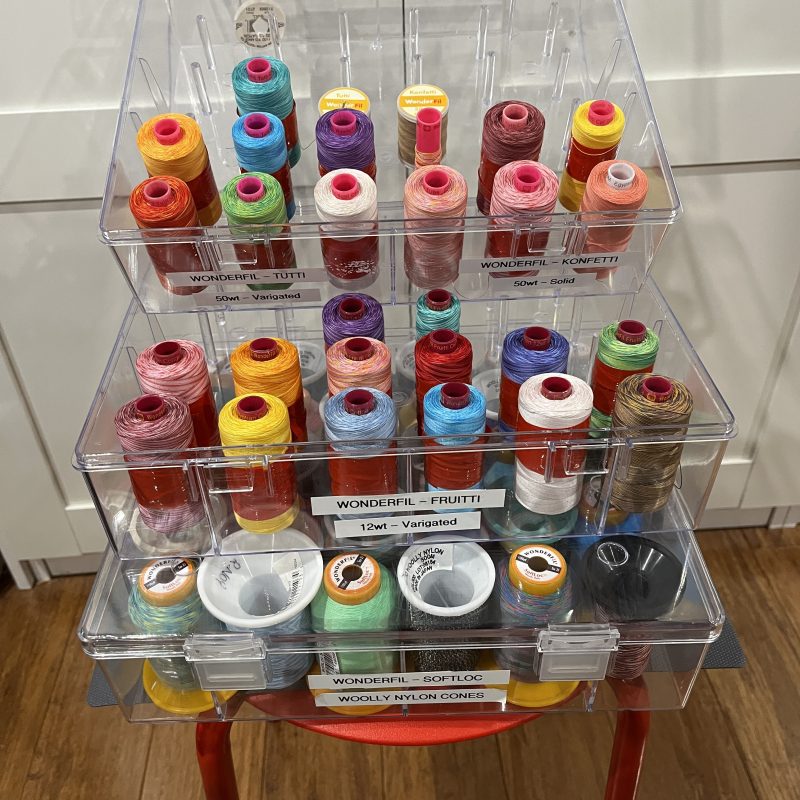
Adding a ‘feature’ on garments, quilts, home decorating items or anything actually, can be more than just for looks. It is a great way to learn to use the creative functions of your machines and threads/trims you have on hand. For so many years, I created samples for Bernina Clubs, and machine classes in stores that I worked in, and these opportunities meant I delved deep into what the machines could create and what products I needed to get the best result I was aiming to achieve. ‘Research and Development’ became a big part of my sewing time at home and work. I have always had a great thirst for sewing knowledge!
Check out if there are any Bernina Dealers near you that offer these types of Clubs and Classes to enable you to get the best from your machines.
Playing with threads the last few weeks has resulted in a finished Thread Fusion pouch … free pattern from Gail Yellen – thank you Gail! Link here to her Freebie Page:

… decorated pockets for a Folio Cover (now at the construction stage) … We All Sew project … front was machine quilted on my B990 … hope to finish it this week.
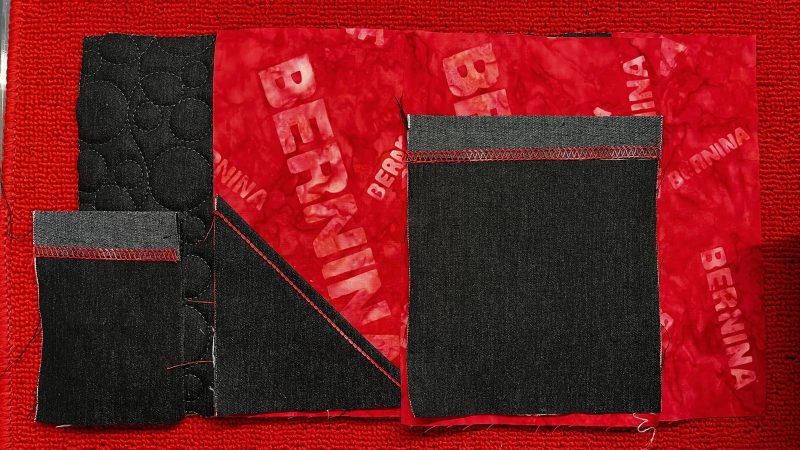
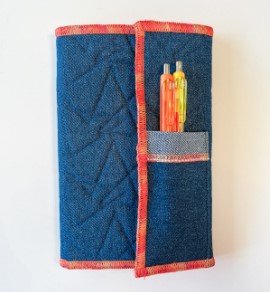
… and of course the iPad cover I showed you last post, although that was Varigated Overlocking Thread, which I still class as a decorative thread!
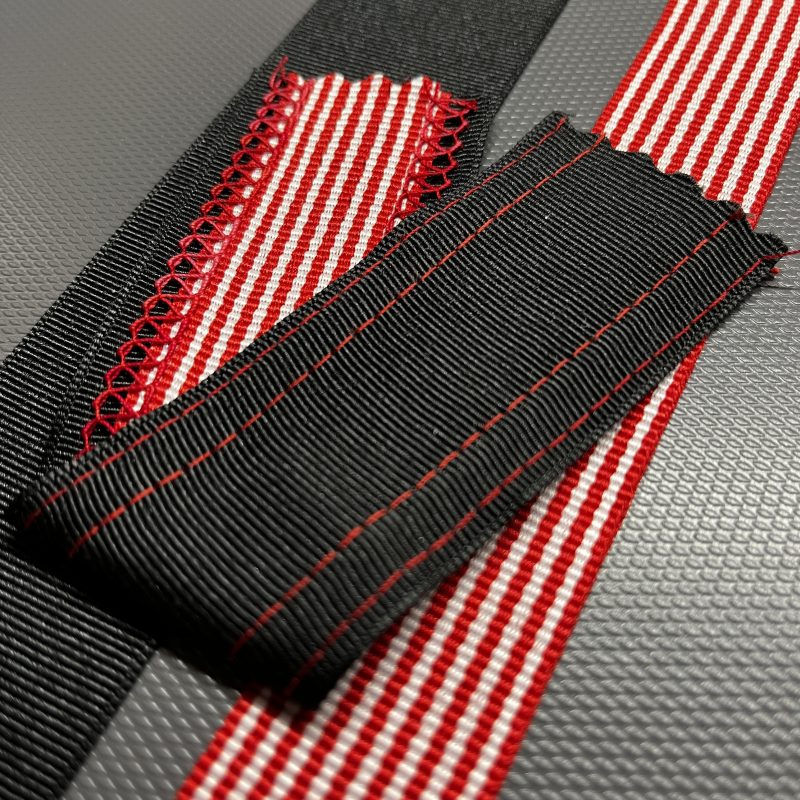
I’ve also had a lovely play, making a lacey look edge to a ribbon/trim – I did post a couple of photos on social media this week, but will keep that info until the next … and final … Challenge Post, in just a couple of days time! It was part of a sample for the ‘Adjustable Tape Guide’.
Threads are so diverse in colour, texture, size, strength, performance and then even how they are wound onto reels! The two categories I most consider when choosing threads to use decoratively in my overlocker are the thread type (how it’s wound) and thread weight. Why these two?
Thread Type – when I’m using a sewing machine, thread type is mostly about whether its spun cotton/polyester, core-spun thread (that is like Rasant, polyester core and wrapped with cotton) or maybe monofilament threads, however most of my consideration with an overlocker is how it will come off the reel, and then into the machine’s threading guides. Thread is either wound in a cross-wound manner or a stacked manner (Parallel wind).
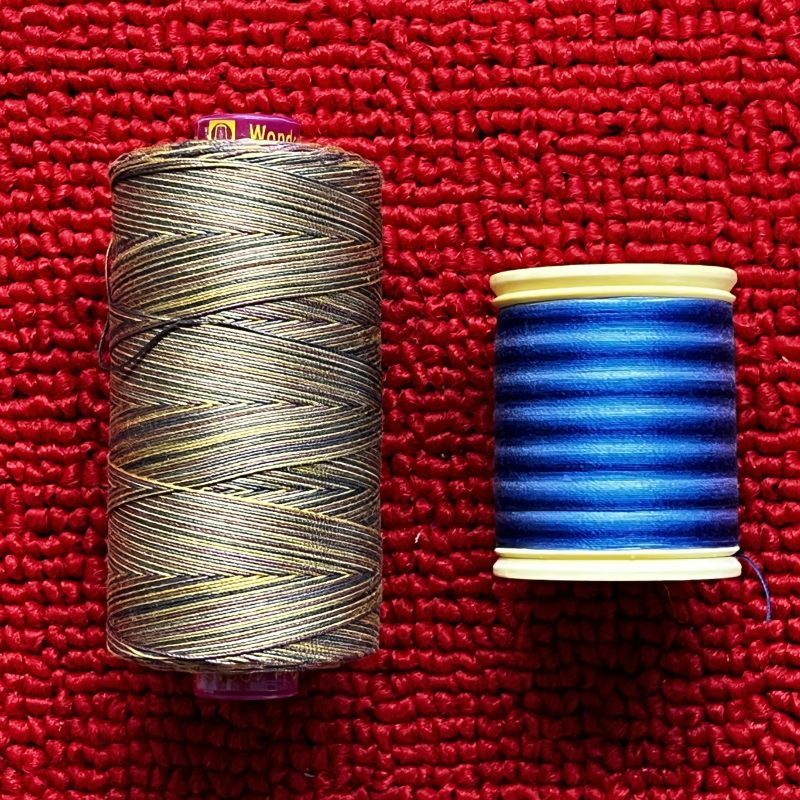
Cross-wound Thread is meant to remain stationery as the thread comes off the reel/cone, and a Stacked Thread reel rotates. So you need to know where to place it on your machine. For more on this, go back to when I talked about the Decorative Thread Spool Pin (L26).
Thread Weight – well, this subject is a real ‘rabbit hole’ if you have the time! The majority of threads for the domestic sewing market are rated by weight – Wt. Simply, the higher the number, the finer the thread – exact opposite to sewing machine needles! Most of my heavier decorative threads are 12wt or 8wt as they provide a standout once stitched. Here’s the tops of some random reels I had that highlights different ways of stating thread weight details – two 12 weight threads … No. 12 and 12 wt … and here’s a 40 weight thread… #40/3 (4 weight/3 plys) … so look out for different ways of saying the same thing! No./#/wt

From my samples and writeups that I’ve created, you will notice I have mentioned which threads I used and what thread paths they were in, e.g. needle/s, upper looper, lower looper or chain looper. When using decorative threads, the threading process is the same as with regular thread, except that you are substituting a decorative thread in that path.
If using multiple threads in the airthreading ports, or single, very thick threads, you may need to use a thread cradle or bypass the ports altogether, inn other words, an Alternative Threading Method.
I have posted a link to the Bernina International video which shows this, however here it is again.
Generally speaking, up to a 12wt thread can be used in the needles (Size #90 Topstitch needle has a larger eye) and heavier weights (including multiples of lighter weights) are used in the upper, lower or chain loopers.
With those two things in mind, let the fun begin!
Consider what decorative feature you are looking to create e.g. edge of a garment, or where else on the item … how prominent the thread will be after stitching, e.g. wide/narrow, shiny/matt/textured … how durable the finish needs to be, which of course then brings you to what type of thread fibre you would be looking at … as all these factors need to be considered before choosing which stitch to use! Research and development reigns …
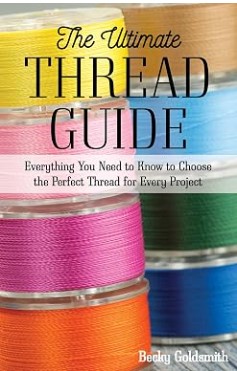
A great little reference book that I bought some years ago now is Becky Goldsmith’s, ‘The Ultimate Thread Guide’. You may find a copy in a store that stocks good sewing reference books, or online at Amazon perhaps. I still love a ‘hold in my hand’ book – I’m an old-fashioned girl!
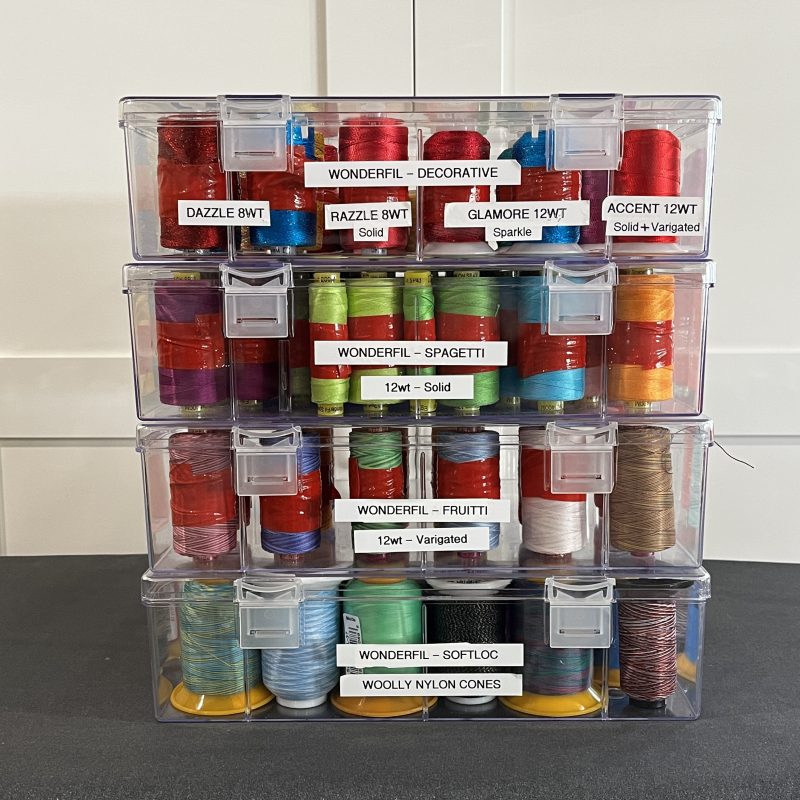
There is a lot of detailed information on many of the thread manufacturer’s sites, and as you may have noted from my samples over the weeks, I love Wonderfil Threads, and have quite a stash to delve into each week. Here’s a link to their site on ‘heavy serger threads’, to inspire you to ‘play with threads’ more. Check out their ‘Threaducation’ tab also.
We All Sew Blog has fabulous articles/projects on decorative threads … Here’s a link I recommend you take a look at if combining two or more threads …
Another resource for discovering the possibilities on your Bernina L890 is Gail Yellen’s ‘Tip Clips’ on her YouTube Channel. Here’s a link to one on Decorative thread in the Needles.
Have some fun with lots of different stitches and combinations (stacked stitches), weights of threads, and a good measure of ‘wild abandonment’! It’s only thread and fabric!
... The Piecemaker ...
Fun Thread and Quilt Finishes
This time we look at some different thread/stitch options for you to try out with all those wonderful threads we chatted about in the ‘Did You Know’ Section, as well as a couple of techniques I wanted to include in the blog.
The Big Book of Serger Quilting has a Chapter titled ‘Recipe for a Quilt’, which is full of information about quilting fabrics, types of batting, and suitable needles and threads, including ones specific to quilts made with an overlock machine. There is a guide for threads ideal for Overlock Quilting, which is very helpful if you don’t want to delve too far into the subject of threads.
But before we go into some speciality stitches and quilt finishes, the first sample is an appliqué technique, using our Chainstitch. There was a similar raw edged sample in the post on #C27 and #C28 with the Combined Applique and Topstitch sample (Pineapple on denim)
‘Serger Applique’: Refer BBOSQ Pg 80 – I roughly cut out a shape with curved edges (would have been better if I had used some type of interfacing on the fabric first!), and finished them off with the ‘Twice As Nice’ Stitch which comes later in this section, then appliquéd it to a piece of denim with Chainstitch – I had a #90 topstitch Needle in the RC Needle (needed for the 12wt thread) – and yes ‘best practice’ would be to use an ELx705 needle here … but I test sewed and it worked fine – no missed stitches!
Machine Setup: 2-Thread Chainstitch Stitch #16 SL – 4.0, CW – NA, DF – 1.0, Tensions – RC 3.0, CL 1.5, #C23 Clear Curve Foot
Needle – Wonderfil Spagetti 12wt Chain Looper – Maxilock O’lock thread

‘Stacked Coverstitch/Chain’: Refer BBOSQ Pg 79 – This sample is made with 4 Steps as per the book, starting with a wide Coverstitch and finishing with a Chainstitch. The stitches are stack on top of each, hence the name, and then a ‘outline’ of Chainstitch on both sides finishes the embellishment. I love the way different threads can appear when combined together.
Machine Setup Basic: SL 3.5, DF 1.0, Tensions – Default, and Size #90 needles.
Needles in all Setups were Maxilock O’lock thread and Chain Looper was different Wonderfil 12wt Fruitti Threads and Loopers – Seracor O’lock threads
Machine Setup #1: 3-Thread Coverstitch Wide Stitch #22 (Orange)
Machine Setup #2: Add 3-Thread Coverstitch Narrow Stitch #24 (Green)
Machine Setup #3: Add 2-Thread Chainstitch Stitch #16 (Purple)
Machine Setup #4: Add 2-Thread Chainstitch Stitch #16 (Green)

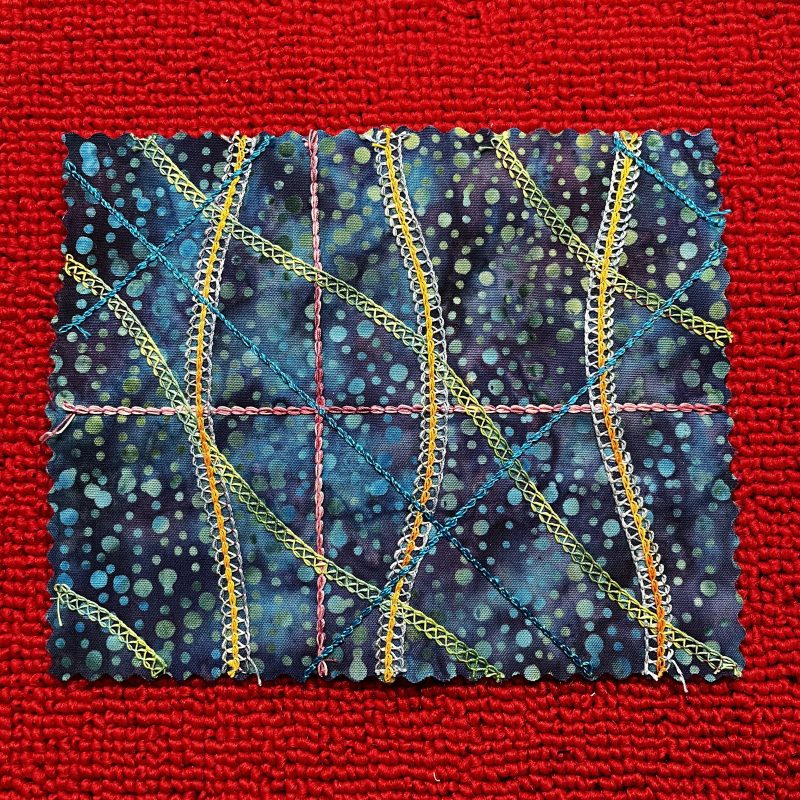
‘Twice As Nice Stitch’: Refer BBOSQ Pg 80 – I used an offcut from a quilted piece of fabric, however if doing again I would decrease the length of my stitch to get a better coverage on the edge, possible down to 1.2 or 1.3
Machine Setup: 3-Thread Overlock Wide Stitch #3 SL – 1.5, CW – 9, DF – 1.0, Tensions – LN 4.0, UL 8.0 and LL 4.0
Needle – Maxilock O’lock thread, UL Wonderfil 12wt Fruitti FT01, L 12wt Fruitti FT 23

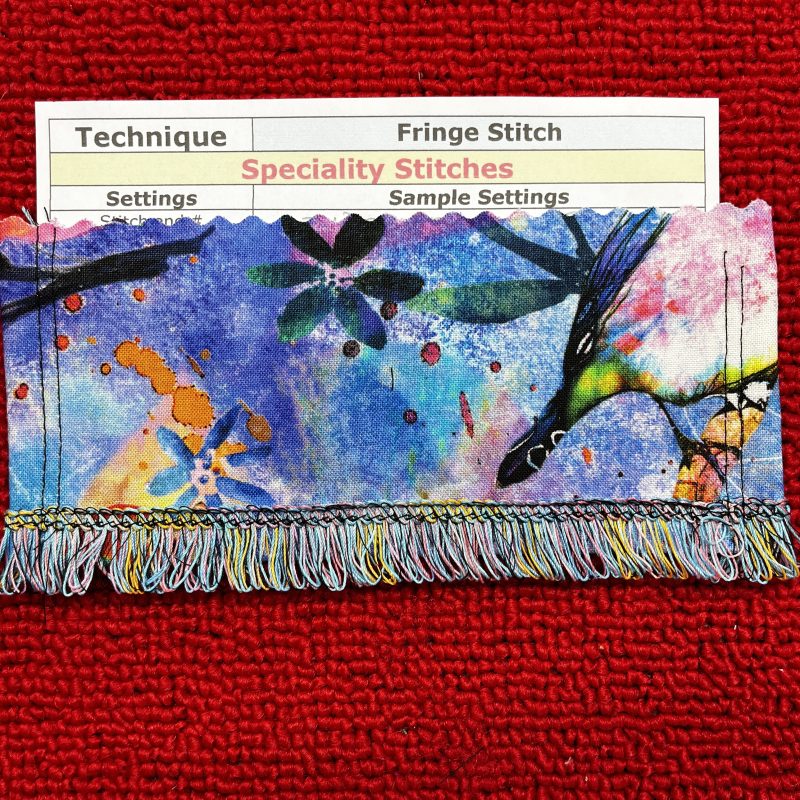
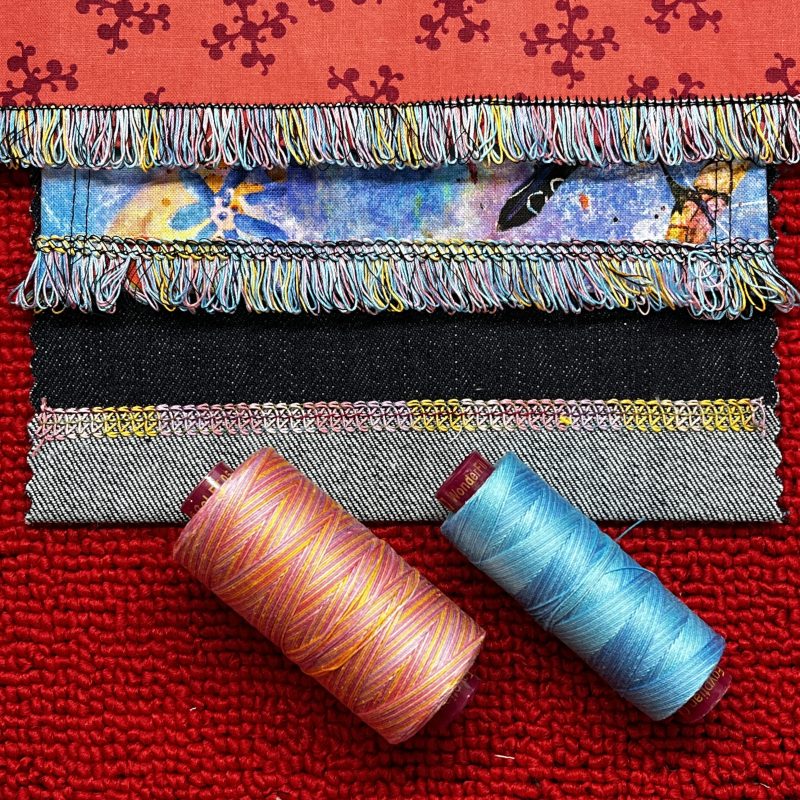
‘Fringe Stitch’: Not in either of the BBOS or BBOSQ however I love this stitch! I included it in the class I taught at Bernina Academy a couple of years ago and it was a real hit! I keep my reference folder we made in class, handy at all times in my top overlocking drawer. Step 1 is to overlock the edge (interfaced and ½” pressed hem to wrong side), then Step 2 is stitch over and secure the ‘inside edge’ (overlocker needle thread) of your stitches in your chosen way – Coverstitch Narrow, Chainstitch, Decorative sewing machine stitch, or my preferred method a small zigzag SL1.0 and SW1.5 – I used a black thread. Step 3 completes the fringe by cutting through the needle thread on the back to allow the loops to form a long fringe.
Centre area of yellow print fabric shows the front after zigzag added, left hand side shows the back before cutting – right hand side shows the back after cutting the needle thread – red fabric below shows finished fringe on front)
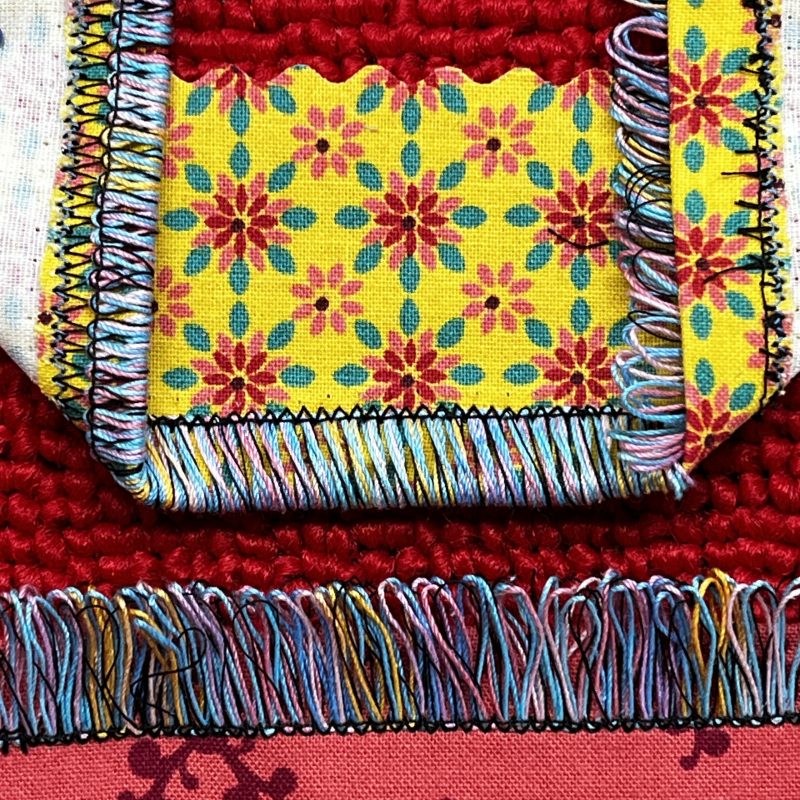
Top red sample shows zigzag in teal thread on left edge, a blanket stitch in black on the centre area and the final zigzag with black thread on the right. The lower print sample has a 3-Thread Coverstitch Narrow Stitch #24 over the needle thread.

Machine Setup: 2-Thread Wrapped Overlock Stitch #9 SL – 1.9, CW – 9, DF – 1.0, Tensions – LN 4.0, UL convertor engaged and LL 3.7
Needle – Black Seracor O’lock thread, LL has three threads in it – one reel of Seracor Black O’lock thread, 2 reels of Wonderfil 12wt Fruitti FT23 (Sea Blue) and FT05 (Pansy)
Adding black overlocking thread to the Lower Looper creates a cohesive finishing touch, complementing the final stitch along the edge of the fringe.
We All Sew Blog and Gail Yellen both have good videos on this – and here are the links …

Then further on in the Big Book of Serger Quilting is a chapter on ‘Finishing Techniques’. We have already looked at binding the edge with the #C21 Double Fold Binder and also using Wonderfil Iron ‘n Fuse thread in the lower looper (#C24 Shirring Foot post) with French/Fusible Binding. Now with decorative threads as our focus this week, here are three techniques from the Big Book of Serger Quilting.
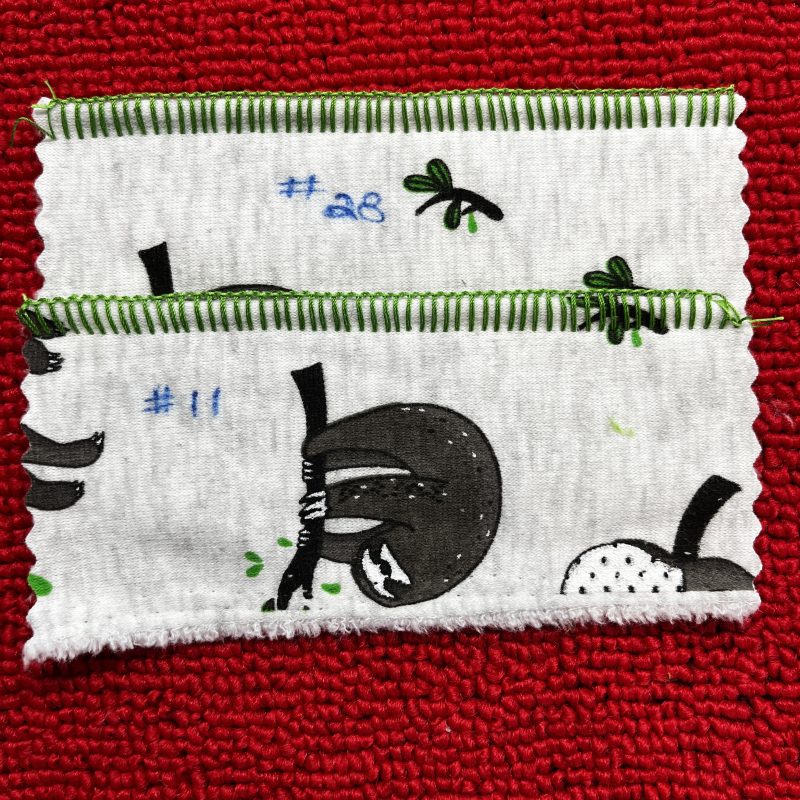
‘Blanket Stitch Edging’: Refer BBOSQ Pg 118 – On the L890 and L860, this stitch has its own dedicated setting—Stitch #28. However, the foundation of this stitch is actually a 2-Thread Flatlock Wide Stitch.
I stitched my first sample using the built-in Stitch #28 setting, then switched to Stitch #11 (2-Thread Flatlock Wide) and entered the same settings manually. The result was virtually identical!
So, if you don’t have an L890 or L860, don’t despair—you can create this stitch by starting with a basic 2-Thread Flatlock Wide and adjusting the settings to suit.
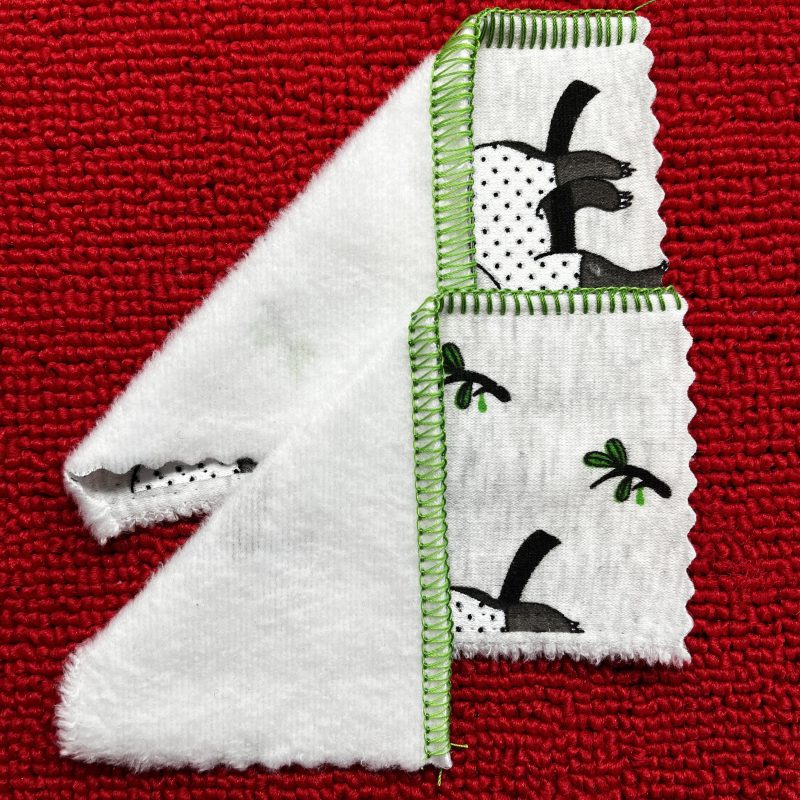
The samples that follow show the steps – one is to stitch the edge with water soluble stabiliser on top, two is to ease the stitches to the edge with the help of the stabiliser, and then I held the threads and gently pulled away the stabiliser – it tore quite easily. Anything left in the stitch will wash out.
I test sewed on a woven scrap sample, before stitching on the fleecy leftover I found – Sally made Ambah something from this many years ago! I love it!
Machine Setup: 2-Thread Blanket Stitch Stitch #28 SL – 4.5, CW – 9, (another sample was done with CW – 6) DF – 0.7, Tensions – LN 1.5 and LL 3.5 – Upper Looper Convertor engaged. Foot #C11 – the clear feet were ‘sticking’ to the water soluble stabiliser. #90 Topstitch Needle
Needle and Lower Looper –Wonderfil 12wt Spagetti



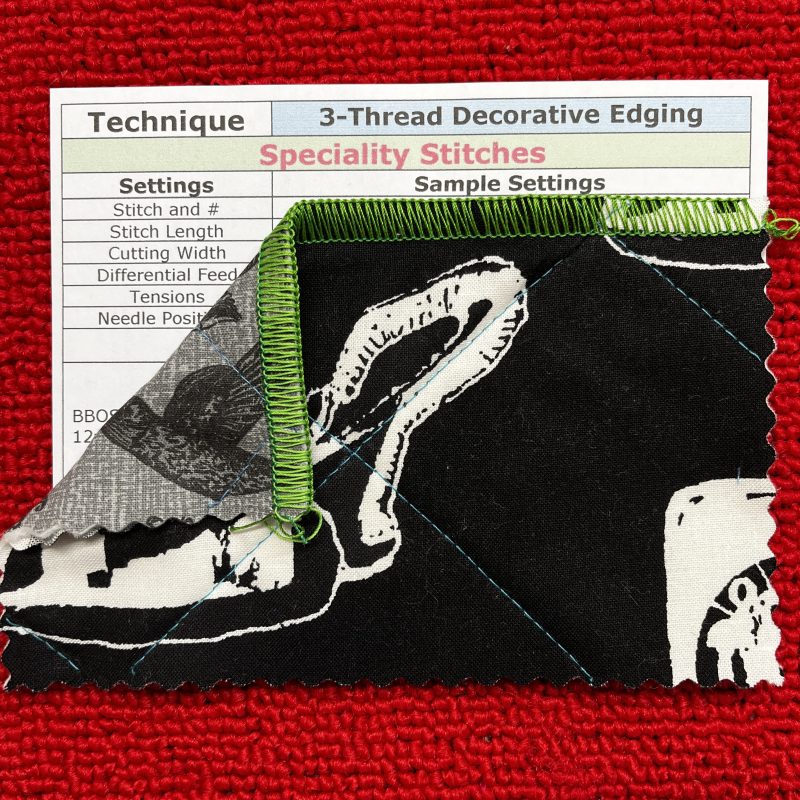
‘3-Thread Decorative Edging’: Refer BBOSQ Pg 118 – I used an offcut from a quilted piece of fabric, however if doing again I would decrease the length of my stitch to get an even better coverage on the edge, possible down to 1.6 or 1.5 – I like this finish!
Machine Setup: 3-Thread Overlock Wide Stitch #3 SL – 1.8, CW – 8 + MTC at +1, DF – 1.0, Tensions – default
Needle – Maxilock O’lock thread, UL and LL Wonderfil 12wt Spagetti
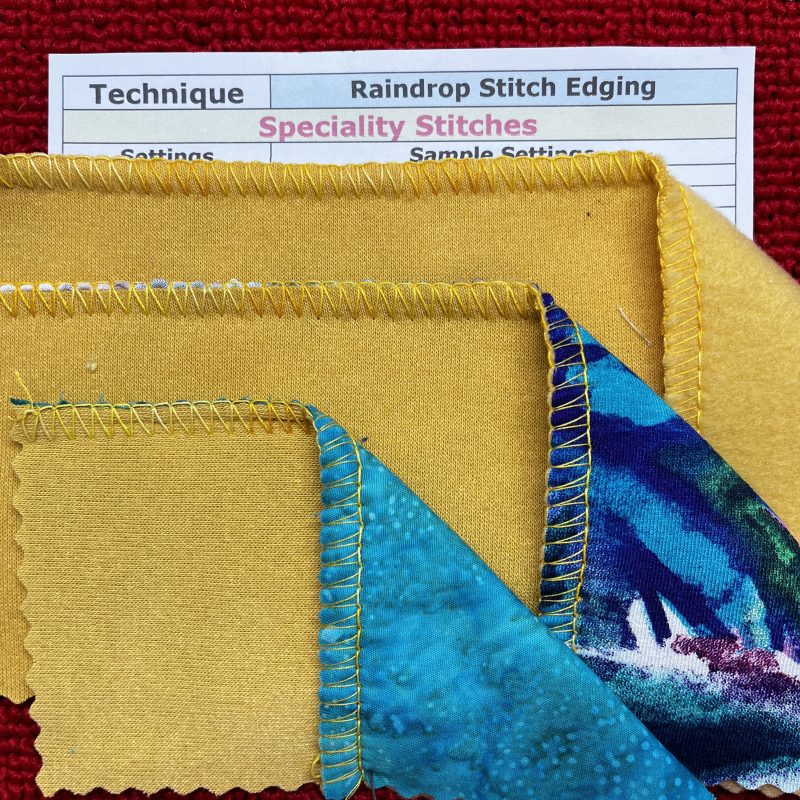
‘Raindrop Stitch Edging’ – Refer to BBOSQ, page 118. As noted in the book, this is a lovely way to finish fleece and other non-fraying knit fabrics. The stitch is a 2-Thread Flatlock designed to be sewn on a single layer of fabric using a heavy decorative thread. The result is a neat, flat edge that helps prevent the fabric from curling.
I made two further samples using two layers of fabric—one with a soft knit (worked nicely!) and the other with a piece of batik quilting cotton (hmmm not ideal fabric I thing, as I’d need to reduce the tension on the lower looper as it is tunnelling as you can see from the closeup below). Why? Well, I was thinking this stitch could be rather lovely on the edges of a simple-shaped fleecy jacket with a contrasting knit lining.
My idea would be to make the jacket and lining as two separate pieces, then place them wrong sides together, with the lining sleeves sitting neatly inside the main sleeves as they would when the jacket is finished. The Raindrop Stitch could then be used as a decorative finish around the sleeve edges, as well as along the entire front opening, neckline and bottom edge. The edges would benefit also from some Stay tape being added between the two layers to eliminate any stretching over time.
I think it could make a rather nice feature, turning what might otherwise be a very simple jacket into something a little more special. No time to make it at the moment, but on the list when I get back from Sydney! Would make a sweet little jacket for my Granddaughter Summer!
Machine Setup: 2-Thread Flatlock Wide Stitch #11 SL – 4.5, CW – 9, DF – 1.0, Tensions – LN 1.5 and LL 9.0 – Upper Looper Convertor engaged. #90 Topstitch Needle
Needle – Wonderfil 12wt Fruitti, LL – Maxilock Overlocking thread

Then to finish off this ‘epic length’ section … over to the Big Book of Serging we go for those couple of techniques I wanted to add.
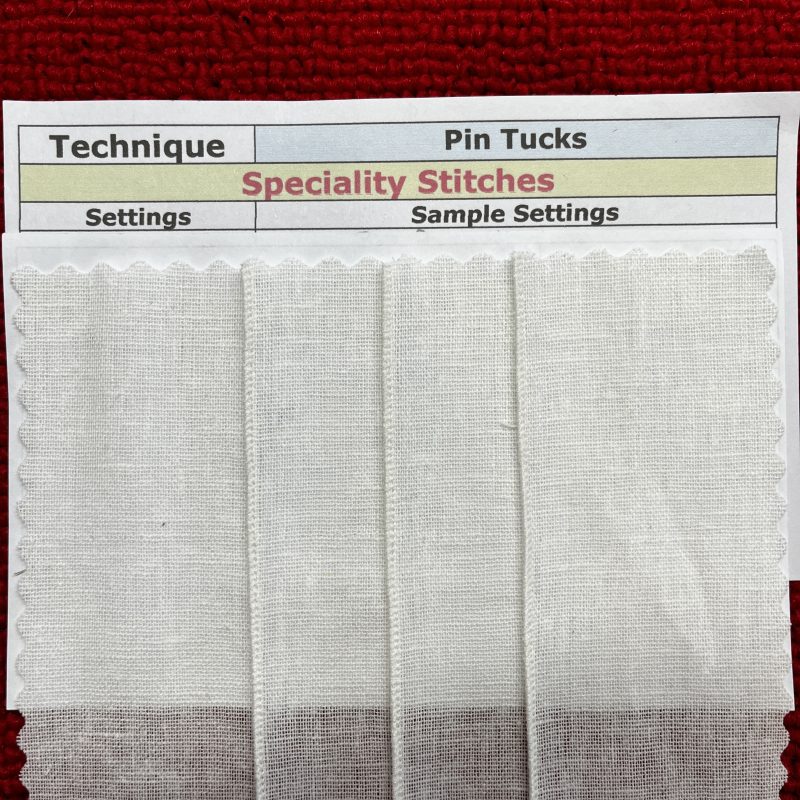
‘Pin Tucks’: Refer BBOS Pg 149 – for this sample I pressed folds approx 1” apart, wrong sides together and using the guide on the foot, roll hemmed the edges.
Machine Setup: 3-Thread Roll Hem Stitch #8 SL – default, CW – 5.5 with blade disengaged , DF – 1.0, Tensions – RN 4.0, UL 4.0, LL 6.0 – #C19 Blindstitch Foot – Roll Hem Lever to ‘R’
Needle and Loopers – Seracor O’lock threads
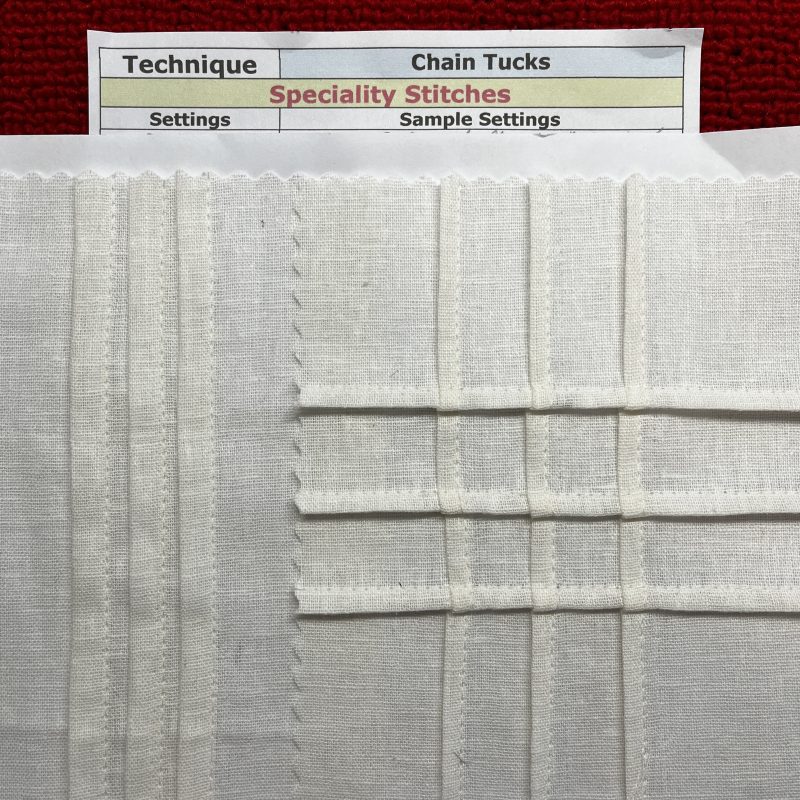
‘Chain Tucks’: Refer BBOS Pg 150 – for the first sample I pressed folds approx 1” apart, wrong sides together and using the edge of the foot as a guide, stitched the tucks all in one direction. This ensures the needle thread is uppermost on all of them. Second sample had pressed folds 1 ½” apart, wrong sides together – stitched closer to the edge, then pressed tucks in the opposite direction and stitched.
Machine Setup: 2-Thread Chain Stitch Stitch #16 SL – default, CW – NA, DF – 1.0, Tensions – Default – #C28 Clear Cover/Chainstitch Foot
Needle and Looper – Seracor O’lock threads
A lot to take in this week, as I’m charging to the finish line, focusing on finishing all these Challenge posts before I leave for Sydney on Sunday morning!! EEEEK!
... Fold, Guide, Stitch! ...
#C31 Coverstitch Hemmer
The #C31 Coverstitch Hemmer is designed to help you create neat, professional-looking 1-inch hems using either a coverstitch or a chainstitch. Let’s take a closer look at how it works.
The hemmer attaches to the Coverstitch Insert using the Accessories Holder, which is sold separately. One of its clever features is that the holder swings away from the machine, making it easy to attach the hemmer and position the fabric. Once everything is in place, simply swing it back into the sewing position and you’re ready to stitch.


As this attachment forms the hem using either a coverstitch or chainstitch, it can only be used on a machine that offers these stitch options, whether that’s a combination overlocker/coverstitch machine or a dedicated coverstitch machine.
Several presser feet are compatible with the Coverstitch Hemmer, including the Standard Overlock Foot #C11, Cover-/Chainstitch Foot #C13, Coverstitch Compensating Foot #C12, Curve Foot #C23, and Clear Feet #C27 and #C28. If you’re using a bernette overlocker, either the Standard Foot or the Standard Foot with Clear Sole can be used.
Attachment #C30 (and I used all three sizes) was used to create 5 options of samples this week.
BERNINA has produced an excellent video on their International YouTube channel demonstrating the setup and use of the Coverstitch Hemmer. I’ll include a link to the presentation below, along with a summary of the key points in my Highlights and Challenges section.
Additional Notes for other Models

Bernina L850 and L860 – not suitable for these machines
Bernina L660 (New*) – not suitable for this machine
Bernina L620 (New*) – the #C31 Coverstitch Hemmer and Accessory Holder can be used on this machine
Bernina L450 and L460 – not suitable for these machines
*New Models July 2026 – L660 Overlocker – L620 Cover/Chainstitch Only Machine – I will have the opportunity to ‘play’ on these at Bernina Academy!
Bernette Funlock 40 Series (b44) and Airlock 60 Series (b64) – not suitable for these machines
Bernette Funlock 40 Series (b42 and b48) and Airlock 60 Series (b62 and b68) – the # C31 Coverstitch Hemmer can be used on these machines. The Bernina Accessory Holder includes M4 size screws to suit the Bernette machines.
... This Week’s Foot Highlights or Challenges ...
Some ‘Practical Tips’ first:
Press first for best results. Press a 1-inch hem to the wrong side of your project before you begin. This helps the fabric feed smoothly through the hemmer.
I often press 1” wide Knit/Woven Stay tape to the wrong side of the hem, 1” up from the raw edge. This means you will have the needles stitching on ‘stabilised’ fabric, which will provide more support for your stitches, meaning less distortion. I hope you can see the difference in the photo below – left side had stay tape aligned with raw edge, hem appears slightly ‘buckled’ – right side had stay tape pressed 1” up from raw edge and hem sits beautifully flat.

Choose the right stitch. Use either a narrow or wide coverstitch for woven fabrics. For knit fabrics or those that won’t fray, a chainstitch is another excellent option.
Position the fabric correctly. Place the folded edge of the hem against the right-hand side of the attachment, with the raw edge against the fabric guide inside the hemmer.
Check that the fabric feeds freely. Before stitching, ensure the fabric moves easily through the attachment without catching or dragging.
Take time to fine-tune the needle position. Adjust the hemmer so the left needle stitches on, or just beyond, the very edge of the hem, to neatly secure the raw edge underneath.
Use the available adjustment options. Fine adjustments can be made using the hemmer locking screw, the Accessories Holder screws, or the machine’s Cutting Width Dial. The presser foot should be aligned close to the attachment, without touching.
Always test first. Stitch a sample using scraps from your project to confirm the stitch position and hem width before sewing the final garment.
Be prepared to adjust the tension. Some fabrics may require a slight reduction in the left needle tension, particularly where it stitches through only a single layer of fabric.
Let’s get stitching …
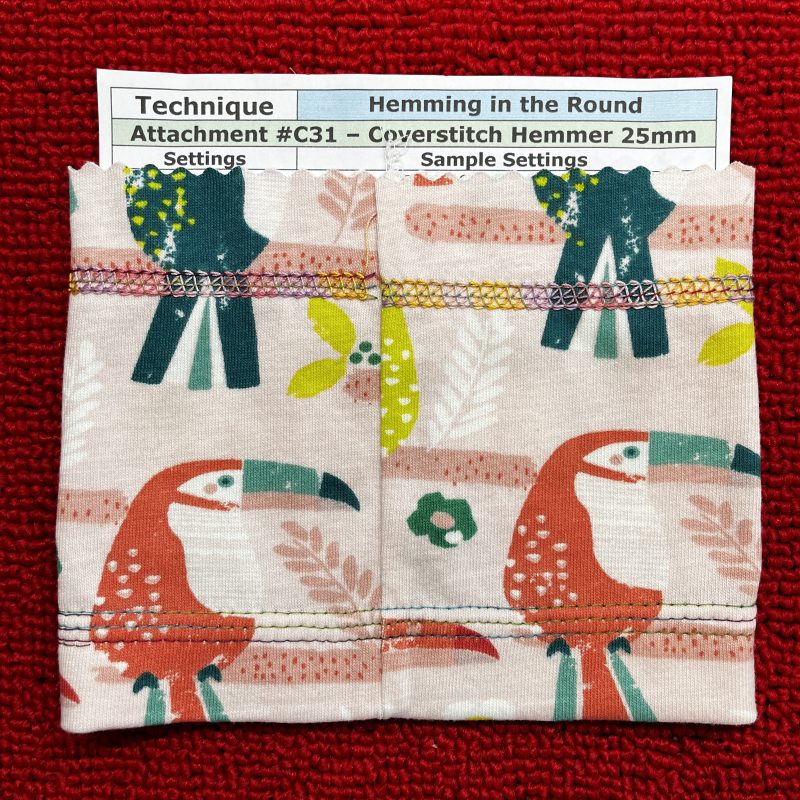
‘Hemming in the Round’: Remove the Slide-on Table and use the free arm, if your item is large enough. If not, stitch ‘inside the cylinder’. Stitch with the Needle Stop in the down position, and check underneath that stitches are covering the raw edge. As you approach the starting point, remove the fabric from the attachment and overlap the stitching by a few stitches, using the foot markings to align with the previous stitches.
This technique gives a more professional finish to the hem than stitching it first and then trying to match up the hem at the seam join – see line of stitching on top of sample below.
Machine Setup: 4-Thread Coverstitch Wide Stitch #21 SL – Default, CW – NA, DF – 1.0, Tensions – Default
All Needles and Chain Looper – Maxilock O’lock Thread (Top section in photo
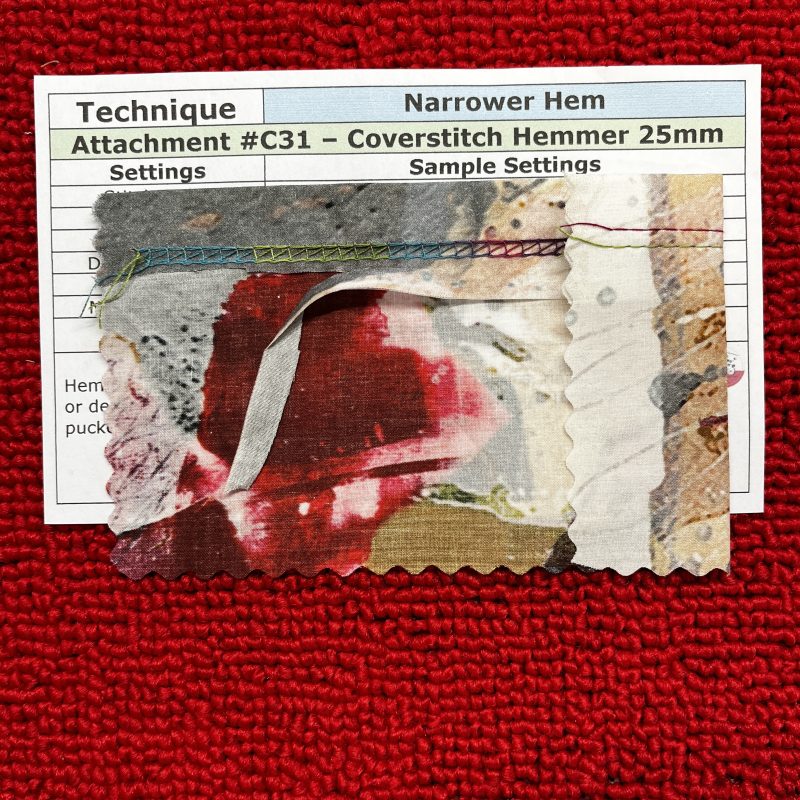
‘Narrower Hem’: Set the folded edge of the Hemmer closer to the needles for finer fabrics, for narrower hems or decorative finishes. After stitching, carefully trim close to the stitching line using appliqué (duckbill) scissors for a neat finish.
Machine Setup: 3-Thread Coverstitch Narrow Stitch #23 SL – Default, CW – NA, DF – 1.0, Tensions – Default
Needles and Chain Looper – Maxilock O’lock Thread
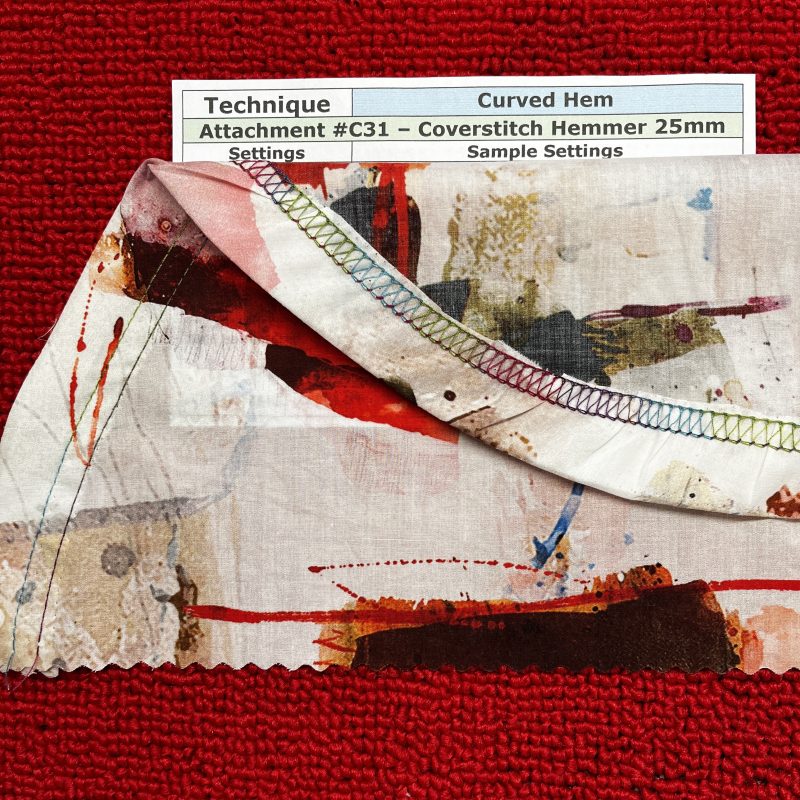
‘Curved Hem’: For slightly curved hems, pre-press the hem and adjust differential feed as required whilst stitching. Could add Knit Stay Tape to edge if required.
Machine Setup: 3-Thread Coverstitch Wide Stitch #22 SL – Default, CW – NA, DF – 0.9, Tensions – Default
All Needles and Chain Looper – Maxilock O’lock Thread
‘Decorative Thread in Looper’: Press the hem to the RIGHT side and stitch on the wrong side of fabric so that decorative threads in the looper can shine.
Machine Setup: 4-Thread Coverstitch Wide Stitch #21 SL – Default, CW – NA, DF – 1.0, Tensions – Default
All Needles – Maxilock O’lock Thread and Chain Looper Wonderfil Fruitti 12wt
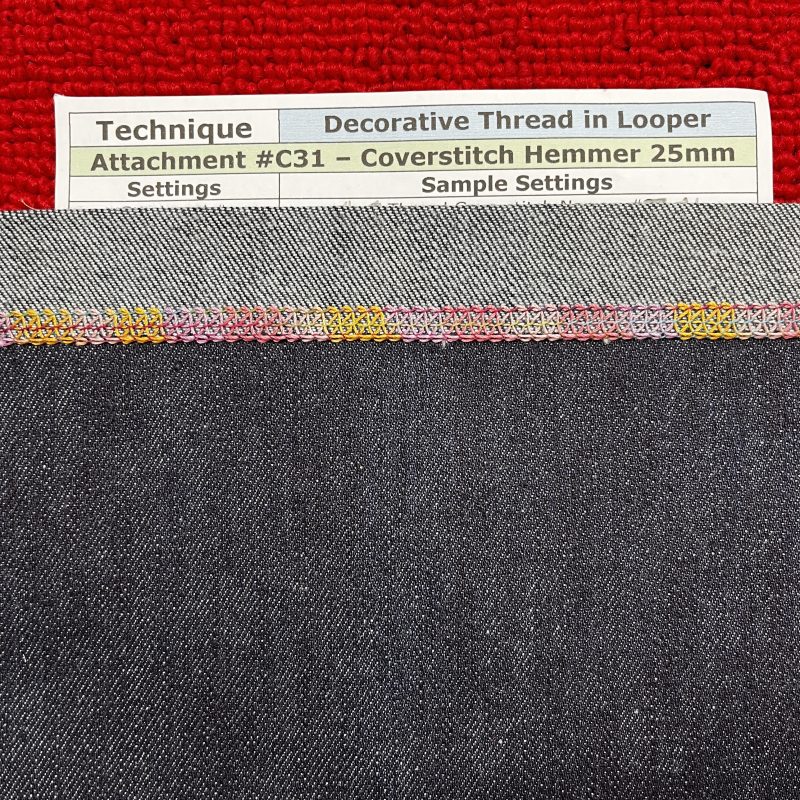
I also used this technique and settings to do the hems on the pocket tops for the ‘DIY Notepad Folio’ project. I had Wonderfil Fruitti colour FT12 in the Chain Looper, and two reels of Maxilock O’lock thread in the needles.

‘Tubular Items’: Start as per ‘Hemming in the Round’, and lastly secure the seam. Use a large tapestry needle or Lil Hookey to secure the beginning thread chain into the stitches to neaten. I started the seam, then with needle in down position, lifted the foot and brought the overlocking chain back under the foot to secure, making a quick, neat finish. An ideal finish for a t-shirt sleeve hem, when the sleeve is set into the armhole before the side seam is completed.
Machine Setup 1: 3-Thread Coverstitch Wide Stitch #22 SL – Default, CW – NA, DF – 1.0, Tensions – Default
All Needles and Chain Looper – Maxilock O’lock Thread
Machine Setup 2: 4-Thread Overlock Stitch #1 SL – Default, CW – 6.0, DF – 1.0, Tensions – Default
Needles and Both Loopers – Seracor O’lock Thread

The #C31 Hemmer 25mm is quick to attach and easy to use for a fast hem on your next project.
... A Little Something Extra ...
Foot User Manuals
On the Bernina Website, you can download a User Manual for the #C31 Coverstitch Hemmer – 25mm

And here’s a link to the We All Sew Blog where they first introduced the Coverstitch Hemmer – since then of course, Bernina have produced the #C28 Cover/Chainstitch Foot, and as I mentioned, it is my preferred foot to use with the Folders, and this Hemmer.
Another We All Sew Blog combines machine embroidery/quilting, overlocking and coverstitch hemming It is the Notepad Folio. It is a two part series and here’s the link to Part 1 …
... A Little Reminder ...
Bernina’s Foot of the Month August 2026 *

is #34/#34C/#34D Reverse Pattern Clear Sole – 20% off – contact your preferred Bernina Dealer for this fabulous offer … this foot gives a clear view of the needle and stitching area, while the red markings on the top of the presser foot allow for especially precise and careful sewing.
A great all-rounder!
*Australia and New Zealand Promotion Only – ends … 31st August 2026
August 2026 Special Offers
Discover limited-time offers on selected BERNINA machines and accessories. Whether you’re upgrading or starting your sewing journey, there’s something special waiting for you.

Experience BERNINA Australia’s unique event and learn from talented International and Australian tutors. This is a sewing event you won’t want to miss!
12/08/2026 – 15/08/2026 Wenty Leagues Club – Wentworthville NSW
Here’s a link to classes still available to book!
Chat again on Friday, with the last challenge post! … and I’ll be combining three accessories (and another holder) that have no dedicated/reference numbers … the Adjustable Tape Guide (which also requires the Upper Accessory Holder), the OL/CS Height Compensating Tool and the Right and Left Seam Guides. I have referred to the last two in other posts, but will look at them separately this time.