Sunday 17th May, 2026
... SEWING THROUGH THE SNIFFLES ...
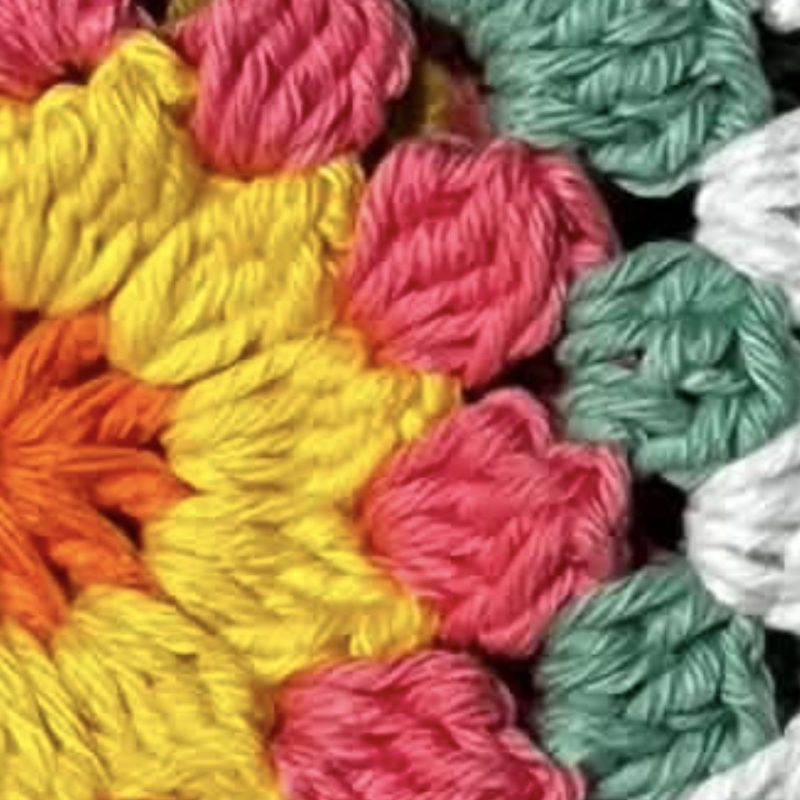
A little later than usual this week, thanks to a couple of days spent battling some sort of virus. There was a lot more sleeping, recovering and crocheting than sewing happening here for a few days! Funny how my watch records crochet stitches as steps/completing ‘exercise goal’ in the little vest I made Summer, with the loveliest Granny Square detail!
Thankfully, I’d already done most of the prep work ahead of time, so Friday and Saturday became dedicated sample-making days, and then today was write-up day instead.
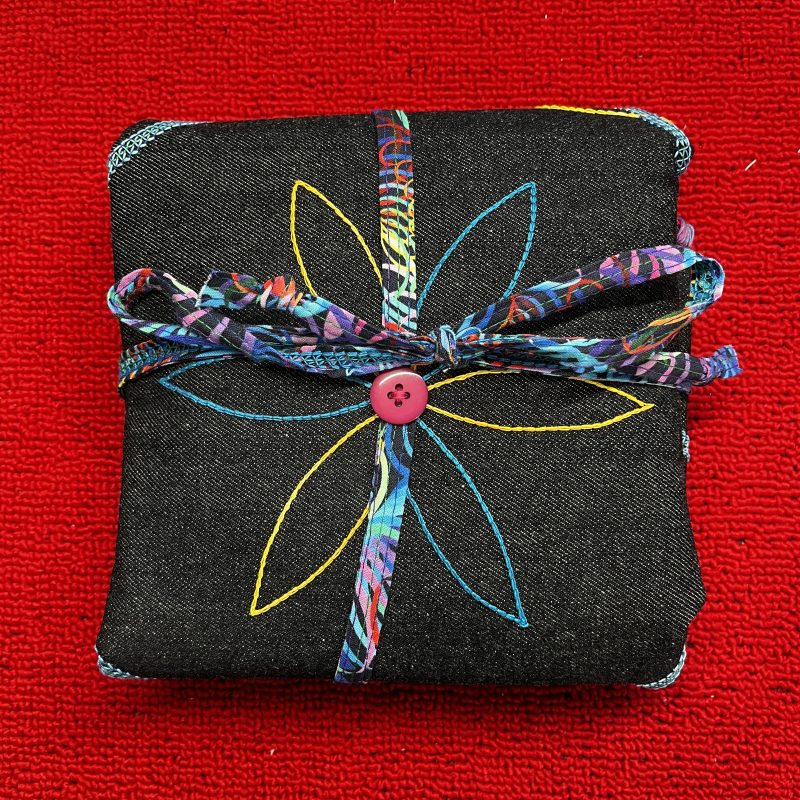
Ambah and Leo stepped into the very important roles of “Blog Models” this week, helping show off the TicTacToe game I made — always more fun with willing assistants nearby. There was also plenty of stitching around circles, experimenting with decorative threads and enjoying all the texture and colour they add.
The L890 has been stitching beautifully, even through some seriously chunky layers — two layers of heavy denim combined with two layers of fusible wadding without missing a beat. I always love seeing what these machines can handle so smoothly.
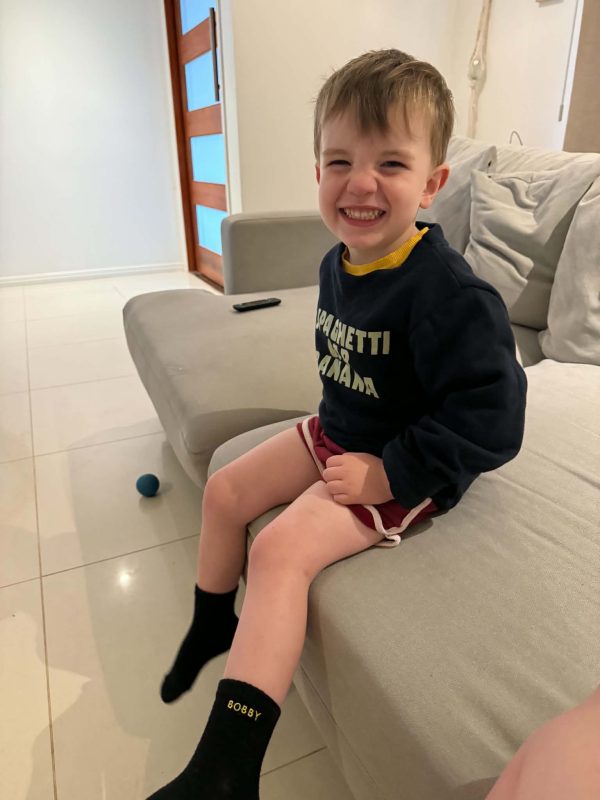
Sally and I also headed down to the Gold Coast for a slightly belated Mother’s Day lunch with Gemma and the grandchildren. Of course I couldn’t arrive empty-handed, so along with me came some embroidered socks created using the Bernina Sock Mini Insert — flower designs for Summer and personalised pairs stitched with names for Bobby … yes, he now has ‘Bobby Socks’. Decided after we finished lunch that he was taking a ride in the pram … and by the time we left, he was ready for a nap – no smiles for the photo!)
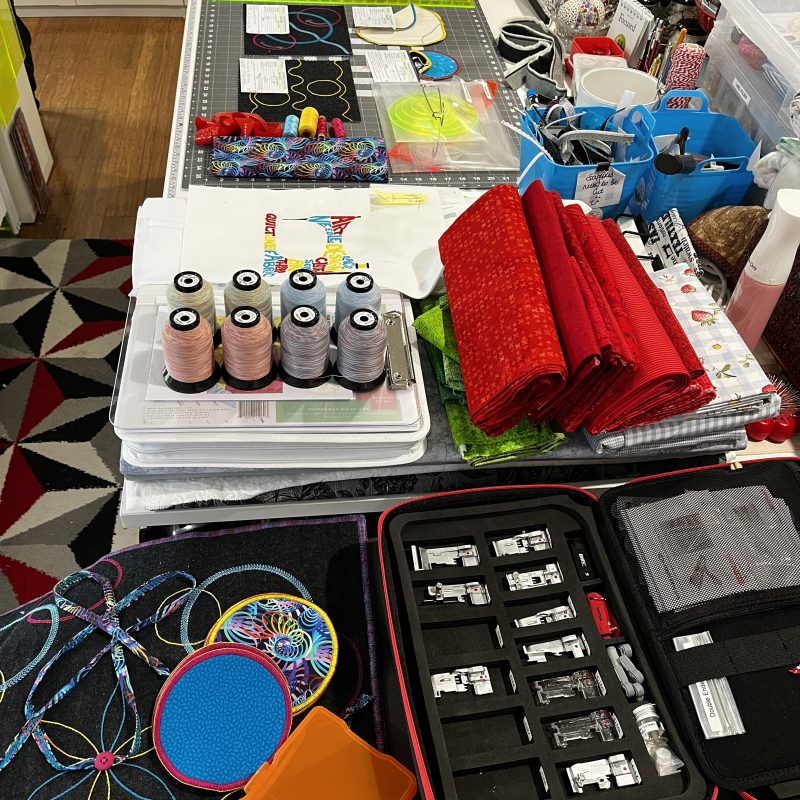
There are always plenty of projects happening here in the Studio, and as soon as this blog post is published, it’s straight onto the next major make. That big pile of red fabrics in the photo below is destined to become a wedding quilt for my beautiful niece Emily and her partner Scotty.
I’m fairly safe sharing that here because I’m quite certain Em doesn’t read my blog — she’s an incredibly talented artist, check her out on Instagram @emilyinghamart, and sewing isn’t really her thing … maybe in the future, as her lovely Mum Belinda is enjoying sewing again after many years! The plan is to create a Strawberry Picnic Quilt for them to enjoy together during those gorgeous sunny North Queensland days, where even Winter is perfect picnic weather. Can you guess Emily loves Strawberries? … and yes, she painted those jackets!!!!
I’d better get moving though — the wedding is on the 6th of June, which is now less than three weeks away. My B990 is about to get very busy with piecing and some edge-to-edge quilting in the hoop, and I’ll be sure to share progress photos along the way. And … I’ve got two more Blog Posts to create, before I take a break for a couple of weeks whilst I head north to celebrate, and catch-up afterwards, with my dear Mum, Brothers and their families.
... The Studio Update ...
It’s been a little while since I last shared an update from around the Studio, mostly because there hasn’t really been much progress to report. But I think the outside path and paved area near the Studio must finally be getting closer! Ben has been busy working on the section below the stairs leading to the Cabin. How good is his ‘patchwork’!
The Cabin sits higher up on the property than the Studio, so naturally that section needed to be completed first. From there it’s technically all downhill … although from my perspective it feels very much uphill — because every step means the paving is getting closer to the Studio!
I currently have a few little outdoor decorating ideas sitting on the planning table, although nothing is finished just yet. One concept may involve a very old vintage sewing machine nestled amongst plants, along with a huge collection of vintage Bernina feet and an old Red Cedar casement window.
The ideas and visions are definitely there — now I just need to figure out the steps to turn them into reality! Hopefully I’ll have some fun reveals to share over the coming months.
... Did You Know? ...
Saving Favourite Settings on L890/L860 Machines
This section is for those who own either the L890 or L860, both of which allow stitch settings to be saved into the Personal Memory, and recalled later. I use this feature quite often, especially when working with decorative stitches, as it means I no longer need to keep track of pages of notes, stitch trials or sample records … although truthfully, I still save quite a few of them!
There’s really nothing better than having an actual hands-on sample to look at when you want to see exactly how a stitch finish turned out.
This week on some of my work, I was stitching around the edges of fabric circles, using 12wt threads in the upper and lower loopers when overlocking.
Once I had the settings correct for the fabric I was using and the finish I liked, I saved them into the ‘Favourites’, noting in the name of the saved stitch what threads I used; and in the altered manual changes, the blade position, cutting width, foot, and any altered stitch lengths or differential feed settings I had made. Yes, all these can be saved for reference later on.
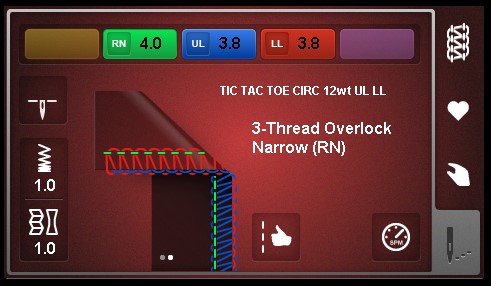
The photos below show an example of one of the stitch settings I saved (Tic Tac Toe Circles 12wt Upper Looper and Lower Looper) … TIC TAC TOE CIRC 12wt UL LL – photos were snipped from my Simulator to get a better view … in real life, I chose the C23 foot for the circles – a foot which is not included in the Simulator’s foot selection – machines get updates when new feet are introduced, Simulators don’t.
Settings are selected (any changes are yellow on the screen) and I’ve stitched out a sample – now to go into Favourite (the little heart) to save …
Time to name it (including what threads I used and where) – then the ‘manual settings I’ll need to change (the little hand)
When I reselect that stitch later, all the settings are now black, and not yellow.
Here’s a photo of my screen with the changes I made in the Manual setting area. You can see I had the option to choose Foot C23.
Project reference and thread used can be added in the ‘name’ section – another ‘naming example’ from my actual machine is the stitch … BA24 FRINGE 50wt LN 2x12wt+50wt LL – ‘decoded’ that is my way of recording a Fringe Stitch I used in a sample for Bernina Academy 2024, 50wt thread in the Left Needle, 2 reels of 12wt plus a reel of 50wt all in the Lower Looper.
Once I select that stitch from my Personal Memory, all the tensions, differential feed and stitch length are automatically set up, and the manual changes saved are at the ready for me to make any changes needed. I also like that the original Stitch used e.g. in that case above 2-Thread Wrapped Overlock Wide (LN) appears on the main screen as well.
I’m not going to detail each step to save your own stitches, as it is all in your Quick Reference Guide that comes with your machine. Here’s a link to each of them below if you want a quick look. The process is the same for both machines.
You can save up to 100 individual stitch patterns on both the Bernina L890 and L860 machines.
... Clear View to Mastering Curves ...
Curve Foot #C23
The narrow shape and shorter sole length of the foot make it easy to manoeuvre around small rounded shapes and curved edges. The foot is both shorter in the front and the back, resulting in less contact with the feed dogs of the overlocker. This means it is not suitable for everyday use, when you may require maximising differential feed to gather fabrics, or to stop stretching of fabrics.
Less sole contact on the feed dogs (which are about ½” longer than the foot) means you have more ability to control the fabric and direct it off the straight and stitch beautifully around curves, without the need to lessen the foot pressure every time. I stitched all my samples with Foot Pressure on 4.
Five needle positions are clearly shown by raised marks on the front of the foot, and the blade position (at stitch width of 6) is marked with an indented line. The foot is suitable for use in both overlock and cover-/chainstitch modes.
I reduced the speed of my machine down to the minimum, which was 600spm, as I was stitching with 12wt Wonderfil Spagetti and Fruitti threads, and also that gives you more control as you round those curves.
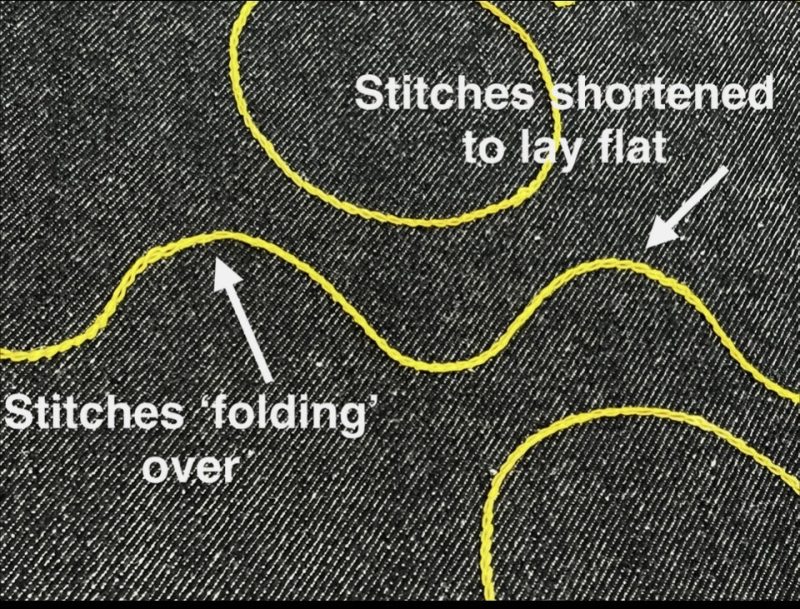
Reducing the stitch length for tighter curves and rounded shapes, results in a flat edge finish. I stitched directly onto the cut edge, having the knife deactivated. The right hand edge of the stitch finger was used as a guide for achieving a nice coverage without any tucks or folds.
If you’re trimming excess as you sew with the blade engaged, I like to first stitch around the multi-layered shape on my sewing machine to create a clear cutting guideline. I then treat the process as a continuous line of overlocking: start by trimming away a small section to get a clean beginning, and once you return to the starting chain, deactivate the knife so you don’t cut into those first stitches.
Continue stitching, overlapping the beginning by around ½”. At the end, use the Bernina CS Locking Tool to pull the needle thread forward, then trim and remove the work from the machine. This leaves you with separate thread tails that can be worked back into the edge for a neat, secure finish.
Curve Foot #C23 was used to stitch out curves and circles in cover-/chainstitch mode, as well as around the edge of a 5” circle, and a ‘mini placemat’ shape in overlock mode.
Here is a link to the Bernina International video for this accessory.
Additional Notes for other Models
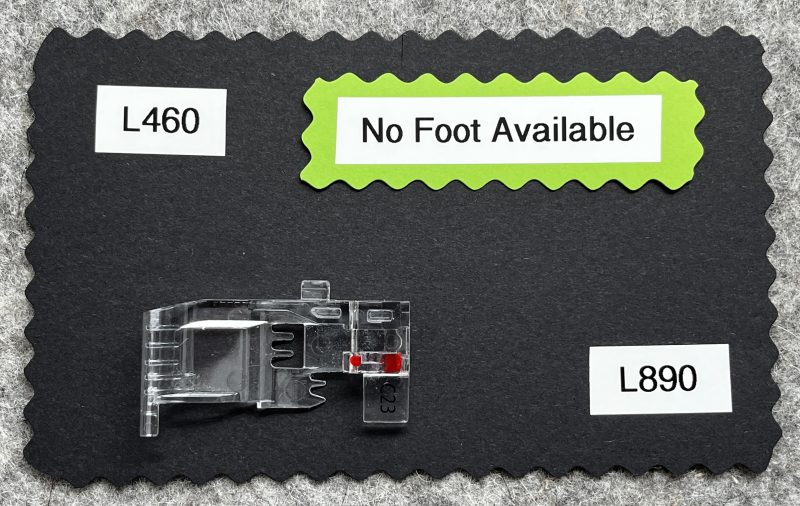
Bernina L850 and L860 – Curve Foot #L23
Bernina L450 and L460 – no Curve Foot Available
Bernette Funlock 40 Series (b42, b44 and b48) and Airlock 60 Series (b62, b64 and b68) – no Curve Foot Available
... This Week’s Foot Highlights or Challenges ...
Quite simple samples to sew this week, and the Curve Foot #C23 truly shone! I do use this foot often, and over the space of the last 2 years I’ve been creating some fun samples with lots of decorative curves using coverstitch and chainstitch. I have yet to finalise the ideas into a completed ‘project’ to share, however it’s getting closer! Just need more ‘me sewing time’.
I plan on having this new project of mine completed by year’s end, so that gives me quite a few more months to achieve that goal. Let’s get the rest of these blog posts out of the way first!
This foot has been a ‘must have’ in the Studio right from when it was first introduced to the accessory/foot lineup! It is also a great foot for overlocking curved seams together in garment construction and patchwork piecing, eg Drunkards Path Blocks.
‘Overlock Along Curves’: Sample was two layers of fabric and one layer of fusible batting, and I stitched along the raw edges, using the right hand side of the stitch finger as a guide – blade was disengaged, however remember stitch width matters as it also changes where the stitch finger lies. Great technique for edges of placemats, coasters, needlebooks and notebook covers, and I used it on the TicTacToe Game Board edges and the playing pieces I made this week.
Tips for this technique … Needle Stop set to Down – Place hands in front of the foot to guide/manoeuvre fabric, not behind as traditionally you would when sewing curves with a sewing machine – Reduce stitch length to get a good coverage on the edge, particularly on tight curves – Reduce speed of machine to minimum, or simply stitch slowly.
If you wish to trim some fabric off as you overlock, staystitch the layers together beforehand with a sewing machine, therefore reducing the movement of the layers as they are overlocked, have the blade engaged, using that line as a guide for the blade. To start using this technique, trim away an area about 2 ½” long and the depth of your topstitching, placing the blade at this cut edge. Stitch around your item until you are back at the starting threads, cut them off with the blade, then disengage blade, stitch until you have oversewn around ½” of the starting stitches. This eliminates the chance of the blade cutting your previously made stitches. Remove your work from the machine as noted below. This is a basic ‘overlocking in a continuous line’ technique.
Machine Setup: 3-Thread Overlock Narrow Stitch #3 … SL 1.0 … CW 6 … Disengage Blade … DF 1.0 … Tensions – RN Default – UL 3.8 – LL 3.8
I had Maxilock thread in the needle, and Wonderfil 12wt Spagetti in both loopers. To begin stitching, ensure threads are off the stitch finger, that is ‘seperate’ and hold at the back of the foot for the first few stitches. I use my CS Lock Tool for this. This results in a very neat start …
When you get back to the beginning, stitch over the start for about ½”, raise the presser foot, and use the CS Lock Tool again to bring the needle thread out from underneath the foot, and then cut. Pull your work out from underneath the machine and cut the looper threads, leaving them a bit longer. You will now have a clean set of threads all ‘seperated’ to thread back into the stitches with a large eyed needle to neatly finish the edge.
‘Overlock Around a Circle: Sample was two layers of fabric and one layer of fusible batting, and I stitched along the raw edges, using the right hand side of the stitch finger as a guide – blade was disengaged, however remember stitch width matters as it also changes where the stitch finger lies.
Tips for this technique … same as for ‘Overlocking Along Curves’ above.
Machine Setup: 3-Thread Overlock Narrow Stitch #3 … SL 1.0 … CW 6 … Disengage Blade … DF 1.0 … Tensions – RN Default – UL 3.8 – LL 3.8
I had Maxilock thread in the needle, and Wonderfil 12wt Spagetti in both loopers. To begin stitching, follow guidelines in the “Overlock Around Curves’ above, whether you are cutting off an excess, or overlocking over the previously cut edge.
‘Chainstitch Circles/Curves’: Sample was heavyweight denim and one layer of fusible batting, and I stitched gentle curves, tighter curves and scallops as well as circles. I love that big space we have on the L890 when working on larger pieces of fabric – like the Game Board I made.
Tips for this technique … Needle Stop set to Down – Use knee lifter, raising foot just slightly if needing to reposition fabric when chainstitching along tight curves, and scallops – Place hands on either side of the foot to guide fabric, just as you would if quilting lines – Reduce stitch length to get stitches to lay flat, particularly on tight curves.
To begin stitching, ensure threads are both ‘untangled’ and hold needle thread at the back of the foot for the first few stitches. I use my CS Lock Tool for this. Ensure those starting threads are clear underneath and out of the way once you’ve started stitching in a circle, then continue until you have oversewn just a couple of the starting stitches. Beginning thread is automatically a locked stitch. Remove threads from your work with the CS Lock Tool as noted before. This locks your final stitches in place, brings your top thread through to the back, where you can thread your large eyed needle with both threads, and then take back to the other side and secure, leaving a nice finish. ‘Chain looper’ side is referred to here as the right side of the stitch, once completed.
Machine Setup: 2-Thread Chain Stitch #32… SL 3.0 and 2.5 … CW 5 … DF 1.0 … Tensions – Default
I had Maxilock thread in the needle, and Wonderfil 12wt Spagetti/Fruitti in chain looper.
‘Coverstitch Circles/Curves’: Sample was heavyweight denim and one layer of fusible batting, and I stitched two small circles with 3-Thread Coverstitch Narrow, as well as a gentle curve and a large circle with 4-Thread Coverstitch.
Machine Setup: 3-Thread Coverstitch Narrow Stitch #24 … SL 3.0 … CW 5 … DF 1.0 … Tensions – Default
Machine Setup: 4-Thread Coverstitch Stitch #21 … SL 3.5 … CW 5 … DF 1.0 … Tensions – Default
I had Maxilock thread in the needles and Wonderfil 12wt Spagetti/Fruitti in the chain looper.
Stitching the Circles – To begin stitching, ensure threads are all ‘seperated’ and hold needle threads at the back of the foot for the first few stitches, as per the previous sample with Chainstitching Circles/Curves
As you are continually moving the fabric around a curve when stitching circles, (I automatically stitch circles in an anticlockwise direction), each of my smaller circles were stitched in opposite directions, just to see if it made a difference to the finish, that’s why there are arrows drawn on the sample above. Yes, sometimes I do over-think what I’m doing here in the Studio! It didn’t make that much of a difference with that particular stitch setting – and I think it was more the colour of the CC needle thread that made it appear straighter on the inside or outside edge of the circles, CC was Purple and RC was Red. Here are some close-up photos I took anyway, proving I really do over-think stuff!
Curve Foot #C23 made curves and circles a real pleasure to stitch, and if you are keen on decorative stitching with either cover-/chainstitching, it’s a ‘must have’ foot. Remember, all feet are 20% off until the end of May!
... A Little Something Extra ...
Foot User Manuals
On the Bernina Website, you can download a User Manual for the Curve Foot #C23
We All Sew Blog – Tic Tac Toe Project
I had a lot of fun making up this little project, which you saw Ambah and Leo ‘demonstrating’ in the introduction. It is an easy sew, and fabulous to hone your skills in sewing circles on the Overlocker/Coverstitch Machines. I used quite heavyweight denim from my stash, some fusible fleece, Spray 505, and made a tie using the Double Fold Binder from a couple of weeks ago.
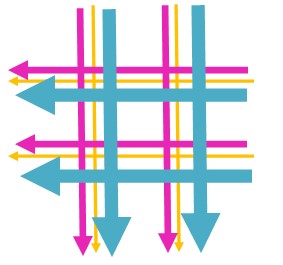
I’m a real plan maker and here’s some details I decided on for the outside … yellow lines are 2-Thread Chainstitch #32, pink lines are 3-Thread Coverstitch Narrow #23, and Aqua lines are 4-Thread Coverstitch #21.
Next was the circle plan … Around the edges I used 3-Thread Overlock Narrow #4 with the settings that I mentioned when I talked about saving your stitches. Again I used Wonderfil 12t Spagetti Threads.
For the ‘game board’ side, here’s my plan … same colour details re stitches as the outside. I used Clear Foot #C27 for these straight lines, as having maximum ‘sole’ contact on those feed dogs were essential to having consistent length stitches through the denim and batting. I used the edge of the foot as a guide to the distance from the previous row.
Instead of placing right sides together, stitching around and turning it through – then topstitching around the edge like the blog instructs, I used a 3-Thread Overlock Wide Stitch #3 on the combined front and back raw edges (placed wrong sides together) – I couldn’t decide on which colour to use on each side so I did a combination!
Maxilock thread in the left needle, and a Wonderfil 12wt Spagetti and a 12wt Fruitti thread in each of the Upper and Lower Loopers. I lowered the tensions in both loopers to 3.3 to account for the thicker threads, and altered my stitch length to 1.5
It’s quite an old post (from 2023 actually) and has been on my ‘fun makes’ list to do since I first saw it. I was still teaching at the time, and I thought it would be a great learning project for someone wanting to upskill their techniques. I hope you try it.
Here’s a link to the Blog posts – there are two parts – first is the circle game pieces … and the second part covers making the game board and outside, as well as putting it all together.
... A Little Reminder ...
Bernina’s Foot of the Month May 2026 *
is #54 Zipper Foot with Non-Stick Sole – 20% off – contact your preferred Bernina Dealer for this fabulous offer. … For accurately sewing in zippers of all sizes and slides smoothly on plastic, vinyl and leather
20% off other Accessories still available until end of the month as well!
*Australia and New Zealand Promotion Only – ends … 31st May 2026
May 2026 Special Offers
Discover limited-time offers on selected BERNINA machines and accessories. Whether you’re upgrading or starting your sewing journey, there’s something special waiting for you.
Chat again next week …